Download
1 / 6
60 likes | 200 Views
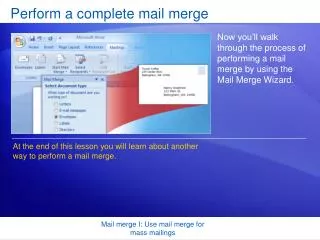
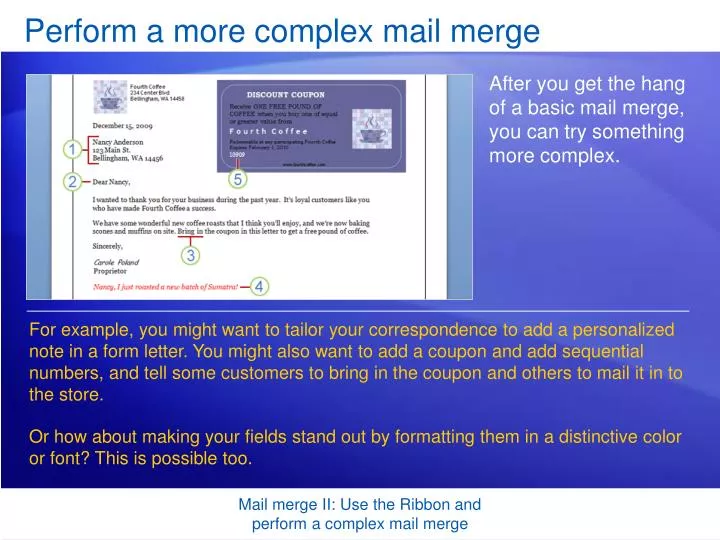
Perform a more complex mail merge. After you get the hang of a basic mail merge, you can try something more complex. .

E N D
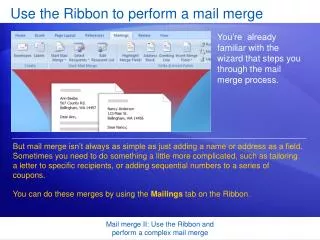
Perform a more complex mail merge After you get the hang of a basic mail merge, you can try something more complex. For example, you might want to tailor your correspondence to add a personalized note in a form letter. You might also want to add a coupon and add sequential numbers, and tell some customers to bring in the coupon and others to mail it in to the store. Or how about making your fields stand out by formatting them in a distinctive color or font? This is possible too. Mail merge II: Use the Ribbon and perform a complex mail merge
Perform a more complex mail merge The picture shows several types of fields that can be used in a mail merge. Address Block Greeting Line If...Then...Else Mail merge II: Use the Ribbon and perform a complex mail merge
Perform a more complex mail merge The picture shows several types of fields that can be used in a mail merge. Personal Note Merge Record # Mail merge II: Use the Ribbon and perform a complex mail merge
Tailor your merge with Rules The Rules command offers a number of popular Word fields, such as If…Then…Else… and Merge Record #, that you can use to add special capability to your main document. The picture shows how to create Rules: Place the cursor where you want the field to be located in the main document. Click Rules in the Write & Insert Fields group and then click the field that you want to include in the document. Mail merge II: Use the Ribbon and perform a complex mail merge
Other fields that you can use When you are writing your main document and inserting fields, you can also use the fields that are available in the Quick Parts command on the Insert tab. To view the entire list of Word fields: Click the Insert tab, and then in the Text group, click Quick Parts and Field. To insert a field, under Field names, click the field you want to insert, and then click OK. Mail merge II: Use the Ribbon and perform a complex mail merge
Format your merged text Information from the recipient list that you merge into the main document does not have any formatting, but you can add some. To format the data in the document, select the field, and then format it by using the commands on the Home tab, just as you would for other text. Make sure that you include the chevrons (« ») that surround the field. Mail merge II: Use the Ribbon and perform a complex mail merge