Download
1 / 4
40 likes | 50 Views
Karana Downs presents a Slideshow on A Dentists guide to the proper flossing technique

E N D
A dentist’s guide to the proper flossing technique
A dentist’s guide to the proper flossing technique Think you’re flossing your teeth correctly? What if we told you you’ve been doing it wrong your entire life? This is the case for some. How you floss your teeth could mean the difference between removing plaque and food, or missing it altogether and letting it build up. This build up can cause tooth decay and gum disease (and nobody wants that). Often, when we show our patients how to floss their teeth using the proper flossing technique, they realise they’ve been doing it wrong all along. Which is why we decided to put together the ‘Dentist’s guide to a proper flossing technique’. You’re welcome.
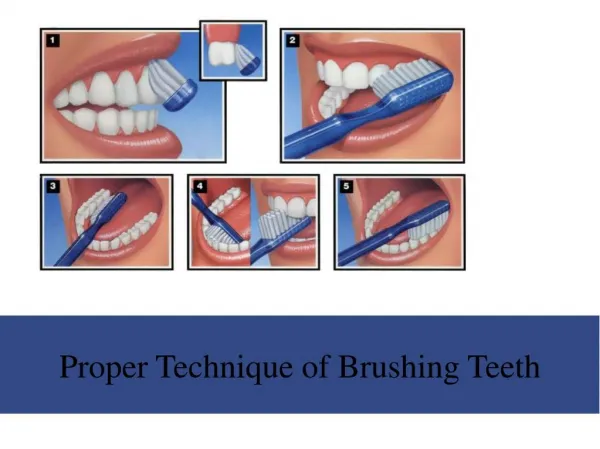
How should we be flossing our teeth? There is a right way and a wrong way. Let’s show you the right way, shall we? For flossing, you’ll need about 45 centimetres of floss, yes that’s right – 45 cms. It sounds like a lot doesn’t it? Most people don’t use nearly enough. You will also need a mirror (it’s easier with a mirror, trust us). The key elements of the proper flossing technique are 4 simple steps: 1. 2. 3. Wind - Wind most of the floss around each index finger, leaving a couple of centimetres of floss to work with Slide - Holding the floss tightly between your thumbs and index fingers, slide it gently up and down between your teeth Guide - Contour and guide the floss around the base of each tooth, making sure you go beneath the gum line (be careful not to force the floss as this may cut or bruise your gum tissue) Slide - Once you’ve flossed all your teeth, use the same back and forth motion to bring the floss up and slide it away from your teeth 4. Finished? Throw your floss away. It’s definitely not something you want to reuse. https://www.youtube.com/watch?v=m3pBA4cgdxw
Do we floss before or after brushing? Many patients have asked us this question and the answer might surprise you. It’s best practice to floss before you brush your teeth. Why? Because when flossing, plaque and food are loosened, making them a little easier to brush away after flossing. Don’t worry too much about the sequence though, as long as you do them both, twice a day, for optimal dental health. Ensure you’re keeping your teeth as healthy as possible between your visits to the dentist with daily brushing and proper flossing technique to go with it – they really do go hand in hand. Need help with your flossing technique or think it might be time for that next check-up? At Karana Downs Dental, we have many years of experience in dental health. We are your Anstead Dentist and are here to help. Contact us to book your next dental check-up today.