Download
1 / 77
780 likes | 1.09k Views
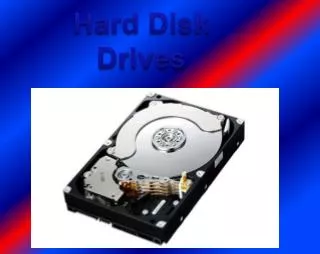
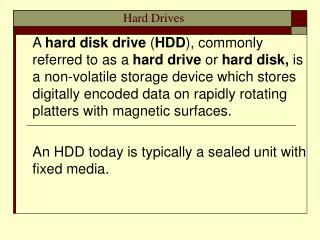
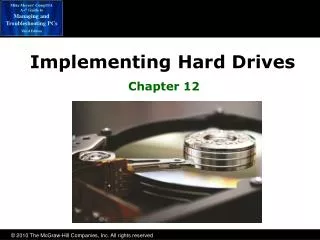
Implementing Hard Drives. Chapter 5. Overview. In this chapter, you will learn to Install a hard drive Partition a hard drive Format a hard drive Maintain and troubleshoot a hard drive. Installing IDE Hard Drives. Hard Drive Interfaces .

E N D
Implementing Hard Drives Chapter 5
Overview • In this chapter, you will learn to • Install a hard drive • Partition a hard drive • Format a hard drive • Maintain and troubleshoot a hard drive
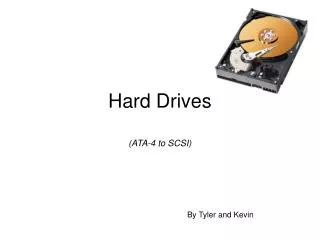
Hard Drive Interfaces • Integrated Drive Electronics (IDE) / Enhanced IDE (EIDE) interfaces dominate today’s market • Parallel ATA (PATA) drives dominate the industry • Serial ATA (SATA) since 2003 • Small Computer System Interface (SCSI) interfaces are fading away
IDE / EIDE • Integrated Drive ElectronicsandEnhanced IDE • Hard drive controller is integrated with the drive • Uses the AT Attachment(ATA) interface and a 40-pin ribbon cable • Everyone calls PATA drives IDE • EIDE added some enhancements to IDE • Higher capacities • Support for non-hard drive devices like CD-ROMs • Support for up to 4 hard drives • ATA, IDE, and EIDE are used interchangeably today to describe all ATA devices
IDE/EIDE • EIDE drives connect to the computer via a 40-pin cable and a controller • The controlleracts as an intermediary between the hard drive and the external data bus • When the BIOS talks to the hard drive, it talks to the circuitry onboard the hard drive • But we still call the connection on the motherboard the hard drive controller (a misnomer) • Most PCs provide two onboard EIDE controllers to support up to four hard drives • Use the primary controller if you are only connecting one device • The other controller is the secondary controller
Controller Cards Expansion controller card On board controller
IDE/EIDE Cabling EIDE Drives: • EIDE drives connect to the controller via a simple 40-pin cable • A single cable can connect up to two hard drives: master and slavebased on the jumper settings. • Cable-select may be set on both drives if you have a cable-select cable Master or Slave – it doesn’t matter which connector you use.
Jumpers and Labels Master and Slave jumpers
ATAPI • Advanced Technology Attachment Packet Interface (ATAPI) • Extension to the ATA specification • Enables non-hard drive devices to connect to the PC via ATA controllers • Same rules on jumper settings • Hard drives get BIOS thru the System BIOS and CMOS • Non-hard drives get BIOS thru an option ROM or software driver
Serial ATA • Serial ATA (SATA) creates a point-to-point connection between the device and the controller • Data is sent serially • Thinner cables resulting in better air flow and cable control in the PC • Maximum cable length of 39.4 inches compared to 18 inches for PATA cables Data connection Power connection
Serial ATA • More on SATA • Hot-swappable • Throughput of 150 MBps (with potential of 600 MBps) • A parallel ATA device (PATA) my be connected to SATA using a SATA bridge • Add SATA functionality via a PCI card • Only one device per controller
BIOS • Every physical device needs basic input/output services (BIOS) to teach the CPU and the OS how to communicate • BIOS comes in three ways • Programs stored on the System ROM chip on the motherboard (firmware) • Programs stored on a ROM chip attached to the external controller card (option ROM) • Software device drivers
Autodetection • To set up a PATA drive just enter the geometry of the drive into CMOS • Geometry refers to the physical components inside the drive like cylinders, tracks per sector, and heads • Techs used to have to set up the geometry manually in CMOS, but now there’s either an Auto type or an autodetection menu option to let the CMOS and the drive work it out
Serial ATA and BIOS • Setting up a SATA drive • Load the drives for an external SATA controller • Configure the controller Flash ROM settings for your specific hard drive
Partitioning • Partitioning is the process of electronically subdividing the physical hard drives into groups of cylinders called partitions • Windows assigns these partitions names like C: or D: • A hard drive must have at least one partition • Partitioning enables organization of a drive that suits your personal taste • Modern partitions may be as large as 137 GB
Partitioning • It enables a single hard drive to store more than one operating system • The boot sector is the first sector of the physical drive and contains information regarding the master boot record(MBR) and the partition table • MBR’s job is to look for valid operating systems • Up to four bootable partitions – only one is marked active at a time and contains the OS that is booted
Primary partitions: Store the operating system A hard drive can have up to four primary partitions An active partition is a partition on which the MBR finds the operating system Only one primary partition can be active at a time Extended partitions: Extended partitions are not bootable and one hard drive can have only one extended partition Optional They can be divided into many logical drives Make the partition extended and then create logical drives within it Partitioning
FDISK • FDISK is used to partition hard drives by DOS, Windows 3.x, Windows 95, Windows 98, and Windows Me • Boot to a floppy and then type FDISK to start the program • Win95 ver 2 and later support FAT32 • When the long message comes up saying you have a disk larger than 512 MB… • Choose Yes to use FAT32 • Choose No to use FAT16 • If you don’t get the message you are using an older version of FDISK that only supports FAT16
FDISK Opening Screen Y means Yes for FAT32 N means No for FAT16
FDISK Main Menu Option 4 Blank drive indicated. If not, you may choose option 3 on the main menu to delete any unwanted partitions. Note that you will loose all data in the partition. Esc always takes us back!
Submenu Option 1 Choosing Yes will create one large primary partition marked active. Choosing No takes us to the next screen shot….
Size of Primary Partition We have a 30 GB drive. If we only see 8.4 GB, our BIOS does not have INT13 extensions. Upgrade your BIOS or use an overlay program from the drive manufacturer. If you see 2.1 GB, you’re using FAT16.
Creating Primary Partition When we exit we’ll see a message saying there are no active partitions. Choose option 2 from the main menu to set the partition active.
Deleting Partitions • Delete all logical drives in the extended partition • Then delete the extended partition • Then delete any primary partitions
Multiple Hard Drives • If you have more than one hard drive in your system, you will have an option 5 in FDISK…
Dealing with Multiple Partitions • A primary partition is necessary to boot the hard drive • A drive only needs a primary partition if you wish to boot from it • Primary partitions always get drive letters before extended partitions • Partitions receive their drive letter at every boot
Drive Letter Assignments • Primary partition of the: • Primary master drive • Primary slave drive • Secondary master drive • Secondary slave drive • Then all logical drives in the extended partition of the: • Primary master drive • Primary slave drive • Secondary master drive • Secondary slave drive
Disk Administrator • Windows NT 4.0 uses Disk Administrator to partition hard drives • It looks and functions almost identically to Disk Management used by Windows 2000 and XP • Therefore, we’ll just look at Disk Manager in detail.
Disk Management • Used by Windows 2000 and XP to manage partitions Alt-click My Computer and choose Manage. Then choose Disk Management under Storage.
Creating a New Partition • Alt-click on some Unallocated space and choose New Partition…
Creating a Logical Drive • Once an Extended partition is created, you may create logical drives in it
Dynamic Disks • Dynamic Disks are a new and improved type of storage unique to Windows 2000 and XP Professional (not the Home edition) • Regular drives are known as basic disks • Dynamic disks are divided into volumes instead of partitions
Volume Types • Volume types • Simple volume: like a primary partition • Create a dynamic disk • Then alt-click any unallocated space and choose New Volume • Spanned volume • Extend the size of a simple volume to include any additional unallocated space – even from other hard drives • If you grab space from another drive, it becomes a spanned volume • Alt-click the volume you want to extend and choose Extend Volume – the unallocated space can be anywhere • Striped, Mirrored, and Striping with Parity • All of these RAID levels may be created thru software in Disk Management on Windows 2000 and 2003 Servers
Mount Points • Your system partition drive (the primary master C: drive) may be made dynamic but cannot be extended or spanned • But you could create a mount point which is a drive that functions like a folder mounted into another drive • That is, you can extend the size of the hard drive by creating a folder that is really another whole hard drive’s worth of space!
Creating Mount Points • Alt-click an unallocated space on a dynamic disk and select New Volume • The second screen in the wizard lets you create a mount point instead of another drive letter
High-level Formatting • Formatting involves configuring a partition, in order to enable it to hold files and folders in a form suitable to the operating system • Major functions of formatting are creating and configuring the • Volume boot sector • File allocation table (FAT) • Root directory
File Allocation Table (FAT) • Every operating system has a File Allocation Table (FAT)that keeps track of the sectors that store the various parts of a file • 16-bit FAT (FAT16) uses 4 hexadecimal digits to number the sectors • 0000 thru FFFF • 216 = 65,536 or 64K -- 64K x 512 bytes per sector = 32 MB maximum size • FAT is like a 2-column spreadsheet • Column one numbers the sectors • Column two contains the status of the sector • Bad sectors = FFF7 • Good sectors = 0000 • Format creates the FAT and then writes and reads from each sector to see if it is good
Clustering • Clustering means to combine a set of contiguous sectors and treat them as a single unit in the FAT called a cluster or file allocation unit • Instead of numbering the sectors, we number the clusters…yielding partition sizes up to 2 GB • DOS, Windows 3.1, and the first version of Windows 95 all use FAT16 • Newer operating systems also support FAT16
How FAT Works • Windows looks for the first cluster marked 0000 (good and available for use) • If the file fits in that cluster, FFFF is put in the status column • If the file is larger than the cluster, Windows finds the next open cluster. That open cluster’s number is put in the first status field in order to know where to link. This process continues until the file is fully stored. The last cluster’s status field is marked FFFF (end-of-file)