Download
1 / 18
180 likes | 281 Views
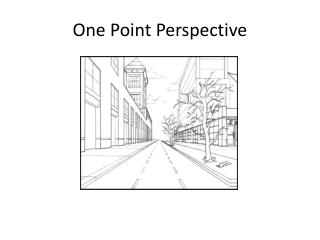
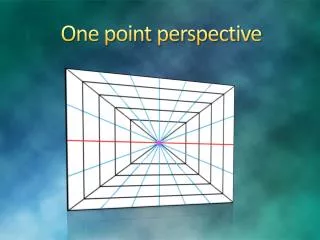
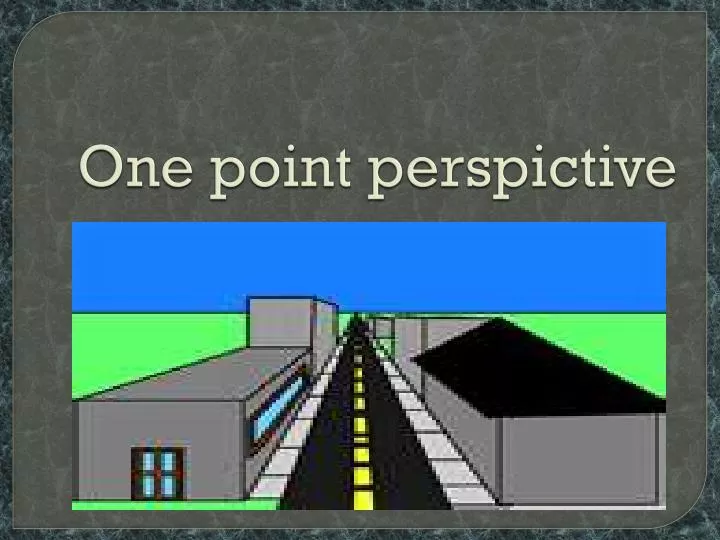
One point perspictive. Start with a rectangle then Draw 2 diagonal lines intersecting at the center of the rectangle.

E N D
Start with a rectangle then Draw 2 diagonal lines intersecting at the center of the rectangle.
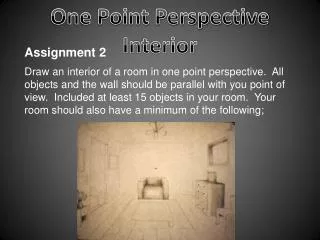
Draw two vertical lines then connect with two horizontal lines to create a smaller rectangle with its center being the intersection. Erase the intersecting orthogonal within the smaller rectangle.
Now colour the small rectangle and the shapes to it’s left and right in blue, and the shape below the rectangle, in green.
The first line that you will need to draw is a vertical line that starts at the floor and, since it is a door, goes almost to the ceiling. It is best to start with the side of the door that is near to you and near to the edge of the paper.
Next is the orthogonal line that starts at the top of the vertical line from the last screen and goes to the vanishing point. This line shows where the top ofthe door will be. Notice how the space between this line and the lineshowing the bottom of the wall appears to get smaller as we move closer to the vanishing point. Why?
The vertical line that shows the side of the door closest to the vanishing point is next. If you wanted the door to be wider you could draw a vertical line that is closer to the vanishing point. How could you make the door look less wide?
Erasing the part of the orthogonal that is not the top of the door is the next step. You can also add a door knob. Look at the height of the door and use that to help you decide where the door knob should be located.
Now follow the same steps you used for drawing the door to draw the molding around the door and glass on the door.
It is best to start a window by first drawing the vertical line that shows the near side of the window. This vertical line will set the height of the window. The bottom of the line will be the bottom of the window and the top of the line will be the top of the window.
The next step is to add the orthogonals. These two lines go from the ends of the vertical line to the vanishing point and show the top and bottom of the window. Notice how the height of the window appears to get smaller as it gets closer to the vanishing point.
You can make your window as wide as you like by moving the vertical line that shows the far side of the window closer to the vanishing point. When the second vertical line is close to the first, the window appears narrow.
To find the center of the window draw diagonal lines from one corner of the window to the opposite corner as shown on the right. This will help determine where the line is that separates the top and bottom windows.
The orthogonal line between the top and bottom of the window shows the middle of the window. To draw this line use the vanishing point and the center of the X that shows the middle of the window. Notice the vertical line that starts at the center of the X and goes to the top of the window.
When the orthogonals and the X lines are erased we have a basic window drawn in one-point perspective.
Continue the same steps used for drawing the window to draw the molding around the window.