Download
1 / 43
440 likes | 584 Views
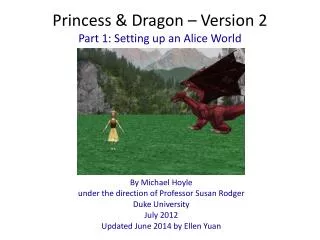
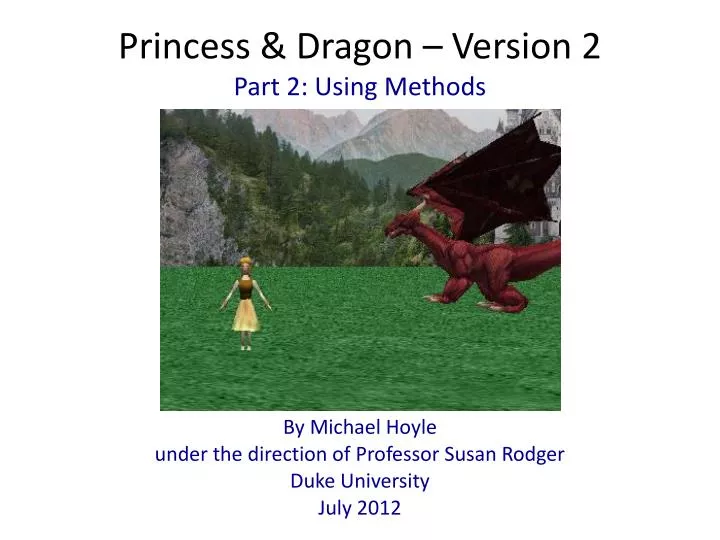
Part 2: Using Methods. Princess & Dragon – Version 2. By Michael Hoyle under the direction of Professor Susan Rodger Duke University July 2012. Overview. The main topic of this tutorial is methods . Methods tell objects what to do.

E N D
Part 2: Using Methods Princess & Dragon – Version 2 By Michael Hoyle under the direction of Professor Susan Rodger Duke University July 2012
Overview • The main topic of this tutorial is methods. • Methods tell objects what to do. • There are two types of methods in Alice, object-level methods, and world level methods. • Object-level methods only tell a single object what to do. • World-level methods tell more than one object what to do.
Built-in methods You’ve already seen and used some methods in your set-up, such as roll (for Cinderella’s arms). You can also use methods in code. Click on Dragon in the Object tree and then select its methods tab. As you can see, there’s a bunch of things we can already tell it to do, like move, turn, say, and others. These are object-level methods, because they only tell the dragon what to do.
Adding to world.my first method Object who owns method Method name Find this area in the lower-right portion of Alice. This is the tab with the contents of the method “world.my first method”. This is a world-level method, and we can drag and drop other methods in here to make our animation.
Explaining world.my first method Find the Events area in the upper-right portion of your screen. Here you’ll find events, which tell your animation when to use methods. There should be one event there (shown above), which is there by default. It means that when you press , whatever methods are in “world.my first method” will happen. If you press Play now, nothing will happen, because “world.my first method” is empty. Let’s put something in it!
Adding to world.my first method Make sure you still have dragon selected, and his methods tab open • Scroll down to find ‘dragon turn to face’. Click it and drag-and-drop it over into the empty yellow space in world.my first method. • When you drop it, a menu will pop up asking you to select a “target”. We want him to turn to face Cinderella, so select Cinderella, then the entire Cinderella.
Play your world! Find the button in the upper-left area of Alice. Press it and watch your animation. You should see a short and simple animation where your dragon turns to face Cinderella. He may turn a lot or a little, depending on how much he was facing her in the set-up.
Creating methods With a dragon coming at her, Cinderella should be scared! The next part of our animation will be for Cinderella to jump up and down and cry for help. Click on cinderella and go to her methods tab. There is no method for jumping up and calling for help, so we’re going to have to create one for her.
Creating methods Click create new method, and a box will pop up for you to type in a name for the method. Call the method “cry for help”, and click OK.
Tabs A new tab should open next to “world.my first method” that shows the method you just created. Tabs exist so you can easily edit multiple methods at once. To switch which method you’re editing, just click on that tab.
Creating cinderella.cry for help As we’ve already seen in “world.my first method”, you create methods by putting together built-in methods, like move and roll. Here are the steps we want Cinderella to follow in this method: Cinderella move up1 meter (jump) Cinderella move down 1 meter (land) Cinderella say “Help!” Let’s create ‘cinderella.cry for help’ by dragging in methods to do these things. Remember that often when you drag in a method it will give you some options, like what direction and distance you want Cinderella to move, or what you want Cinderella to say.
Creating cinderella.cry for help Click Cinderella and go to her methods tab. Drag in a “cinderella move” and select up, then 1 meter. Do the same thing again, this time selecting down for the direction Finally drag in a “cinderella say” and select ‘other…’. Type in “Help” and select OK. Final code for ‘cinderella.cry for help’
Calling methods we created Now you’re done creating the method, but if you press play, Cinderella won’t jump or cry for help. That’s because right now, only ‘world.my first method’ runs when the world starts. We need to go to the ‘world.my first method’ tab and tell Cinderella to cry for help after the dragon turns to face her. Drag-and-drop in the ‘cry for help’ method just like any other method. NOTE: Make sure you click the world.my first method tab!
Getting the dragon to flap his wings Now let’s write another method to make the dragon flap his wings. We’re going to have to use his sub-parts and tell them to follow these steps: Flap left wing down Flap right wing down Flap left wing up Flap right wing up By default, Alice does commands in order. For us to get Alice to do some methods at the same time, we’ll need to use a Do Together block. Do at the same time Do at the same time
Getting the dragon to flap his wings First, we need to create the method. Select dragon, go to methods tab, and select ‘create new method’ Name it “flap wings” We know that we will want to do two methods together (we want both wings to flap at the same time). Find ‘Do together’ near the bottom of Alice and drag it up into the new method.
Getting the dragon to flap his wings Remember what we want to do together is flap the left wing down, and flap the right wing down. Press the ‘+’ next to dragon to see his subparts. Click ‘left wing’. Notice that left wing has a methods tab of its own, meaning you can call methods on just that wing.
Getting the dragon to flap his wings Drag-and-drop ‘left wing roll’ into your Do together. Select ‘left’ as the direction, and ‘other’ as the amount. When a calculator pops up for you to enter an amount, type .15 The default duration of these methods in your animation is 1 second. That’s a little slow for just half of a wing flap, so let’s make it happen faster. Click the small arrow next to ‘more…’ and select duration, and for amount select 0.5 seconds.
Getting the dragon to flap his wings Follow the same steps outlined in the past two slides to roll the right wingright0.15 revolutions. Remember to select the right wing in the object tree, and then use the roll method in its methods tab. Your code should look like the above when you’re done. Remember that this code is only for flapping the wings down, so we’ll need another Do together to make them flap up.
Getting the dragon to flap his wings Instead of following all of the same basic steps as before to flap the wings back up, we’ll make use of the “make copy” feature. Right click on any purple portion of the “Do Together” to get a drop-down options menu. Select ‘make copy’, and you should see a copy of the whole block appear. In order to make the wings flap back up, we need to do the exact opposite as we just did. To do this, find arrow next to left and click it to change it to right. Do the same on the other wing by changing right to left. Your code should look like the above when you complete this step. Pay attention to which wing moves which direction.
Incorporating dragon.flap wings Click the world.my first method tab to return to the main script for our animation. Now let’s add to it so that the dragon flies a little towards the princess. The dragon will use these steps: Move up 1 meter Move forward 2 meters Do together Flap his wings We want all of these things to happen together, so our first step should be to drag in a ‘Do Together’ block. The rest of our code for this part will be inside the block.
Incorporating dragon.flap wings Select dragon in the object tree, and drag in a move method. Select up for the direction, and 1 meter as the amount. We’ll want him to fly a little slower, so click ‘more…’ and select duration = 2 seconds. Follow the same steps to have him move forward 2 meters. Remember that if an amount you want isn’t an option, always select ‘other…’ to use a custom entry. Finally, drag in your newly made flap wings method. Your Do together should look like this at this point
Loops Play your world. It should look like the dragon is flying towards Cinderella. If your dragons wings do not flap correctly, look back to your flap wings method to make sure it is correct. There is a problem though – his wings only flap for half of the movement. That’s because your method ‘flap wings’ only takes a second, while the movements take 2. To solve this problem, we’ll put the flap wings method in a loop. A loop tells Alice to do the same method(s) some time in a row. Our wing flap only takes one second when it should take two, so we want to loop it twice.
Loops From the bottom row, drag in a Loop into your Do together. Select 2 times as the amount. Now move your ‘dragon.flap wings’ method into the loop Your code should look like this. Play your world to test it out!
asSeenBy Our next step will be to make the dragon fly in a circle around Cinderella. To do this, we will use the tool asSeenBy. asSeenBy is used with the turn method to have one object turn around another. Go to dragon’s methods tab and drag in a turn, select left, and 1 full revolution.
asSeenBy If we left this code as it was, the dragon would just turn around in place, but we want him to turn around Cinderella. To do this we use asSeenBy Click ‘more…’ and select asSeenBy. When asked for a target select cinderella > the entire cinderella. After, your code should look like this: Play your world to see your dragon circle around cinderella
asSeenBy You may have noticed that the dragon’s turn around her looks a little unnatural because he is facing her the whole time. We can fix this by having him turn to the right ¼ revolution before his asSeenBy turn. Then, he will look like he’s flying around her. Make sure you drop in the new turn method before the asSeenBy method! When dragging over a method, a green line will appear to show you where it will go if you drop it.
Re-using methods One of the big advantages of creating methods in your Alice world is that you can re-use them whenever you want. Go to cinderella’s methods tab and drag in another ‘cry for help’. She will jump into the air and say “Help!” again.
Saving the princess It’s about time for our valiant knight to save the damsel in distress! Go to knight’s methods tab and drag in a say method. Select “other…” and type in “Stop!” Remember that even if an object is out of the camera view it can still do methods. To the viewer (who doesn’t know there is a knight off-screen) someone just yelled out “Stop!”, but they don’t know who it is yet.
Changing the camera view Now we’ve had the knight say “Stop!” from off-screen, now lets move our camera to show our viewer who said it. We can use the dummy object ‘knight view’ that we created in part 1. Whenever you want to set the camera view to a dummy you created, always use the set point of view to method. Click camera and go to its methods tab. Scroll down to find set point of view to, and drag it in below your knight say method. When it asks you for a target, select camera views > knight view.
Getting the dragon’s attention Here is the script for what we want to happen next: Dragon turn to face knight Knight turn to face dragon Knight say “Don’t hurt her!” These are all concepts we’ve used so far, see if you can figure out the code for this part! The correct code is on the next slide. Do together
Getting the dragon’s attention The correct code is: If you had trouble, remember that Do Together can be found along the bottom of Alice, and to access an object’s methods, just click it in the object tree and find its methods tab. Now play your world. We’ve done a lot of animating! Next, we’re going to write a new world-level method for the knight to vanquish the dragon.
Creating a new world method Now we want to create a new method for the knight to jump off his horse and kick the dragon. All the methods we’ve written so far have been object methods, which only tell one object what to do. This method will involve the knight, dragon, and camera, so it should be a world method. Click world, and go to its methods tab. You will already see ‘my first method’. Click create new method, and call this new method “kick dragon”. A new empty tab should open up in your method editor.
World.kick dragon Let’s start this method by having the knight jump off his horse to move to the dragon. For this, we’ll use the move to method. Move to moves an object to another so that their centers are in the same place. If we say “knight move to dragon,” the objects will look like they’re inside each other. Instead we can tell the knight to move to the dragon’s left front paw. Find the knight’s methods tab and drag in a move to. For the target, select dragon > left arm > left forearm > left paw > the entire left paw.
World.kick dragon Now the knight is where the dragon is, we can have all of our characters in frame if we go back to our original view. Go to camera’s methods tab and find the set point of view to method. Drag it into the method we’re working on and select as your target camera views > original view.
World.kick dragon At this point your knight will be moved to the dragon, and facing him. Because the dragon was behind the knight, your knight will be facing away from the camera. Turn him to the side a little bit so that we’ll be able to see his kick well in the animation. Choose knight > turn > left > ¼ revolution. This is only a small turn so it shouldn’t take a full second (which is the default). Click ‘more…’ to change the duration to .25 seconds.
World.kick dragon Now it’s time for the kick! For a kick we only need the knight’s leg to move, so select his rightLeg subpart in the object tree and have it turn > backwards > ¼ revolution. This also should happen quickly, so change the duration to .25 seconds. If you forget how to change the duration, check the previous slide. His kick should send the dragon flying off-screen, so for your next method, select dragon, and choose move > up > 10 meters.
World.kick dragon Now we need the knight to put his leg back down from the kick, and then fall to the ground. Right-click the “knight.rightLeg turn backwards method” and select ‘make copy’. A copy will appear below that method. Click-and-drag the copy to come after the “dragon move up” method. Change ‘backward’ to ‘forward’. This should make his leg return to normal. Above is what your code should look like for ‘kick dragon’ so far.
Finishing World.kick dragon - functions We are almost done! The last thing we need to do is make the knight fall back to the ground, but there is no ‘move to ground’ method. The issue is that we don’t know how high above the ground he is, so we don’t know how far down to move him. This is where functions come in handy. Click ‘knight’ and go to his functions tab. You can see there are already a lot of functions you can use, and you can even create new ones. Functionsgive us information about our world, such as how big something is, or how far apart things are, or what color something is. A function whose value is a number can be used in place of any number in our code.
Finishing World.kick dragon - functions To get the knight to move to the ground we know we need to have him move down. Go ahead and go back to his methods tab and drag in a move > down > 1 meter. One meter isn’t right, though. We need to use a function to tell us what the knight’s distance above the ground is. Go back to knight’s functions tab and find distance above. Click this, and you will see yellow boxes appear in your code where you are allowed to drop it. Because this function tells us a number, we can drop it anywhere where we use a number. Drop it over ‘1 meter’ in the method we just put in, and then select “ground” from the dropdown menu.
World.kick dragon – final code If your code doesn’t look like the code above, go back and make sure you did it right!
Putting it all together Now you have your ‘kick dragon’ method made, but your code doesn’t use it yet, so it won’t show up in your animation! You need to tell Alice when to use it. Remember that the main script for your animation is in world.my first method. Select that tab, and then select ‘world’ in your object tree. Drag over your kick dragon to the bottom of your code.
Part 2 Complete! Congratulations, you finished part 2! In part 3, you’ll learn about billboards, 3D text, events, sounds, and properties.