Download
1 / 20
210 likes | 681 Views
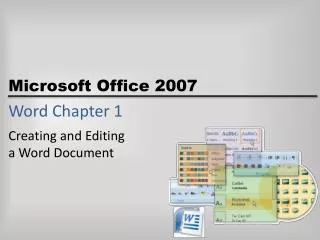
INTRODUCTORY MICROSOFT WORD Lesson 6– Desktop Publishing with Word. Objectives. Format text into columns. Add borders and shading. Insert and scale clip art. Wrap text around graphics. Draw objects. Objectives. Select, resize, cut, copy, and paste objects. Change appearance of objects.

E N D
INTRODUCTORY MICROSOFT WORDLesson 6– Desktop Publishing with Word
Objectives • Format text into columns. • Add borders and shading. • Insert and scale clip art. • Wrap text around graphics. • Draw objects.
Objectives • Select, resize, cut, copy, and paste objects. • Change appearance of objects. • Add text to drawings. • Create and modify diagrams.
Borders Chart Clip art Desktop publishing Diagram Graphics Scale Selection rectangle Shading Sizing handles Terms Used in this Lesson
Desktop Publishing • Desktop Publishing – process of combining text and graphics to create attractive documents such as a newsletter, an advertisement, or a flyer.
See Figure 6-1 in student book, Columns dialog box Creating Columns • Sometimes a document, such as a newsletter, can be more effective if the text is formatted in multiple columns. • Choose Columns on the Format menu and the Columns dialog box appears, or click the Columns button on the Formatting toolbar.
See Figure 6-3 in student book, Borders tab of the Borders and Shading Dialog box Borders • Borders – single, double, thick, or dotted lines that appear around words or paragraphs. • Choose Borders and Shading on the Format menu and the Borders and Shading dialog box appears. Select the Borders tab.
See Figure 6-4 in student book, Shading tab in Borders and Shading dialog box Shading • Shading – adding color, grays, or patterns to lines or paragraphs to emphasize text. • Choose Borders and Shading on the Format menu and the Borders and Shading dialog box appears. Select the Shading tab.
See Figure 6-6 in student book, Page Border tab in the Borders and Shading dialog box Adding Borders to Pages • Select the Page Border tab in the Borders and Shading dialog box. Choose the setting, line style, width, and color for the border. • The Art box has predefined art borders.
Working with Graphics • Graphics – pictures that illustrate the meaning of text and make the page more attractive. • Word has predefined pictures, diagrams, shapes, and pictures. • Word also includes drawing tools that enable you to create your own graphics and add them to your documents.
Inserting Clip Art • Clip art – graphics that are already drawn and available for use in documents. • Choose Picture on the Insert menu and Clip Art on the submenu. The Insert Clip Art task pane appears. • Key a descriptive word in the search text box and word will search for images that match the search text you entered.
See Figure 6-9 in student book, Insert Clip Art task pane Insert Clip Art Task Pane
Selecting Clip Art • To edit clip art, it must be selected. Position the insertion point over the clip art and click. • Selection rectangle – box with eight small squares that appears around the clip art when it is selected. • Sizing handles – squares on the selection rectangle used to adjust the size of the clip art.
See Figure 6-11 in student book, Selection rectangle with sizing handles Selection Rectangle
Drawing Graphics • The Drawing toolbar contains buttons for drawing and manipulating objects such as lines, arcs, rectangles, circles, and free-form shapes. • Objects that have been drawn can be resized, cut, and copied. You can also add color and change the line style.
See Figure 6-8 in student book, Drawing toolbar See Table 6-1in student book, Drawing tools Drawing Toolbar/Drawing Tools
Text Box • You can add text to a document by adding a text box. • Choose Text Box on the Insert menu or click the Text Box button on the Drawing toolbar.
See Figure 6-22 in student book, Diagram Gallery Diagrams and Charts • Diagrams and charts - organize information in illustrations so that the relationships of the data can be better understood. • Choose Diagram on the Insert menu. A Diagram Gallery appears. • Text, color, and other design elements can be added to the diagram and chart.
Summary • Documents can be created with multiple columns. • Borders and shading add interest and emphasis to text. • You can insert clip art and scale it to fit the document.
Summary • The Drawing toolbar allows you to draw shapes such as lines, rectangles, and ovals. • Text boxes can be created to contain special text for a document. • Diagrams and charts can be inserted in a document to illustrate and organize data.