Download
1 / 81
810 likes | 1.11k Views
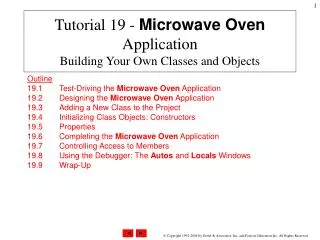
19. Microwave Oven Application Building Your Own Classes and Objects. Outline. 19.1 Test-Driving the Microwave Oven Application 19.2 Designing the Microwave Oven Application 19.3 Adding a New Class to the Project 19.4 Initializing Class Objects: Constructors 19.5 Properties.

E N D
19 • MicrowaveOven Application • Building Your OwnClasses and Objects
Outline • 19.1 Test-Driving the MicrowaveOven Application • 19.2 Designing the MicrowaveOven Application • 19.3 Adding a New Class to the Project • 19.4 Initializing Class Objects: Constructors • 19.5 Properties
Outline • 19.6 Completing the MicrowaveOven Application • 19.7 Controlling Access to Members • 19.8 Using the Debugger: The Locals Window
In this tutorial you will learn: Create your own classes. Create and use objects of your own classes. Control access to object instance variables. Use keyword Private. Create your own properties. Use the Panel control. Use String methods PadLeft and Substring. Objectives
Introduction • You have used several .NET classes: • Each GUI control is defined as a class. • Classes String and Random have been used tocreate objects. • When you use an object of a class, your application is known as a client of that class. • Creating your own classes is a key part ofobject-oriented programming. • As with procedures, classes can be reused.
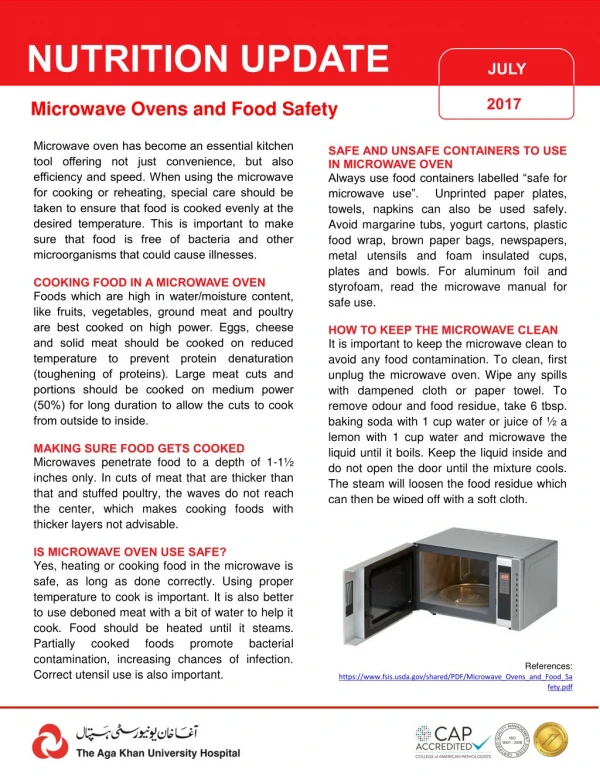
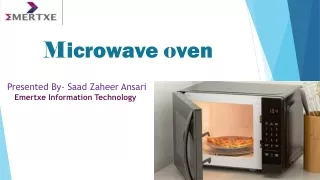
19.1 Test-Driving the MicrowaveOven Application • An electronics company has asked you to develop an application that simulates a microwave oven. The oven contains a keypad that allows the user to specify the microwave cook time. Once a time is entered, the user clicks the Start Button to begin the cooking process. The microwave’s glass window changes color (from gray to yellow), and a timer counts down one second at a time. Once the time expires, the color of the microwave’s glass window returns to gray and the microwave displays the text “Done!” The user can click the Clear Button at any time to stop the microwave and enter a new time. A beep is sounded whenever a Button is clicked and when the microwave oven has finished a countdown.
Test-Driving the MicrowaveOven Application • Run the completed application (Fig. 19.1). • The Buttons’ FlatStyle property has been set to Flat. • The Label’s BorderStyle property has been set to FixedSingle. Label Microwave’s glass window Numerickeypad(Buttonsappear flat) Figure 19.1|MicrowaveOvenapplication’s Form.
Test-Driving the MicrowaveOven Application (Cont.) • Click the numeric Buttons to enter a time. • Note that you can enter no more than four digits—any extra digits will not appear (Fig. 19.2). Figure 19.2|MicrowaveOven application accepts only four digits.
Test-Driving the MicrowaveOven Application (Cont.) • Click the ClearButton to clear your input. • Enter an invalid input, such as: 7, 2, 3 and 5(Fig. 19.3). Figure 19.3|MicrowaveOven application with invalid input.
Test-Driving the MicrowaveOven Application (Cont.) • Click the StartButton, and note that the number of minutes has been reset to 00 (Fig. 19.4). Color yellow simulates microwave light Figure 19.4|MicrowaveOven application after invalid input has beenentered and the StartButton clicked.
Test-Driving the MicrowaveOven Application (Cont.) • Click Clear, enter a cook time of 5 seconds, then click Start (Fig. 19.5). Figure 19.5|MicrowaveOven application with valid time entered andinside light turned on (it’s now cooking).
Test-Driving the MicrowaveOven Application (Cont.) • After the microwave finishes counting down to zero, you should hear a beep and see a change in the GUI (Fig. 19.6). Label displays Done! when cooking is finished Color returns to default color to simulate that cooking has finished Figure 19.6|MicrowaveOven application after the cooking time has elapsed.
19.2 Designing the MicrowaveOven Application • The following pseudocode describes the basic operation of class Time: When the time object is created: Assign input to variables for number of minutes and number of seconds When setting the number of minutes: If the number of minutes is less than 60 Set the number of minutes to specified value Else Set the number of minutes to 0 When setting the number of seconds: If the number of seconds is less than 60 Set the number of seconds to specified value Else Set the number of seconds to 0
19.2 Designing the MicrowaveOven Application (Cont.) • The following pseudocode describes the basic operation of your MicrowaveOven class: When the user clicks a numeric Button: Sound beep Display the formatted time When the user clicks the Start Button: Store the minutes and seconds Display the formatted time Begin countdown—Start timer Turn the microwave light on
19.2 Designing the MicrowaveOven Application (Cont.) When the timer ticks (once per second): Decrease time by one second Display new time If new time is zero Stop the countdown Sound beep Display text “Done!” Turn the microwave light off When the user clicks the Clear Button: Display the text “Microwave Oven” Clear input and time data Stop the countdown Turn the microwave light off
Action/Control/Event (ACE) Table forthe MicrowaveOven Application • Use an ACE table to convert the pseudocode into Visual Basic (Fig. 19.7). Figure 19.7|ACE table for the MicrowaveOven application. (Part 1 of 2.)
Action/Control/Event (ACE) Table forthe MicrowaveOven Application (Cont.) Figure 19.7|ACE table for the MicrowaveOven application. (Part 2 of 2.)
Adding a Panel Control to theMicrowaveOven Application • Add a Panel control to the Form by double clicking the Panel control ( ) in the Containers tab of the Toolbox. • The main difference between Panels and GroupBoxes is that GroupBoxes can display a caption. • Name the control windowPanel. • Set its Size to 328, 224 and its Location to 14, 16. Set the BorderStyle property to FixedSingle.
Adding a Panel Control to theMicrowaveOven Application (Cont.) • Use instance variable timeIs (Fig. 19.8) to store user input. Figure 19.8|Variable timeIs contains the user’s input.
GUI Design Tip • Use Panels to organize groups of related controls where the purpose of the controls is obvious. If the purpose of the controls is not obvious, use a GroupBox rather than a Panel, because GroupBoxes can contain captions.
GUI Design Tip • Although it is possible to have a Panel without a border (by setting the BorderStyle property to None), use borders on your Panels to improve user interface readability and organization.
GUI Design Tip • A Panel can display scrollbars when it is not large enough to display all of its controls. To increase usability, we suggest avoiding the use of scrollbars on Panels. If a Panel is not large enough to display all of its contents, increase the size of the Panel or place the content in multiple Panels.
Adding a Panel Control to theMicrowaveOven Application (Cont.) • One of the numeric Buttons’ Click event handlers is shown in Figure 19.9. • Function Beep causes your computer to make a beeping sound. • The current Button’s number is appended to timeIs. When a number is entered, play a beep, append the number to the timeIs and display the new time Figure 19.9|Typical numeric event handler.
Adding a Panel Control to theMicrowaveOven Application (Cont.) • The template application has several empty event handlers (Fig. 19.10). startButton_Clickcreates an object to storethe time and begin cooking clearButton_Click resets variables and Label DisplayTime formats time information for display clockTimer_Tickperforms countdownand updates display Figure 19.10|MicrowaveOven application’s remaining event handlers.
Adding a Class to the MicrowaveOven Application • Select Project>Add Class. • Enter the class name (Time) in the Name: field and click Add (Fig. 19.11). Select Class as new item Name of new class Figure 19.11|AddNewItem dialog allows you to create a new class.
Adding a Class to the MicrowaveOven Application (Cont.) • The class appears in the SolutionExplorer (Fig. 19.12). New file displayed in SolutionExplorer Figure 19.12|SolutionExplorer displaying the new class file.
Adding a Class to the MicrowaveOven Application (Cont.) • Open Time.vb. (Fig. 19.13). • Keyword Class indicates that what follows is a class definition. • The keywords EndClass indicate the end of the class definition. • Any methods or variables defined in the body of a class are considered to be members of that class. Empty class definition added by the IDE Figure 19.13|Empty class definition.
Adding a Class to the MicrowaveOven Application (Cont.) • The Time class (Fig. 19.14) stores a time value: • The value for minutes is stored in minuteValue • the value for seconds is stored in secondValue Instance variablesstore minute and second information Figure 19.14|Time’s instance variables.
Good Programming Practice • Add comments at the beginning of your classes to increase readability. The comments should indicate the name of the file that contains the class and the purpose of the class being defined.
Defining a Constructor • Add the constructor method New (Fig. 19.15). • Whenever an object of that class is instantiated (created), this constructor method is called. New is the constructor method Figure 19.15|Empty constructor.
Common Programming Error • Attempting to declare a constructor as a Function procedure instead of as a Sub procedure and attempting to Return a value from a constructor are both syntax errors.
Defining a Constructor • Lines 13–14 (Fig. 19.16) initialize Time’s instance variables to the values of the constructor’s parameter variables. • A Time object can now be created with the statement timeObject = New Time(5, 3) Initialize instance variables Figure 19.16|Constructor initializing instance variables.
Error-Prevention Tip • Providing a constructor to ensure that every object is initialized with meaningful values can help eliminate logic errors.
Defining a Constructor (Cont.) • Add lines 6–7 of Fig. 19.17 to MicrowaveOven.vb. • The class name, Time, is used as a type. Declare timeObject of programmer-defined type Time Figure 19.17|Declaring an object of type Time.
Defining a Constructor (Cont.) • Visual Basic is known as an extensible language. • The language can be “extended” with new data types. • Your Time class can be displayed in the IntelliSense window (Fig. 19.18). Time appears as a type in the IDE Figure 19.18|Time appearing as a type in an IntelliSense window.
19.5 Properties • Clients of a class usually want to manipulate that class’s instance variables. • A class (Person) that stores information about a person. • Clients who create an object of class Person might want to modify age. • Classes provide properties to allow clients to access and modify instance variables safely. • The code in the property typically checks the value to be assigned and rejects invalid data. • Minute and Second are two properties used in the Time class.
19.5 Properties (Cont.) • A propertydefinition may consist of two accessors: • The Setaccessor allows clients to set a property. timeObject.Minute = 35 • The Getaccessor allows clients to get a property. minuteValue = timeObject.Minute • Each property typically performs validity checking—to ensure that the data assigned to the property is valid. • Keeping an object’s data valid is also known as keeping that data in a consistent state.
Defining Properties • Add lines 17–18 of Figure 19.19 to Time.vb below the constructor, then press Enter. • Note the syntax used in a property definition: • The first line of the property concludes with the keyword As followed by a data type. Get accessor retrieves data Set accessor stores data Figure 19.19|Empty Minute property.
Good Programming Practice • Name each property with a capital first letter.
Defining Properties (Cont.) • When property Minute is referenced, the Get accessor (Fig. 19.20) should return the value of minuteValue. Returning data from a property Figure 19.20|Get accessor definition.
Defining Properties (Cont.) • When property Minute is assigned a value (Fig. 19.21), you want to test whether the value to be assigned is valid. Validate minute data Figure 19.21|Set accessor definition.
Defining Properties (Cont.) • Add the Second property (Fig. 19.22). Empty property Figure 19.22|Second property.
Defining Properties (Cont.) • Second (Fig. 19.23) is similar to Minute, except that variable secondValue is being modified and read. Second property performs similar data manipulations to Minute property Figure 19.23|Second property definition.
Defining Properties (Cont.) • Use the Minute and Second properties to safely initialize instance variables in the class’s constructor. • When a client calls New and passes values for mm and ss, the constructor calls the Set accessors to validate the values (Fig. 19.24). Safer to assign data to properties rather than instance variables,because Set accessors perform validity checking Figure 19.24|Constructor using properties to initialize variables.
Completing the MicrowaveOven Application • second and minute (Fig. 19.25) store the values entered by the user. • PadLeft appends characters to the beginning of a String. • A given character is added to the beginning of the String until it has the proper length. Ensure timeIs has four characters forconversion purposes Figure 19.25|Declaring variables for second and minute values.
Completing the MicrowaveOven Application (Cont.) • Convert.ToInt32 converts the last two characters of timeIs to an Integer (Fig. 19.26). • Arguments passed to Substring indicate the start and end of a subset of characters. • Substring with a single argument returns the characters after the given index. • The argument 2starts with the third character, because the first character’s index is 0. Convert input to seconds and minutes Figure 19.26|Form minute and second values from input.
Completing the Microwave Oven Application (Cont.) • When the Time object is instantiated, operator New allocates the memory in which the Time object will be stored. • The Time constructor is called with the values of minute and second (Fig. 19.27). • The New operator returns a reference to the newly created object; this reference is assigned to timeObject. Use keyword New to create a new object Figure 19.27|Creating a Time object.
Completing the MicrowaveOven Application (Cont.) • If the time entered was 3 minutes and 20 seconds, the String that will display for the user is "03:20". • The format control string "{0:D2}:{1:D2}" indicates that arguments take the format D2—thus, 8 would be converted to 08 (Fig. 19.28). Display cooking time Figure 19.28|Displaying time information with separating colon.
Completing the MicrowaveOven Application (Cont.) • Note that Time’s properties appear in the IntelliSense window (Fig. 19.29) when you try to access the object’s members. Time’s propertiesappear in IntelliSense Figure 19.29|Properties of a programmer-defined type also appear in IntelliSense.
Completing the MicrowaveOven Application (Cont.) • The Timer is started by setting its Enabled property to True (Fig. 19.30). • The Panel’s BackColor property is set to yellow to simulate the light inside the microwave oven. • The Color structure contains several predefined colors. Start timer and turn light on to indicate microwave oven is cooking Figure 19.30|Starting the microwave oven countdown.