Download
1 / 2
20 likes | 29 Views
Photoshop has some incredible features, and one of them is an amazing feature that no other program on the computer has: an image-masking tool. Image masking in Photoshop is similar to what you see in many photo editing programs.

E N D
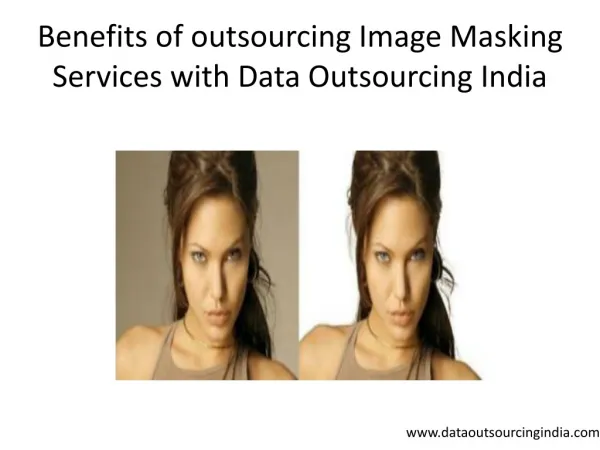
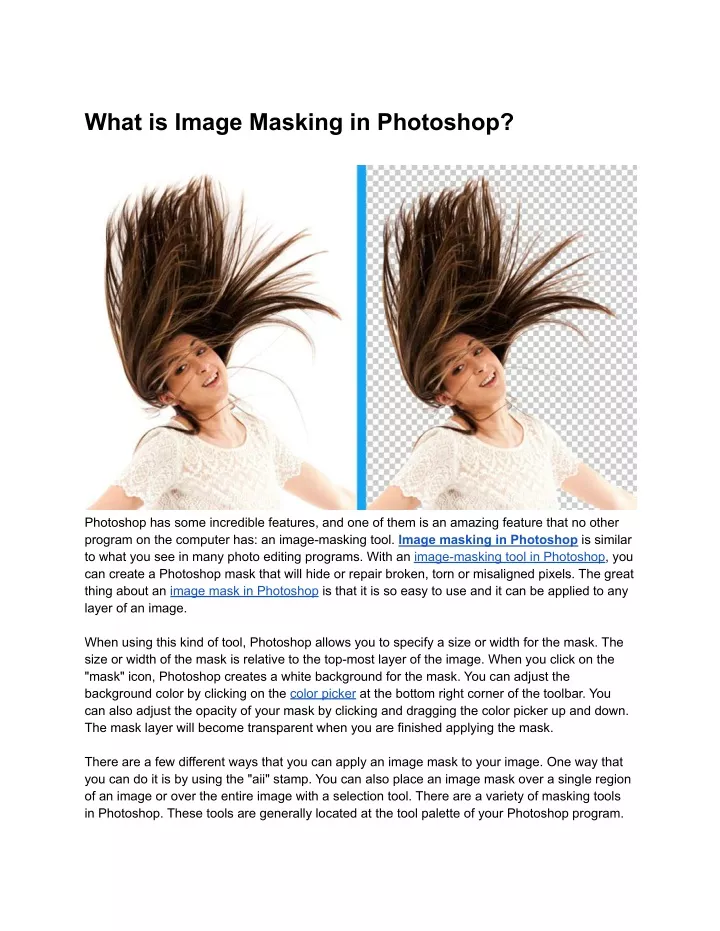
What is Image Masking in Photoshop? Photoshop has some incredible features, and one of them is an amazing feature that no other program on the computer has: an image-masking tool. Image masking in Photoshop is similar to what you see in many photo editing programs. With an image-masking tool in Photoshop, you can create a Photoshop mask that will hide or repair broken, torn or misaligned pixels. The great thing about an image mask in Photoshop is that it is so easy to use and it can be applied to any layer of an image. When using this kind of tool, Photoshop allows you to specify a size or width for the mask. The size or width of the mask is relative to the top-most layer of the image. When you click on the "mask" icon, Photoshop creates a white background for the mask. You can adjust the background color by clicking on the color picker at the bottom right corner of the toolbar. You can also adjust the opacity of your mask by clicking and dragging the color picker up and down. The mask layer will become transparent when you are finished applying the mask. There are a few different ways that you can apply an image mask to your image. One way that you can do it is by using the "aii" stamp. You can also place an image mask over a single region of an image or over the entire image with a selection tool. There are a variety of masking tools in Photoshop. These tools are generally located at the tool palette of your Photoshop program.
There are some techniques that you can use to add image masking services to your images. The first thing that you need to do is select the tool that is called "Free Mask." This will give you a preview of what your mask will look like so you can determine if you like the look. When you have finished playing around with Free Mask, click on the "color" drop down menu near the "Free Mask" button. You will then see the options that are available to you in this drop down menu. The first option that you can select from is the black outline mask. When you click on this option, the outline of your image will be highlighted. You can use the mouse to create a black outline for your image. This option is great if you want to create an effect similar to what is done with Photoshop masks. You can use black only for the outline or you can use it with the color selections as well. The next option that you have is the selection mask. This option is just what it sounds like. You will be able to select different areas of your image using the mouse and it will become invisible so you can move around your image easily. You can use this with the black outline and black color selections as well. The last option that you will be able to select from is the blend edit. With this tool, you will be able to add various effects to your image. If you are looking for a way to change the overall appearance of your image without making any changes to the actual image, this is definitely the way to go. Simply select the freehand tool, and then drag your mouse over the image that you would like to have masked. A mask shape will be created for your selected image. Once you have your image masked, you will be able to save your image by clicking on the "Save Image." You will then be able to see the masked area on your image. If you need to undo any changes that you have made, all you have to do is click on the "undo" button. Image masking is an essential skill to learn if you are going to be serious in your Photoshop practices.