Download
1 / 31
310 likes | 462 Views
Locating and Operating Vehicle Controls. Accelerator and Brake Pedals Position the right heel of foot on the floor so the ball of foot can pivot between pedals Accelerator is used to maintain , increase , and/or decrease speed

E N D
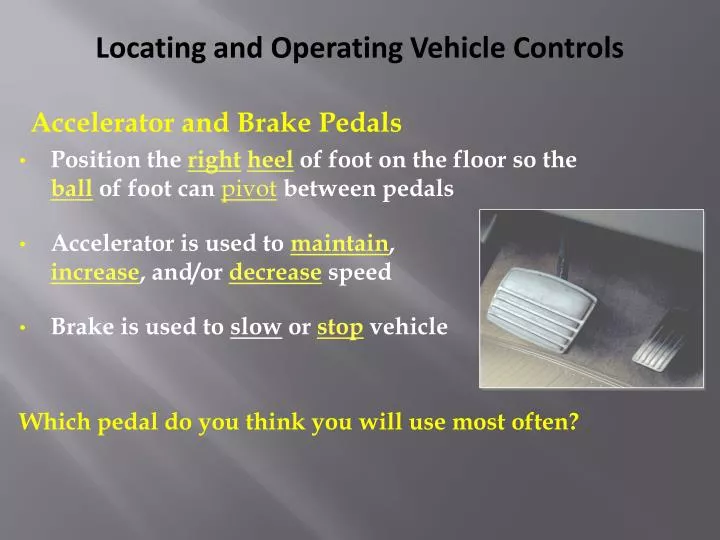
Locating and Operating Vehicle Controls Accelerator and Brake Pedals • Position the rightheel of foot on the floor so the ball of foot can pivot between pedals • Accelerator is used to maintain, increase, and/or decrease speed • Brake is used to slow or stop vehicle Which pedal do you think you will use most often?
Locating and Operating Vehicle Controls Parking brake • Used to hold vehicle in place when parked • Can be used as an “emergency brake” • Small pedal located to the left of the driver or a hand-operated lever near the center console Clutch pedal (Manual shift) • Pedal located to the left of the brake • Depress pedal to switch gears • ease off clutch until friction point to smoothly engage engine
Locating and Operating Vehicle Controls Ignition Switch or Remote • Located on the dashboard • Off/Accessories/On/Start Cruise/Speed Control • Located on steering wheel, dash, or lever to the right of the wheel • Allows vehicle to maintain constant speed and should be used only on dry pavement • *DO NOT USE WHEN ROAD IS WET*
Locating and Operating Vehicle Controls Gear Selector Lever Located on steering column or center console • Press button on end of lever • P=Park, R=Reverse, N=Neutral, D=Drive (O/D overdrive on/off switch) 2=Stronger engine brakingL=Maximum engine braking • Brake pedal must be depressed to place vehicle in gear or park
Locating and Operating Vehicle Devices Turn Signal Lever • Located on left side of steering wheel • Lift up for right turn, press down for left turn • Lane change hold up or press down half way Hazard Flashers • Located on steering column to the right or instrumental panel Windshield Wipers and Washer Control • Part of turn signal lever in some vehicles • Opposing lever on some vehicles • Two controls: one for speed, one for washerfluid
Locating and Operating Vehicle Devices Headlights / Running Lights / Tail Lights • Controlled usually by a knob or switch located on the left of the dash or a lever on the steering column • Low to high beam pull toward you or push away • On/Off: twist lever away or toward you to proper setting
Locating and Operating Vehicle Devices Horn • Located on the steering wheel cross bar or on the pad on the lower half of the wheel, above or below the air bag cover., and usually marked with horn symbol • Used as a warning device only Hood Release • Usually located on the left side under the instrument panel • Pull the lever to release the hood • A second latch under the hood also needs to be released • Driver often the confuse the brake release with the hood release
Locating and Operating Vehicle Devices Trunk Release (if equipped) • Located in glove box, driver’s door, or keyless remote entry fob • Inside trunk - safety release device glows in the dark for emergency trunk escape Fuel Door Release (if equipped) • Can be a lever on floor to the left of the driver’s seat or may be located in the glove box Sun Visor • Angle away from face for glare protection
Locating and Operating Vehicle Devices Heater/Ventilation/Air Conditioner (HVAC) • Temperature control • Variable fan speed • Air flow movement • Windshield defroster • Rear window defroster Optional Accessories • Radio/Sound System • Other?
Locating and Operating Vehicle Devices Tire Pressure Monitoring System (TPMS) • The Tire Pressure Monitoring System (TPMS) uses a dashboard warning light to alert the driver when one or more of a vehicle’s tires is significantly underinflated – a leading cause of tire failure • A tire is considered significantly underinflated when its pressure is 25 percent below the vehicle manufacturer’s recommended tire inflation pressure • Since September 1, 2007, all new vehicles have TPMS
Locating and Operating Vehicle Devices • Backup Camera Activates when the vehicle is shifted to Reverse Helps drivers see the blind spot directly behind the bumper and beyond • Global Positioning System Gives reliable location and time information anywhere on or near Earth when there is an unobstructed line of sight to four or more GPS satellites
Locating and Operating Vehicle Devices Instrument Panel Gauges and Lights • Location of gauges, controls, alert and warning symbols/lights varies from one vehicle to another • Refer to vehicle owner’s manual for accurate use and directions • Instrument panel is usually back-lit at night • Some vehicles have a “rheostat” to regulate the intensity of the light
Control, Information, Comfort, and Safety Devices Instrument Panel • Speedometer • Tachometer • Odometer • Tripometer • Fuel Gauge • Oil/Temperature Pressure Location and description for all instruments and features can be found in the Vehicle Owner’s Manual
Control, Information, Comfort, and Safety Devices • Airbag Warning Light • Brake System Warning Light • ABS Alert/Warning Light
Control, Information, Comfort, and Safety Devices Instrument Panel • Turn Signal Indicator Light • High Beam Indicator Light • Others Location and description for all controls and safety devices are located in the Vehicle Owner’s Manual
Locating and Operating Vehicle Devices Alert/Warning Symbols and Controls Worksheet A. F. K. P. Air Bag On/Off Switch Battery/Alternator Warning Light Low Oil Pressure Warning Light Fuel Indicator B. G. L. Q. Air Bag Functioning Brake Warning Light Fuse / Fuse Box Temperature Indicator C. H. M. R. Antilock Brake System Functioning Safety Alert Symbol Seat Belt Reminder Emergency Flashers D. I. N. S. THEFT Theft-Deterrent System Activation Vent and Air Flow Control Fog Lamps Turn Signal Wipers Stalk E. J. O. T. TPMS/Tire Pressure Monitoring System 12 Volt Extension Outlet Door Locks Drive Wheel Selector
Locating and Operating Vehicle Devices Alert/Warning Symbols and Controls Worksheet U. Z. EE. JJ. Headlights/High Beam Indicator Left/Right Signal Indicator Lighter Indicator Power Window Controls V. AA. FF. KK. Rear Defroster Indicator Hood Release Exterior Lights Front Windshield Defroster W. BB. GG. LL. O/D OFF Horn Cruise Control Device Windshield Washer Overdrive On/Off Indicator X. CC. HH. MM. Steering Wheel Height Adjustment Fan Speed Indicator Parking Lamp Indicator Windshield Wipers Y. DD. II. NN. ETS OFF Electronic Traction Control System Interior Light Adjustment Adjust Left/Right Side Mirror Trunk Release
Locating and Operating Vehicle Devices NAME: ___________ Alert/Warning Symbols and Controls Worksheet A. F. K. P. B. G. L. Q. C. H. M. R. D. I. N. S. THEFT E. J. O. T.
Locating and Operating Vehicle Devices Alert/Warning Symbols and Controls Worksheet U. Z. EE. JJ. V. AA. FF. KK. W. BB. GG. LL. O/D OFF X. CC. HH. MM. Y. DD. II. NN. ETS OFF
Starting Tasks Seatbelts! Check/set park brake (P) and place Right foot on brake pedal, heel on floor Left foot on “dead pedal” for balance Key in ignition, and turn toward start Check alert, warning lights and gauges Adjust ventilation, accessories, etc Turn headlights on
Steering Wheel Control • Amount of steering required to adjust path of travel varies among vehicles • Slower speeds require faster steering wheel movement • Faster speeds require slower steering movement • Steer right – vehicle turns to the right • Steer left – vehicle turns to the left
Proper Hand Position If your steering wheel were a clock, your hands should be at the 8 o’clock and 4 o’clock positions. Hold the wheel with your fingers and thumbs Avoid gripping it with your palms.
Proper Hand Position Acceptable Steering Techniques: • Push/Pull/Slide (*recommended) • Hand-Over-Hand (*for tight spots ex. parking)
Operating Vehicle Control Devices • Safety Considerations to Minimize Risks : • Maintain steering control while adjusting information, comfort, or control devices • Always turn steering wheel in direction of desired movement when - Moving forward or - Moving backward • When adjusting steering wheel height and/or angle consider - Airbag deployment - Hand position - Wheel movement Crossing arms over airbag creates an injury & crash risk!
Back It Up…You Got It… Beep. Beep. Beep. Backing up your car may be considered one of the most dangerous maneuvers. As a matter of fact, CDC estimates that an average of 7,475 children under the age of 15 were injured as of a result of backing up cars between the years of 2001-2003. The reason behind this is the presence of blind spots, not allowing sufficient visibility for the naked eye. For this reason when baking up, it is essential and of utmost importance to practice extreme caution.
Backing Mirror usage should be secondary. Trust what you see with your eyes! Reverse
Common Mistakes While BackingDMVM - page 27 • Failing to look both ways behind you • Mirrors don’t give full view • Turn body and head • Backing up too fast/in a hurry • Back-up slowly • Checking for pedestrians and approaching traffic • Foot remains on/near/covering the brake • If acceleration is required, press gently • Turning the wheel in the wrong direction… Continued on next slide…
MISTAKE:Turning the Wheel in the Wrong Direction HERE’S HOW IT WORKS: • Turn the wheel in the direction you want the back end of the car to turn. • If you want the rear of the car to turn to the right, turn the wheel to the right. • If you want the rear of the car to turn left, turn the wheel to the left.
Backing Straight • Place your left hand on top of the steering wheel and your right arm across the top of the passenger seat. • Reversing is the only driving situation where holding the wheel with one hand is encouraged. Left Hand
VisibilityDMVM p. 21 • Most of what you do while driving depends on what you see. To be a good driver, you need to know what to look for, where to look, and how to adjust to possible problems. The single biggest contributor to crashes is failing to identify a risk. You must look down the road, to the sides, and behind your vehicle. You must also be alert for unexpected events. You must use your headlights at night and other times when it’s hard to see. You must be alert and pay attention to what is going on around you.