Download
1 / 4
40 likes | 47 Views
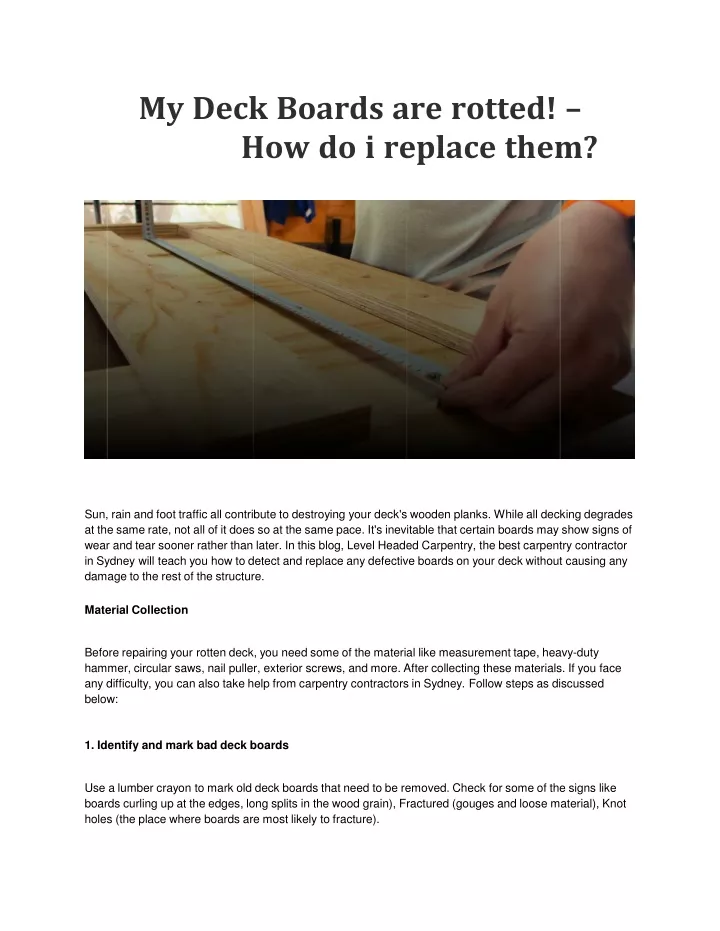
Sun, rain and foot traffic all contribute to destroying your deck's wooden planks. While all decking degrades at the same rate, not all of it does so at the same pace. It's inevitable that certain boards may show signs of wear and tear sooner rather than later. In this blog, Level Headed Carpentry, the best carpentry contractor in Sydney will teach you how to detect and replace any defective boards on your deck without causing any damage to the rest of the structure.<br><br>visit our website : https://levelheadedcarpentry.com.au/

E N D
MyDeckBoardsarerotted!– Howdoireplacethem? Sun,rainandfoottrafficallcontributetodestroyingyourdeck'swoodenplanks.Whilealldeckingdegradesatthesamerate,notallofitdoessoatthesamepace.It'sinevitablethatcertainboardsmayshowsignsofwearandtearsoonerratherthanlater.Inthisblog,LevelHeadedCarpentry,thebestcarpentrycontractorinSydneywillteachyouhowtodetectandreplaceanydefectiveboardsonyourdeckwithoutcausinganydamagetotherestofthestructure. MaterialCollection Beforerepairingyourrottendeck,youneedsomeofthemateriallikemeasurementtape,heavy-dutyhammer,circularsaws,nailpuller,exteriorscrews,andmore.Aftercollectingthesematerials.Ifyoufaceanydifficulty,youcanalsotakehelpfromcarpentrycontractorsinSydney.Followstepsasdiscussedbelow: 1.Identifyandmarkbaddeckboards Usealumbercrayontomarkolddeckboardsthatneedtoberemoved.Checkforsomeofthesignslikeboardscurlingupattheedges,longsplitsinthewoodgrain),Fractured(gougesandloosematerial),Knotholes(theplacewhereboardsaremostlikelytofracture).
Note:Trytousearedorbluelumbercrayontoidentifyanyboardsthatappeartobefracturedorinmuchpoorerconditionthantheirneighbours.YoucanalsogetyourdeckboardrepairfasterbycallingyourfavouritecarpentrycontractorinSydney.Note:Trytousearedorbluelumbercrayontoidentifyanyboardsthatappeartobefracturedorinmuchpoorerconditionthantheirneighbours.YoucanalsogetyourdeckboardrepairfasterbycallingyourfavouritecarpentrycontractorinSydney. Identifyandcalculatefootageoflumber Thenextstepistoexaminethethicknessoftreateddeckboards.Afterindicatingtheboardsthatneedtobereplaced,lookforthetypeoflumberthatwasusedtobuildthedeck'stop.Treated5/4(five-quarter) timber, which is 1′′ thick and 5-1/2′′ wide, is the most common type of deck board. Note:Toestimatethethicknessofyourdeckplanks,payattentiontotheedges.Thetopandlowerlevelsofatwo-storydeckmaycontainvarioustypesoftimber.Makesurethethicknessofyourlumberiscorrectbeforeyoubuyandmovealargeamountoflumber.Withatapemeasure,roughmeasuretheolddecking.Takeapproximatemeasurementstogetanideaofhowmuchmaterialyou'llneed. Buyanewlumbertoreplacetheold Replacingdamagedormissingpartsisassimpleasvisitingyourlocallumberyard.Makesuretoinspecttheedgesofanyboardsthathavebeentreatedwithapreservative,sincemanymayhavevisiblescarsandimperfections.Asidefromthat,lookforboardswithlittleknotsalongtheedges.Fracturepointsmaybeseenhere.Checktheundersidesoftheboardsforlargeknothollowsbyflippingthemover.Finally,lookforlumberthatdoesnotshowanyobvioussignsofwarping.Youwantboardsthatarelongandstraightforthemostpart.Smallbowsandcurvescanbechurnedout,buthugeswoopsinshortspanscan’tbehandledwith. Removeolddeckboards Trytoremoveolddeckboardswithahammerandnailpuller.Withyournewtimbersuppliedtothejobsite,youmaybeginremovingyouroldboards.Youcouldjustriptheseboardsoutwithaprybarandforce.But,you’relikelytoharmthesurroundingboardsthatyouplantomaintain.Youcanalsotryitanotherway.Removethenailsfromapproximately2/3oftheboardlength,youmaygentlypryupthefreeendandusethelengthoftheboardforleveragetocrankoutthefinalfewnails.Benddownanynailspokingthroughthebottomsideoftheboard,thenplacetheboardaside.Repeattheprocessforallofyourdesignatedboards. Measureforreplacementdeckboards Thenextstepistomeasurethedeckboardgapusingtapemeasure.Nowtakeaprecisemeasurementforthenewboard.Measureeverygapwhereaboardismissingbybuttingtheendofyourtapemeasureagainsttheendofthenextboardup.Pullthetapeacrossthevacantarea,then verifythemarkonyourtapewhenitultimatelycrossestheexistingboardattheotherend.(Ithelps
to look down on this measurement from above). Subtract roughly 1/8″ from your measurement. This willleavealittlewiggleroomforthenewreplacementcomponenttoslipintopositioneffortlessly. Sweepthejoists Beforeinstallingthenewboards,carefullycleanthejoists.Leaves,pineneedlesanddirtcanfallintothecrevicesbetweendeckboardsandgatheronthetopsofthestructuraljoists.Takethetimetoclearthisjunkoffsoitdoesn’timpedeyournewboardsfromsettingdownwherethey’reintendedtobe.Also,evaluatethegeneralconditionofyourjoists.Makesuretheyaren’tdisplayinganyindicationsofdecay.Deckframingoftentakesalotlongertodecaysinceitisshadedfromthelightbytheboardsaboveit.So,joistsshouldbeinfineshape. CutReplacementpieces Useacircularsawandspeedsquaretocutreplacement.Besureto“squareup” theendsofyourboardsfirst,astreatedtimbertypicallycomeswithraggedcutsontheends.Tocreatecuts,pullandmarkmeasuresbyhookingyourtapemeasureontothesquareendoftheboard,pullingoutthetapeblade,andputtingatiny“V” markatyourpreferredcutpoint.UseyourspeedsquaretodrawastraightlineacrossthetipoftheV.Now,lineupyourcircularsawbladesuchthatitwillcutthislineinhalf.Useyourspeedsquareasaguidetopasstherotatingsawbladethroughthetimberatthisstage.Letthediscardedlumberfallawaysecurely.Ifthewastetimberisquitelengthy,itmightassisttolayanothersupportpiecebeneathitaswell.Justmakesurethatthepropblockisneartothecutpoint,sothatthecut“opensup” anddoesn’tbindtheblade. AttachReplacementdeckBoards Newdeckingplacedandreadyfornailing.Testthefitofallnewcomponentsbyputtingtheminthegapswheretheygo.Iftheyfitproperly,getreadytojointhembypre-drillingtwoholesateachjoistsite, approx. 1″ from the sides of the board. (You maymatchuptheseholeswithnailheadsorscrewheadsinnearbyjoists).GetthisjobdoneeasilybyyourmatchedcarpentrycontractorinSydney. Driveexterior-gradescrewsintothesepre-drilledholes.Makesurethatthescrewsarelongenoughtosinkatleast1-1/2″ into the joist below. You may “countersink” screwsbydrivingthemuntilthe headsarebarelybelowthedecksurface.Attachscrewsatalljoistpositions.Wherethereplacementboardbuttsupagainstanoriginalboard,“toenail” thescrewsbydrivingthematanangle.Thiswill makesurethattheysinkintothejoistthey’resharingwiththenextboardinline. WRAP-UP Justrepeatthesestepsfortherestofyourremainingboards.Yournewdeckboardsmaystandup higherthantheboardsaroundthem.Thisisbecausenewtreatedlumberisoftenstillwet,while
olderboardshavelongsincedriedout.Newboardswillmostlikelysitdownastheytooslowlydryout.Ifyou’refacinganyprobleminrepairingyourdeckboards,callusat0412531757forcarpentrycontractorsinSydney.olderboardshavelongsincedriedout.Newboardswillmostlikelysitdownastheytooslowlydryout.Ifyou’refacinganyprobleminrepairingyourdeckboards,callusat0412531757forcarpentrycontractorsinSydney.
