Download
1 / 35
350 likes | 434 Views
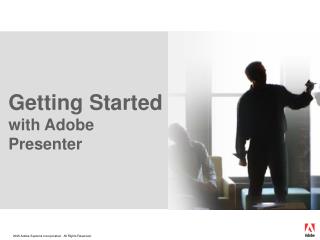
Creating Your 1 st Course with Adobe Presenter 9. Introduction.

E N D
Introduction After you install Adobe Presenter, you will access the application from within PowerPoint. All Adobe Presenter authoring functions in PowerPoint can be reached using the Adobe Presenter ribbon. When you open PowerPoint, a new menu named Adobe Presenter appears in the menu bar. With Adobe Presenter, you can create content that includes interactive quizzing and surveys, audio, and a customizable viewer. For our purposes, presenters should use PowerPoint and video with no interactivity so that courses can be stored on ASCE’s online video storage platform –Brightcove.
Planning a Presentation • It is helpful to do some planning before you create a presentation. We recommend the following: • Consider what you want the user to learn from your presentation. Defining this goal at the beginning lets you create a comprehensive plan for success. • After you have defined the goal of the presentation, you can use an existing PowerPoint presentation and enhance it with Adobe Presenter.
Adobe Presenter Best Practices Adobe recommends these best practices for creating presentations: • Consider creating a written script before recording audio for your presentation. Speaking into a microphone can be more difficult than giving a presentation to a live audience. To ensure a smooth delivery that covers all of your important points, consider creating a script for the entire presentation before recording audio for it. • Create presentations that are a manageable size. A single PowerPoint presentation typically corresponds to a single module. Each module will contain numerous segments, each containing approximately 20–40 slides and resulting in a 15–45-minute video for users. A course could contain numerous segments within each module. • Get familiar with the program and make sure you are comfortable with the controls before recording your course. It is good practice to create a few sample videos (web and audio) before getting started.
Elements of Presentations • Branded PowerPoint: Instructors are required to use ASCE’s PowerPoint template for all Adobe Presenter courses to help with the societies branding. • Title slide: Each course module should have its own title slide. The title of each module should clearly state the learning outcomes of that module. (ex. a Course titled, “Fundamentals of Sustainable Engineering” might have a module titled, “Trends and Issues” and/or “Social Factors”. • Learning Outcomes: Slide two (of each module) should list the specific, measurable learning outcomes of that module. • Attachments: Add supporting content to your course. You can include documents, spreadsheets, links to web pages, and images as attachments. These will be stored in ASCE’s Learning Management System (LMS) myLearning, not embedded in the actual course.
Tips for Recording Audio • Placing the microphone: Positioning your microphone correctly can make a big difference in the finished audio file: • Get as close as possible to the microphone (within 4–6 inches) so that you avoid recording any other nearby sounds • Don’t speak down to the microphone; instead, position it above your nose and pointed down at your mouth. • Position the microphone slightly to the side of your mouth, to help soften the sound of the letters s and p.
Tips for Recording Audio, Continued… • Additional Tips: • Find a quiet room with no background noise (ex. fan, heater) and no distractions. A wall (rather than a crowded bookcase) works best as a backdrop to your video to eliminate distractions. • Make sure your cell phone is silenced to avoid interruptions and unintended background noise • Have a glass of water nearby so you can avoid “dry mouth.” • Before recording, turn away from the microphone, take a deep breath, exhale, take another deep breath, open your mouth, turn back toward the microphone, and start speaking. This can eliminate breathing and lip-smacking sounds frequently recorded at the beginning of audio tracks. • Speak slowly and carefully. • Keep in mind that you don’t have to get everything right the first time. You can listen and evaluate each recording and rerecord, if necessary.
Open an Existing PowerPoint • Click on ‘Adobe Presenter’ tab to view ribbon. • Set audio recording quality (detailed instructions on next slide) • Click on Record Button over ‘Video’. 2 3
Set audio recording quality Audio files present the common challenge of balancing quality against size. The higher the sound quality, the larger the file size. In PowerPoint, open a presentation (PPT or PPTX file). • Click Adobe Presenter, and in the Tools group, click Settings. • In the Presentation menu on the left, click Quality. • Select an audio quality level. Remember that a higher quality level results in a larger audio file size. • Please Use: Near CD Quality (stereo or mono): Bit rate of up to 112 Kbps and sampling frequency of 44 Khz
Your PowerPoint will open up in full screen, wait for the recording window to appear. • To enable closed captioning, click on the popup below. Audio will be converted to closed captions automatically once this is enabled. Note: You may need to configure your microphone, if a pop-up window prompts you to do so, follow the directions provided.
Enter audio script in the Closed Captioning (CC) Window on the right (if applicable). • Once CC is enabled, you can paste a script in the CC window (1). This will allow for more accurate closed captions. After pasting your script, click on the double arrows (2) to hide the CC window. 2 1
5. Click ( ) at the top right of the window to set recording preferences. For details, see Set recording preferences. • Make sure your Camera and Microphone are selected from the drop down menu. • Set the resolution to HD Plus [HD Screen, HD Camera] then select your folder location to save your project locally. Click on ‘Ok’ to continue. Note: Adobe Presenter Video Creator produces best quality videos when your camera is High Definition (1280 x 720) and supports at least 10 FPS (frame rate). Use of cameras that support lesser FPS results in choppy videos (similar to slide-show)
Note the key controls to Pause, End, or Annotate. • The recording begins after a 3 second countdown. Fixed annotations above. • You can highlight important areas of your video by hovering on the screen and annotating the area through gestures. Annotation can be a circle or a straight line. • To Add annotations: • Hover on the screen. Select the precise time point at which you want the annotation to start and do one of the following holding the shift key: • Gesture in a circular manner on your screen. Circle can be clock-wise or counter-clockwise. • Gesture in a straight line. • Release the shift key on completion of the annotation and continue with the rest of the recording. • Note: The color and size of the annotation are fixed.
Click through your presentation while recording narration • Your webcam will be recording in the background, you will not see this output until the recording is complete.
Editing Your Course When the recording is complete, the project will open in the editing Interface.
E Preview of the Editing Interface A B D C Adobe Presenter Video Creator editing interface A. Recorded video B. PlaybarC. Editing controls D. Timeline E. Project name
Editing Interface, Continued. Branding Both (Presenter on right) Presentation Only Trim Zoom Presenter Only Both (Presenter on left)
Editing Interface, Continued. • When you have played through your video, and made your screen selections, the timeline will change colors based on your selections and the color coded icons below.
Editing Interface. How to delete Annotations • If an annotation doesn’t appear properly in the output, you can delete them in the editing interface. • If you want to delete the annotation, hover over the annotation marker present on the timeline. You will notice that the tool tip displays "Annotation“. The start of the annotation displays a deletion ( ) symbol. Click on it to delete the annotation. • Not all markers indicate an Annotation, hover over it with your mouse to determine (you’ll see the “Annotation” tool tip appear).
Editing Interface. Pan and Zoom • In addition to video and PowerPoint display options, you can add zoom and panning effects to your course. • Pause the video at the point where you want to add a pan and zoom effect. • Click the Add Pan And Zoom icon ( ). • The Pan And Zoom panel appears on the right (screen shot next slide). • Click and drag the handles to define the pan and zoom region. • A pan and zoom icon appears in the Timeline. Note: The pan and zoom icon for the ‘Presentation Only’ stretch of the video are at the top while the icon for the ‘Presenter Only’ stretch is at the bottom. Pan and zoom icons on the Timeline (above)
Editing Interface. Pan and Zoom • The video is played at the specified pan and zoom level until the next pan and zoom point. This means, if you have zoomed into the video, you have to zoom out again to display the video in the original size. • Double-click anywhere in the pan and zoom region of the Presentation (a) or the Presenter (b) to display the video in the original size. Note: Delete a pan and zoom point by clicking the corresponding delete icon ( ) in the Pan And Zoom panel. a b
Editing Interface. Closed Captioning • After recording your presentation you can easily do post editing to your closed captions. Click on CC to open up the CC window, then play from the beginning. Double click on each highlighted text box (right) to edit the CC text that appears in the recording. Note: You cannot manipulate the time that the text appears on the screen, only the text.
ASCE will add branding and Lower Third Text in Post Production
Editing Interface. Trim Video. • Pause the video (click the Play button) at the point where you want to start trimming the video. • Click the Trim icon ( ) and then click ‘Set Inpoint’ ( ). • The start marker appears on the Timeline. • Next, pause the video at the point where you want the end marker for trimming. • Click ‘Set Outpoint’ ( ). • Click and drag the start and end markers to increase or decrease the trim region. Note: To snap to a specific point in the video, you can use the markers in the Timeline. The markers are represented by tiny dots in the region where the playhead moves. See Timeline for an image that shows these markers. To delete a trim region, hover your mouse anywhere on the region and press Delete. The playhead can be positioned anywhere.
Editing Interface. Trim Video, Continued. Note: Inpoint has been set – see marker 2 4 Screen shot referenced from bullets 2 and 4 from previous slide.
When you are finished editing your video, click on Publish. • Give your project a name, then click ‘Yes’ to proceed.
Course Output • Adobe will create two folders in your ‘Documents’ folder. • ‘My Adobe Presenter Video Projects’ • ‘My Adobe Presenter Video Projects Published’ The complete packed course will be found in the second folder (Published).
Recommended cameras and microphones • Yeti Blue microphone • Logitech HD Pro Webcam C910 • Creative Live! Cam inPerson HD • FREETALK® Everyman HD