Download
1 / 24
370 likes | 662 Views
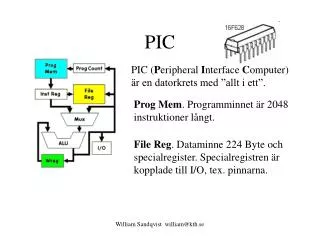
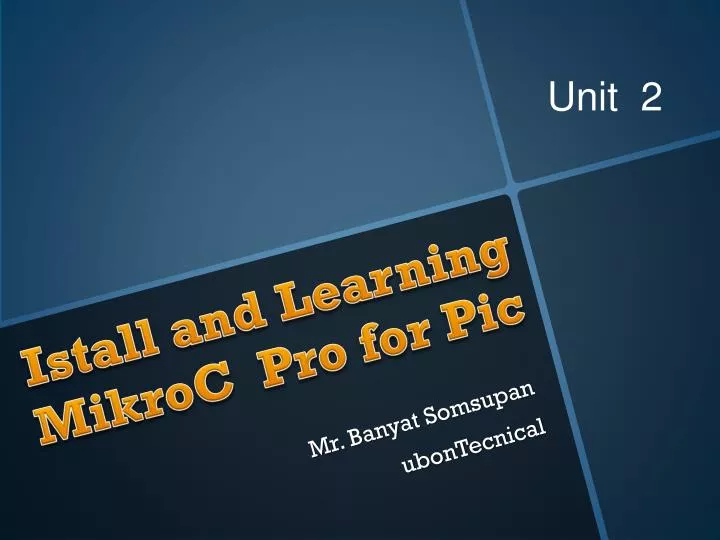
Unit 2. Istall and Learning MikroC Pro for Pic. Mr. Banyat Somsupan ubonTecnical. (1) S/W Installation. software is called MikroC for PIC which you can download from the following link http:// www.mikroe.com / eng /products/view/228/ mikroc -pro-for- avr /

E N D
Unit 2 Istall and Learning MikroC Pro for Pic Mr. BanyatSomsupan ubonTecnical
(1) S/W Installation • software is called MikroC for PIC which you can download from the following link • http://www.mikroe.com/eng/products/view/228/mikroc-pro-for-avr/ • It would be used to simulate C-programs in PIC microcontrollers Electronic Ubontecnical
การติดตั้ง MikroC Pro for Pic 1. ดับเบิ้ลคลิก Icon 2 2. คลิก next Electronic Ubontecnical
การติดตั้ง Mikroc Pro 3 คลิก € 4คลิก Electronic Ubontecnical
การติดตั้ง MikroC 5 คลิก Electronic Ubontecnical
การติดตั้ง MikroC pro 6 กา ถูกทั้งหมด แล้วคลิก Next Electronic Ubontecnical
การติดตั้ง MikroC pro 7 คลิก Electronic Ubontecnical
การติดตั้ง MikroC pro 9 คลิก 8 คลิก Electronic Ubontecnical
การติดตั้ง MikroC pro 10 คลิก Electronic Ubontecnical
การติดตั้ง MikroC pro 11 คลิก 12 คลิก Electronic Ubontecnical
การติดตั้ง MikroC pro 13 คลิก 14 คลิก Electronic Ubontecnical
การติดตั้ง MikroC pro 15 คลิก Electronic Ubontecnical
การใช้งาน MikroC Pro. 1. ดับเบิ้ลคลิก Icon 2 ดับเบิ้ลคลิก New Project Electronic Ubontecnical
(1) cont. 3 คลิก Next Electronic Ubontecnical
(2) cont. 4 ตั้งชื่อ ไฟล์ 5คลิกสร้าง Folderใหม่ 6 คลิก Drive C 7คลิก Make New Folder Electronic Ubontecnical
(3) Cont 10 คลิกเลือกเบอร์ Pic 8 ตั้งชื่อ 9คลิก OK 11 พิมพ์คาของ Crystall 12 คลิก Next Electronic Ubontecnical
(4) Cont. 13 คลิก Next Electronic Ubontecnical
(5) cont. 14 คลิก Electronic Ubontecnical
(6) Cont. 15 คลิก Finish Electronic Ubontecnical
(7) Cont พิมพ์ Code ภาษา C Electronic Ubontecnical
ตัวอย่าง การพิมพ์ Code คำสั่ง 1 พิมพ์ Code 2คลิก Build เพื่อสร้าง .hex 3 หากไม่มีข้อผิดพลาดจะพบ Successfully Electronic Ubontecnical
Example (1) Write a MikroC for Pic program to toggle all the bits of port B void main(void) { TRISB =0; // make Port B an output While ( 1 ) // repeat forever like while(ture) { PORTB = 0x55; delay_ms(1000); PORTB = 0xAA; delay_ms(1000); } } Electronic Ubontecnical
Example (2) Write a MikroC program to send values 00-FF to port B voidmain(void) { unsigned char z; TRISB =0; // make Port B an output while (1); // needed If running in hardware { for (z=0;z<=255;z++) PORTB =Z; delay_ms(500); } } Electronic Ubontecnical
Thanks Mr. BanyatSosupan Electronic Ubontecnical