Download
1 / 32
320 likes | 325 Views
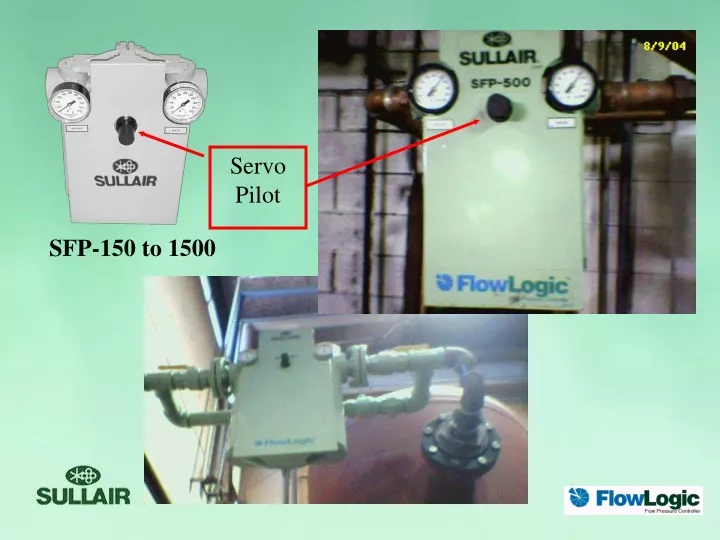
Servo Pilot. SFP-150 to 1500. Receiver tank sizing 3 to 5 gallons per SCFM of compressor capacity NOTE: The receiver tank should fluctuate a minimum of 10 psi or higher than SFP air outlet pressure. Repair kit parts. 2’nd Troubleshooting step. Adjust the Servo pilot valve (reg)

E N D
Servo Pilot SFP-150 to 1500
Receiver tank sizing 3 to 5 gallons per SCFM of compressor capacity NOTE: The receiver tank should fluctuate a minimum of 10 psi or higher than SFP air outlet pressure.
2’nd Troubleshooting step. Adjust the Servo pilot valve (reg) all the way open ”120 psi”, and then closed “20 psi” 1’st Troubleshooting step. Open the bypass.
3’rd step Attach a gauge to the Servo pilot (reg), and cap the copper line on the control valve. Test the Servo from all the way open ”120 psi”, and then closed “20 psi” Always check the filter first. Is it clean?
The Servo Pilot is a precise adjustment control. • The best adjustment procedure: • Slow adjustments • bring 2 psi lower than the customer wants, and then adjust the 2 psi higher. • This valve is typically not repaired, just replace it. • It can be cleaned out in some cases.
Pictures Jagemann Plating Company Manitowoc, WI 54221 SFP-500 S/N: 04050081 P/N: 02250141-552 Correct Tool 1” to 2 ½” spanner wrench Wrong wrench it scratches up a lot of Green paint, but it works.
A lot of white material White Flux / Solder? A very small pilot hole. Make sure it’s cleaned out.
Diaphragm O-ring # 4 - Balancing control Diaphragm
NOTE: Pressed in aluminum metal retaining ring. This holds the stem sealing O-ring that’s inside.
ONE Piece Service Kit – Included items: ALL O-rings should be replaced, they develop flat spots.
Breather Vent Hole Servo Pilot Air IN Air OUT
NOTE: The 2 large #4 piston O-rings are VERY VERY loose fitting ! This is how they were designed. Take CAUTION when assembling the valve piston that you don’t cut these O-rings.
Air IN Air OUT
NOTE: Torque is VERY important, these bonnet screws should be tightened to 20 foot lbs. Maximum of 20 foot lbs of torque.
Key # 20 balance diaphragm Pilot Plug, and plug valve seats.
NOTE: Torque is VERY important, this diaphragm should be handtight. Approx 10 inch lbs of torque. NOTE: this is a breather plug
NOTE: Torque is VERY important, this diaphragm should be handtight. Approx 10 inch lbs of torque.
NOTE: Torque is VERY important, this diaphragm should be handtight. Approx 10 inch lbs of torque.
NOTE: Torque is VERY important, this diaphragm should be handtight. Approx 10 inch lbs of torque.
Top # 23 Nut Bottom # 24 Pilot Diaphragm # 25 Plate Connected to the Small Pilot Seat # 14 Diaphragm Ring