Download
1 / 50
500 likes | 510 Views
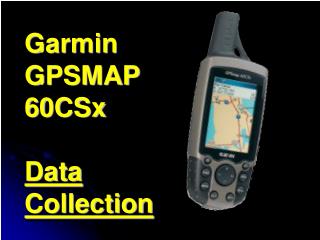
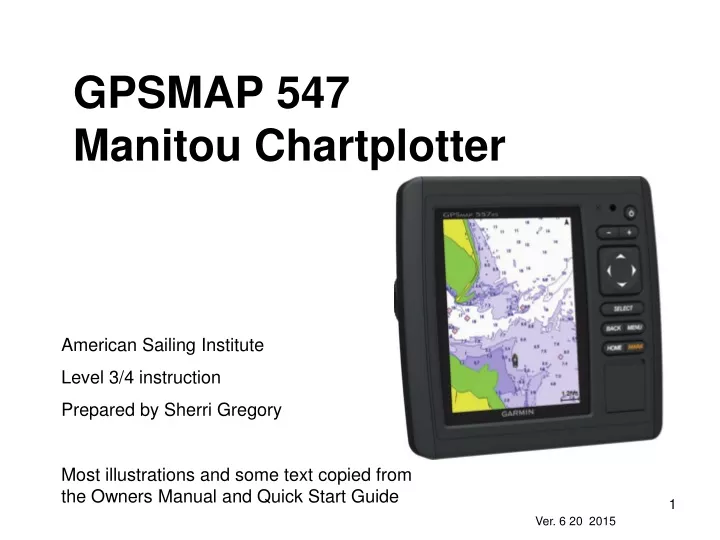
GPSMAP 547 Manitou Chartplotter. American Sailing Institute Level 3/4 instruction Prepared by Sherri Gregory Most illustrations and some text copied from the Owners Manual and Quick Start Guide. Ver. 6 20 2015. Cleaning the Unit.

E N D
GPSMAP 547Manitou Chartplotter American Sailing Institute Level 3/4 instruction Prepared by Sherri Gregory Most illustrations and some text copied from the Owners Manual and Quick Start Guide Ver. 6 20 2015
Cleaning the Unit • The device is coated with a special anti-reflective coating which is very sensitive to skin oils, waxes, and abrasive cleaners. Cleaners containing ammonia will harm the anti-reflective coating. • Apply an eyeglass lens cleaner specified as safe for anti-reflective coatings to a soft, clean, lint-free cloth and gently wipe.
Differences between old and new Chartplotters on Manitou • Screen navigation (no Page, Find) • Editing • Enhanced chart options • Enhanced navigation options • Wifi and Bluetooth communications • Waypoint and Route transfer
Not available on Manitou The following are a few items mentioned in the GPSMap 500/700 Series and echoMAP 50/70 Series Owners Manual that are not available on our unit: • Touchscreen (different model) • Menu Bar (different model) • Premium Charts (BlueChart g2 Vision) including Auto Guidance • Most gauges and system monitoring including Sonar • Automatic Identification System (AIS)
Home button Home menu • “Home” is the main menu. • Everything can be accessed from Home. • Menu order can be changed. • Scroll up/down to see entire list Navigation Chart Nav Info Man Overboard Gauges Settings Customize Home Combinations Charts
What replaces Page and Find keys? Home menu • Most old “Page” screens are under Navigation Chart,Gauges, and Settings • “Find” items by Pressing Nav Info and selecting item type or Search by Name Navigation Chart Nav Info Man Overboard Gauges Settings Customize Home Combinations Charts
Some Settings you may want to check and change • Press Home => Select Settings • System => Simulator => On/Off, location • System => Display => Backlight/Color Mode • (or press on/off button from any screen) • Units => North Reference (Magnetic/True) • Alarms (see next slide)
Some Settings you can check and change - Alarms • Home=> Settings => Alarms => Navigation => • Arrival: Sets an alarm to sound when you are within a specified distance or time from a turn or a destination. • Anchor Drag: Sets an alarm to sound when you exceed a specified drift distance while anchored. • Off Course: Sets an alarm to sound when you are off course by a specified distance
Some other System Information you may want to view • Press Home => Select Settings => System => • System Information => Software Information (Displays charts used) • System Information => Garmin Devices (Shows software version) • GPS => Skyview (shows satellite page)
Some useful Chart Appearance options • Home => Navigation Chart => Menu => Chart Setup => Chart Appearance • Orientation => North, Head or Course Up • Heading line => Display On/Off • (Keep setting for Source as GPS Hdg) • Spot Depths => Dangerous=> set depth • (shows depths in red at that depth and lower) • Safety Shading => Select Manual to specify maximum depth for shading • Symbols => Several options available
Compass Rose • A compass rose can be displayed on the Navigation chart: • Home => Navigation Chart => Menu => Chart Setup => Roses => Compass or None (to remove) • No other Roses options are available on Manitou.
Navigation Chart Screen options • Select Navigation Chart from the Home Screen (or from the Charts Screen) • Options: • Zoom: +, - • Pan: Drag the Navigation Screen or use arrow keys to view a different location. Press Back to return to present location • View details about an item: place cursor on item Select => Information (Or if the item is a waypoint, select the waypoint name to get information about or to edit the waypoint.)
Navigation Chart Screen options (Continued) • Select Navigation Chart from the Home Screen (or from the Charts Screen) • The following may be performed by placing your cursor anywhere on the Navigation Chart and pressing Select: • Navigate To => SelectGo To or Route To • Create Waypoint • Measure distance: Distance and angle from your current location is displayed. To reset from a different current location select Set Reference. • Information
Viewing Charts in Split Screen • Home => Charts => Split Navigation Chart (Shows two charts so you can pan on one while keeping the other positioned on your current location.) • Home => Combinations (You can view two charts such as standard and “3D”. You can customize the appearance.)
Numbers • Numbers can be displayed on the Navigation Chart and Gauges screens. • You can change the Layout (1-6 numbers) • You can change the numbers. On our boat select from these categories: • GPS • System • Navigation
Number options available on Manitou • GPS • GPS Speed • GPS Position • GPS Heading (COG) • GPS Error • System • Time of Day (H:M) • Time of Day (H:M:S) • Date
Number options available on Manitou (Cont.) • Navigation Data
Changing Chart to show and hide numbers From NavigationChart: • To change from Full Screen to Numbers: Menu => Select Show Numbers • To change from Numbers to Full Screen: Menu => Select Full Screen Map Note: If you move the cursor (pan mode) the numbers disappear from the map screen. Back takes you out of pan mode and numbers reappear.
Changing number layout and contents • Navigation Chart => Menu => Chart Setup => Overlay Numbers => Edit Layout • Use + and – keys to select a layout • Highlight a field, then press Select to change the data field: • Select a category (GPS, Navigation, System) • Select the number
Navigation numbers • Different number layouts can appear when you are navigating to a destination. You can not change the number of fields displayed so you may want to turn this off. • To change numbers: Navigation Chart => Menu => Chart Setup => Overlay Numbers => Navigation Inset Setup • If you want to view your standard numbers during navigation: Navigation Inset => Off
Chart Latitude and Longitude displays • The only way to see your current position is to have “GPS Position” displayed as an optional number. • When you move the cursor (pan mode), a small window is opened on the lower right of the screen showing the latitude and longitude of the cursor, along with the distance and bearing from your current position to the cursor
Gauges Three items are operational on Manitou. Press Home => Gauges => • Numbers: View and customize up to 6 numbers • Compass: Also shows speed, heading and navigation information. (GPS based) • Trip: View odometer, time and speed information. Press Menu for reset options.
Creating Waypoints • Mark your current location as a waypoint: From any screen select Mark • To create a waypoint at a different location select Nav Info => Waypoints => New Waypoint • Select Enter Coordinates or • Select Use Chart, put cursor on location and Select
Marking and Starting Navigation to an MOB Location • From any screen, select Mark > Man Overboard. • From the Home screen, select Man Overboard > Yes. • An international MOB symbol marks the active MOB point and the chartplotter sets a direct course back to the marked location.
Selecting a Destination • By Name: Nav Info => Search by Name => Enter full or partial name. The 50 nearest destinations with your search criteria will appear. • By Type: Nav Info => Select Waypoints, Routes, Tracks, Services • From Chart: Navigation Chart => Place cursor on destination and press Select
What navigation method is most appropriate?
Go To and Route To • Go To: Takes you directly to the destination. This is the standard option for navigating to a destination. The chartplotter creates a straight-line course or navigation line to the destination. The path may run over land and other obstacles. • Route To: Creates a route from your location to a destination, allowing you to add turns along the way. This option provides a straight-line course to the destination, but allows you to add turns into the route to avoid land and other obstacles.
Establishing a Go To Select a Destination=>Navigate To => Go To • A magenta line appears. In the center of the magenta line is a thinner purple line that represents the corrected course from your current location to the destination. The corrected course is dynamic, and it moves with your boat when you are off course. • To stop navigation: Navigation Chart=>Menu=>Stop Navigation
Establishing a Route to(“on-the-fly” temporary route) Select a Destination=>Navigate To =>Route To • Select the location of the last turn before the destination. • Select Add Turn. • If necessary, repeat the last two steps to add additional turns, working backward from the destination to the present location of your vessel. • The last turn you add should be the first turn you make, starting from your present location. It should be the turn closest to your vessel. • If necessary, select Menu.Select Navigate Route.Review the course indicated by the magenta line. • To stop navigation: Navigation Chart=>Menu=>Stop Navigation • No waypoints are saved but the route can be saved after ending navigation.
Creating and Saving a Route This procedure saves the route and all the waypoints in it. The starting point can be your present location or another location. • Select Nav Info > Routes > New Route > Select Use Waypoint List or Use Chart. Using Chart: • Select the starting location of the route. • Select Add Turn. • Select the location of the next turn on the chart. • Select Add Turn. • The chartplotter marks the location of the turn with a waypoint. • If necessary, repeat last two steps to add more turns. • Select the final destination.
Navigate parallel to a saved route • Select Nav Info => Routes => Select a route => Navigate To => Offset => Indicate how to navigate the route: • To navigate the route from the starting point used when the route was created, to the left of the original route, select Forward – Port. • To navigate the route from the starting point used when the route was created, to the right of the original route, select Forward – Starboard. • To navigate the route from the destination point used when the route was created, to the left of the original route, select Backward – Port. • To navigate the route from the destination point used when the route was created, to the right of the original route, select Backward – Starboard.
Editing Waypoints • Nav Info => Waypoints => select waypoint => Edit Waypoint => select items to edit => use text editor to edit most items. • Position can be edited using the chart.
Editing Routes (easy methods) • Nav Info=>Routes=>select route=>Edit turns=> see below • Create new turn: Use Chart=>place cursor on existing leg of route where you want to add a turn=>Select=>Add Turn=>drag leg out to create new turn=>Select • Remove a waypoint from a route: Use Turn List=>select the waypoint=>Remove
Transferring Waypoints and Routes Using Garmin HomePort Requirements • Garmin Homeport populated with your waypoints and routes. (Can be loaded on Microsoft or Apple computer.) • MicroSD card • MicroSD card reader (if your computer doesn’t have a MicroSD slot)
Transfer your data(Apple example) • Insert MicroSD card • (Name card if new) • Open HomePort • Highlight a file to transfer • Select “Send List” or Microsoft equivalent • Check off what you want to transfer
Memory Cards on Chartplotter • This unit has two microSD memory card slots. • We have a chart memory card inserted in one slot: Canada g2 HXCA015R. • Even though there are two slots, the chart memory card must be removed before performing data transfer.
Insertion of MicroSDmemory card Memory card is inserted with printed side to right
Transferring data to Chartplotter • Insert microSD data card with unit turned on. • When your data card is inserted this screen appears. • Select “Manage User Data”
Transferring data to Chartplotter (continued) Select “Merge from Card”to add the data on your card to the Waypoints and Routes already on the chartplotter. Select “Replace from Card” to erase all the Waypoints and Routes on the chartplotter and replace with yours
Select the file to download. “userdata” is the default first file created by HomePort. After the data is transferred this message appears.
Re-inserting the Map Card When you re-insert the map card you will see this screen. Select “Update Software”. Caution: Do not Select “Copy Built-in Map”. It will overlay the chart on the card.
How do I differentiate between the chart card and my data card? • Caution: The chart card is not labeled in any way to indicate it contains charts. • The printed side of the chart card says SanDisk 4GB • Your data card will probably be larger than 4GB Photo of chart card
Wi-Fi Apps You can access the chartplotter using two free Apple Apps (for Iphones and Ipads only) • Garmin Helm – allows you to view and control the chartplotter (Access can be limited to viewing or it can be turned off.) • Garmin BlueChart Mobile – allows you to create waypoints and routes and transfer to chartplotter via Wi-Fi
Wi-Fi Network The chartplotter has it’s own local Wi-Fi network: Name: MANITOU Password: MANITOU1 (all caps) To activate Wi-Fi on chartplotter: Settings => Communications => Wireless Devices => Wi-Fi Network => Wi-Fi ON
Garmin BlueChart Mobile • Export: Sends all routes and waypoints from your Apple device to the chartplotter via Wi-Fi • Import: Adds all routes and waypoints from the chartplotter to your Apple device via Wi-Fi
Transferring waypoints and routes using BlueChart Mobile • Turn on chartplotter Wi-Fi • With your Apple device join the Manitou Wi-Fi network. • From BlueChartMobile select Settings => GarminMarine Network => Export or Import • From the chartplotter confirm the transfer
Using Garmin Helm On an Apple mobile Device: • Download Garmin Helm App • Connect to Manitou Wi-Fi • Open Helm App • View or control chartplotter using superimposed keyboard.