Download
1 / 53
530 likes | 536 Views
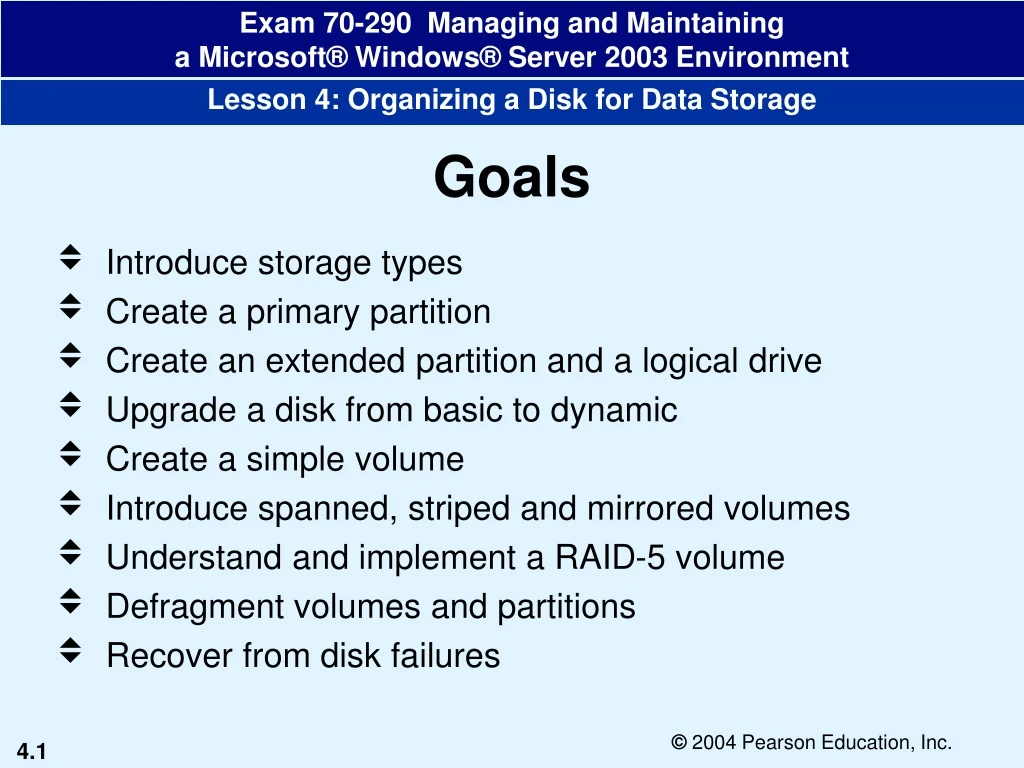
Goals. Introduce storage types Create a primary partition Create an extended partition and a logical drive Upgrade a disk from basic to dynamic Create a simple volume Introduce spanned, striped and mirrored volumes Understand and implement a RAID-5 volume Defragment volumes and partitions

E N D
Goals • Introduce storage types • Create a primary partition • Create an extended partition and a logical drive • Upgrade a disk from basic to dynamic • Create a simple volume • Introduce spanned, striped and mirrored volumes • Understand and implement a RAID-5 volume • Defragment volumes and partitions • Recover from disk failures
(Skill 1) Introducing Storage Types • Storage types used by Windows Server 2003 • Basic storage (divides a hard disk into partitions) • Dynamic storage (divides a hard disk into volumes) • Basic disk supports the following types of partitions • Primary partition – a physical unit of storage created on a basic disk • Extended partitions – created from free space that has not yet been partitioned
(Skill 1) Introducing Storage Types (2) • Dynamic disks support the following types of volumes • Simple volume – consists of disk space from a single hard disk, an entire disk, or multiple regions on the same disk that are linked together • Spanned volume – consists of disk space from multiple disks. • Striped volume (RAID-0) – combines areas of free disk space from two or more hard disks • Mirrored volume (RAID-1) – is created using the free disk space on two physical hard disks • RAID-5 volume – is a fault-tolerant, striped, dynamic volume that combines free disk space from 3 to 32 physical hard disks
(Skill 1) Figure 4-1 Types of partitions on a basic disk
(Skill 1) Figure 4-2 How data is written to dynamic volumes
(Skill 1) Figure 4-3 Limitations of dynamic disks
(Skill 2) Creating a Primary Partition • One primary partition on a basic disk stores the files required for the computer to boot • System files can be on an extended partition, but the boot files must reside on a primary partition or a volume • Use the Disk Management snap-in, or disport.exe, to create additional primary partitions using unallocated space on the hard disk • The Disk Management snap-in is included in the pre-configured Computer Management console.
(Skill 2) Provides information about the type of disk, the file system used to format the disk, the disk capacity, and the status of the disk Provides information about each physical disk and the partitions or volumes on each disk Figure 4-4 Available disk configuration
(Skill 2) Figure 4-5 Assigning the drive letter
(Skill 2) Figure 4-6 Formatting the partition and labeling the volume
(Skill 2) Figure 4-7 Properties dialog box for the primary partition
(Skill 2) Figure 4-8 Changing the drive letter of a primary partition
(Skill 2) Figure 4-9 The Change Drive Letter or Path dialog box
(Skill 3) Creating an Extended Partition and a Logical Drive • Basic disks can have a maximum of four partitions per drive using the default master boot record (MBR) partitioning style • Extended partitions • Do not store data like primary or logical partitions • Act as containers for logical partitions, where the data is actually stored
(Skill 3) Right-click on the Unallocated disk area Figure 4-10 Starting the New Partition Wizard
(Skill 3) Newly created extended partition on Disk 0 Figure 4-11 Creating an extended partition
(Skill 3) Figure 4-12 Setting the size for the extended partition
(Skill 3) A logical drive has been created on Disk 1 Figure 4-13 A logical drive on an extended partition
(Skill 4) Upgrading a Disk from Basic to Dynamic • By default, the hard disk on a Windows Server 2003 computer is initialized with basic storage • When you upgrade a basic disk, the existing partitions are converted into simple volumes • Use the Disk Management snap-in to upgrade a basic disk to a dynamic disk
(Skill 4) Figure 4-14 The Convert to Dynamic Disk dialog box Figure 4-15 The Disks to Convert dialog box
(Skill 4) Figure 4-16 The Disk Management message box Figure 4-17 The Convert Disk to Dynamic warning message Figure 4-18 The Confirm message box You will have to reboot if you are converting a disk that includes the boot volume, system volume or a volume that includes the paging file
(Skill 5) Creating a Simple Volume • Upgrading a basic disk to a dynamic disk • Any existing partitions are converted to volumes • Any free space that is left on the drive can be used to create additional volumes • Simple volume • Can be part of a disk or an entire disk • Can be created only on a single dynamic disk
(Skill 5) Figure 4-19 Creating a simple volume
(Skill 5) Figure 4-20 Setting the size for the simple volume
(Skill 5) Note that if you created the primary partition and the logical drive on the extended partition on the same disk, they were converted to simple volumes when the disk was upgraded to dynamic Figure 4-21 Newly created simple volume
(Skill 6) Introducing Spanned, Striped and Mirrored Volumes Spanned volumes • Creating a spanned volume • Combines the unallocated space on multiple disks into one logical volume • A spanned volume can organize disk space on up to a maximum of 32 disks • Spanned disks allow you to combine the space used by multiple, smaller volumes, on multiple disks, into one spanned volume represented by a single drive letter
(Skill 6) Figure 4-22 Creating a spanned volume
(Skill 6) Figure 4-23 Selecting the disks to create a spanned volume
(Skill 6) Figure 4-24 Details of the spanned volume
(Skill 6) Spanned volume created using 300 MB of disk space from two hard disks on your machine Figure 4-25 Newly created spanned volume
(Skill 6) Introducing Spanned, Striped and Mirrored Volumes (2) Striped volumes • As with spanned volumes, you can combine disk space from a maximum of 32 disks to create a striped volume • On a striped volume, data is divided in blocks of 64 KB across each segment of the volume • Data is simultaneously written across all of the disks so that it is added to the disks at the same rate
(Skill 6) Figure 4-26 Assigning a drive letter to the striped volume
(Skill 6) Figure 4-27 Newly created striped volume
(Skill 6) Introducing Spanned, Striped and Mirrored Volumes (3) Mirrored volumes • A mirrored volume provides fault tolerance because you create two drives that are duplicates of each other • Mirrored volumes are inefficient in some respects because fifty percent of the available disk space is consumed by fault tolerance
(Skill 6) Figure 4-28 Selecting the disks for a mirrored volume
(Skill 6) Figure 4-29 Selecting the file system, name, and format the volume
(Skill 6) Mirrored volume created by combining free space from two hard disks Figure 4-30 Newly created mirrored volume
(Skill 7) Understanding and Implementing a RAID-5 Volume • Consists of disk space on at least three physical hard disks • Provides fault tolerance by writing one block of parity information for each stripe of data • If a disk fails, the system uses the parity information and the data from the remaining disks and performs a logical XOR (Exclusive OR) operation to determine what the missing section of data should be
(Skill 7) 300 MB of space will be used from each disk for a total of 600 MB of usable storage space 1/3 (300 MB) will be lost to parity data Figure 4-31 Setting the size for a RAID-5 volume
(Skill 7) Summary of the settings for the RAID-5 volume Figure 4-32 Details of the RAID-5 volume
(Skill 7) A RAID-5 volume created using disk space from three hard disks Figure 4-33 Newly created RAID-5 volume
(Skill 8) Defragmenting Volumes and Partitions • The Disk Defragmenter rearranges files and unused space, moving the segments of each file and folder to one location so that they occupy a single, contiguous space on the hard disk • Enhancements • In Windows XP and Windows Server 2003, file system defragmenter support is no longer dependent on compressed file routines and the Cache Manager • Limitations on defragmenting volumes with cluster sizes larger than 4 KB and on moving single NTFS file clusters have been remedied
(Skill 8) Defragmenting Volumes and Partitions (2) Disk Defragmenter window • Partitions to analyze and defragment • Lists the volumes you can view and defragment • Provides details such as the type of File System, amount of Free Space, and Capacity of the drive • Analysis display • Provides a graphical display of the fragmentation on the drive • Defragmentation display • Provides a constantly-updating representation of the volume during defragmentation
(Skill 8) Figure 4-34 The Disk Defragmenter utility in the Computer Management console
(Skill 8) Figure 4-35 The Defragment Now button on the Tools tab
(Skill 8) Click to view the analysis report for the selected disk volume Figure 4-36 Analyzing a disk
(Skill 8) Select to open a report detailing the number of fragmented files in each identified file, the file size, and file name Select to analyze a disk for fragmentation Select to defragment the disk Figure 4-37 Viewing the status of a disk after defragmentation
(Skill 8) Figure 4-38 The Analysis Report
(Skill 9) Recovering from Disk Failures • In the event of disk or volume failures, it is important to repair the disk or volume as quickly as possible to minimize the damage • Disk Management snap-in • Used to monitor the status of a disk or volume to determine if it is functioning normally • Used to review information about the disk including its status
(Skill 9) Recovering from Disk Failures (2) Corrective actions • Offline or Missing Status • Make sure the disk is plugged in and attached to the computer • If Windows 2003 cannot locate the disk, use the Reactivate Disk command to bring the disk online • Online Disks (w/Errors) Status • A disk with the Online Disks (w/Errors) status is accessible, but may contain I/O errors • In such a situation, you can try to reactivate the disk to bring it back online