Download
1 / 17
170 likes | 321 Views
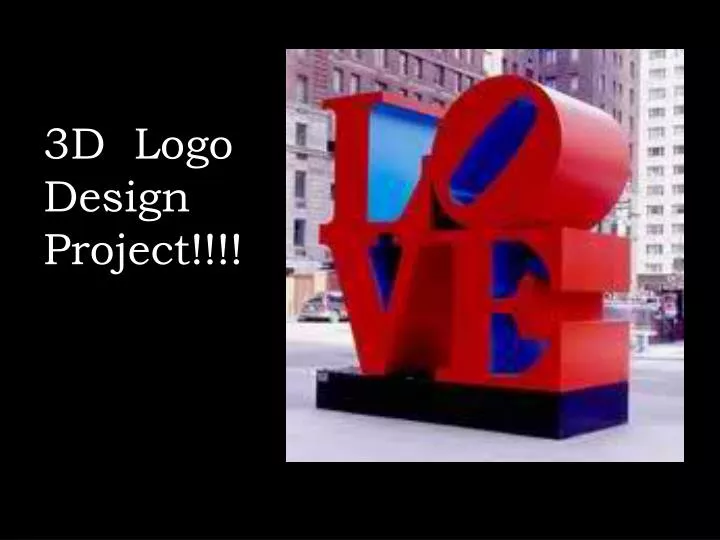
3D Logo Design Project!!!!. Robert Indiana American artist associated with the Pop Art movement .

E N D
Robert Indiana American artist associated with the Pop Art movement Robert created the iconic sculpture of the word love first for a Christmas cardfor the Museum of Modern Art in 1964 and later was included on an eight-cent United States Postal Servicepostage stamp in 1973, the first of their regular series of "love stamps.
Robert Indiana was born Robert Clark in New Castle, Indiana. His family relocated to Indianapolis, where he graduated from Arsenal Technical High School. He moved to New York 1954 and joined the pop art movement, using distinctive imagery drawing on commercial artapproaches blended with existentialism, that gradually moved toward what Indiana calls "sculptural poems".
Now use Robert Indiana as your inspiration for your next project. As you look through some examples of 3D art start to think about how you would create your own 3D logo using your initials or a simple four letter word that would fit into the shape of a square.
Your Assignment: • Assignment 1#: Create an original logo design using the initials of your name or a simple four lettered word that describes you as a foundation. Link, interlock and exaggerate the letters until they form an interesting abstract design. then you are to sketch letters and your designs on a 6”x 6” white piece of paper. • Once your words and design have been approved you will measure and cut out four 6"x6" white pieces of paper and redraw each letter. Making each piece of paper like a template to use when you cut out your cardboard pieces. • Assignment 2#:You will then take this abstract design that represents your logo and express it three-dimensionally using cardboard. Construct into a fully three-dimensional, in-the-round sculpture of your logo. The completed piece should measure no higher than 2ft. (61 cm) in any direction. Once you are done with construction the logo must be painted and have design on it.
Step by step of construction of lettering So first thing’s first, you’ve got to choose your letters. Trace out your letters. Cut your letter out. Take the letter you’ve just cut out, trace around it onto the card and cut out another copy of it.
5.&6. Next we want to start 3D-ifying it. Use a ruler width to make sure they were the same width each time. Then its a good idea to number which lengths go where, as they all start to look the same. 7. Use your tape to start sticking your letter together, with the strips sandwiched inside the cardboard letters. You can afford a little messiness, but any big lumps and bumps will show through the outer paper. 8. If you’re letter has any annoying curves, cut out a strip that’s slightly wider than your original width. This time it’s going to sit around the edge of the 2 cardboard letters
9. Curve your thin card round and stick it to the letter. 10. Once its all looking solid, paper Mache with newspaper and cover the letter, smooth out all the air bumps. Once it’s dried a bit, cut the corners of your paper. For the curved edges make little snips as indicated. 11. Repeat step 10 with a second coat of paper Mache. Only paper Mache the second coat when the first coat is dry. Wait until dry and then paint Gesso on and wait until dry.
12. Once the Gesso is dry you may begin painting on your designs .