Download
1 / 33
330 likes | 455 Views
Access Chapter 4. Creating Reports and Forms. Objectives. Create reports and forms using wizards Group and sort in a report Add totals and subtotals to a report Resize columns Conditionally format controls Filter records in reports and forms Print reports and forms

E N D
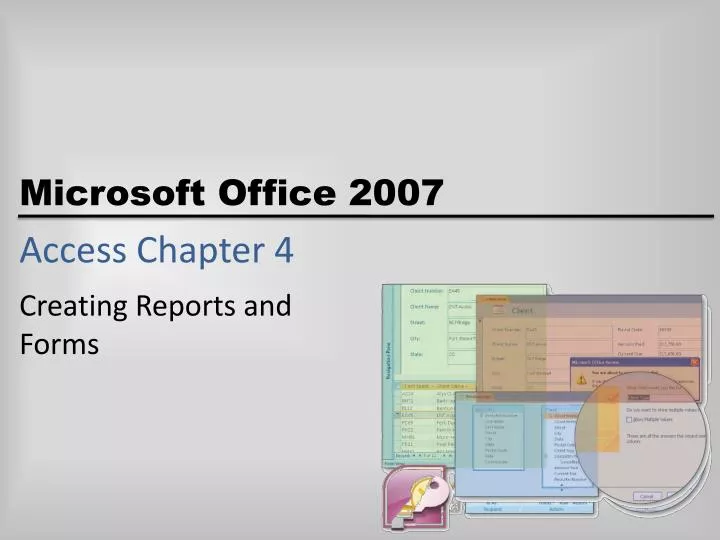
Access Chapter 4 Creating Reports and Forms
Objectives • Create reports and forms using wizards • Group and sort in a report • Add totals and subtotals to a report • Resize columns • Conditionally format controls • Filter records in reports and forms • Print reports and forms • Add a field to a report or form • Include gridlines • Add a date • Change the format of a control • Move controls Microsoft Office 2007: Complete Concepts and Techniques - Windows Vista Edition
Creating a Report Using the Report Wizard • Start Access and open the JSP Recruiters database as described on pages AC 237-238 • Show the Navigation Pane if it is currently hidden • If necessary, click the Client table in the Navigation Pane to select it • Click Create on the Ribbon to display the Create tab • Click the Report Wizard button on the Create tab to start the Report Wizard Microsoft Office 2007: Complete Concepts and Techniques - Windows Vista Edition
Creating a Report Using the Report Wizard • Click the City field and then click the Add Field button to add the City field to the list of selected fields • Using the same technique, add the Client Number, Client Name, Amount Paid, and Current Due fields • Click the Next button to display the next Report Wizard screen which asks for grouping levels • Because you do not need to specify grouping levels, click the Next button to display the next Report Wizard screen, which asks for sort order Microsoft Office 2007: Complete Concepts and Techniques - Windows Vista Edition
Creating a Report Using the Report Wizard • Because you do not need to specify a sort order, click the Next button to display the next Report Wizard screen, which asks for your report layout preference • With Tabular layout and Portrait orientation selected, click the Next button to display the next Report Wizard screen, which asks for a style • If necessary, click the Module style to select it • Click the Next button and then type Clients by City as the report title • Click the Finish button to produce the report • Click the Close ‘Clients by City’ button to close the report Microsoft Office 2007: Complete Concepts and Techniques - Windows Vista Edition
Creating a Report Using the Report Wizard Microsoft Office 2007: Complete Concepts and Techniques - Windows Vista Edition
Grouping and Sorting in a Report • Right-click the Clients by City report in the Navigation Pane to produce a shortcut menu • Click Layout View on the shortcut menu to open the report in Layout view • Hide the Navigation Pane • If a field list appears, close the Field List by clicking its Close button • If necessary, click the Group & Sort button on the Format tab to produce the ‘Add a group’ and ‘Add a sort’ buttons Microsoft Office 2007: Complete Concepts and Techniques - Windows Vista Edition
Grouping and Sorting in a Report • Click the ‘Add a group’ button to add a group • Click the City field in the field list to group records by city • Click the ‘Add a sort’ button to add a sort • Click the Client Name field in the field list to alphabetically sort by client name Microsoft Office 2007: Complete Concepts and Techniques - Windows Vista Edition
Grouping and Sorting in a Report Microsoft Office 2007: Complete Concepts and Techniques - Windows Vista Edition
Adding Totals and Subtotals • Click the Amount Paid field on the first record to select the field • Click the Totals button on the Format tab to display the list of available calculations • Click Sum to calculate the sum of amount paid values • Using the same technique as in Steps 1 and 2, add totals for the Current Due field Microsoft Office 2007: Complete Concepts and Techniques - Windows Vista Edition
Adding Totals and Subtotals Microsoft Office 2007: Complete Concepts and Techniques - Windows Vista Edition
Resizing Columns • If necessary, close the Group, Sort, and Total pane by clicking the Group & Sort button on the Design tab • Click the City column heading. • Point to the right boundary of the City column heading so that the pointer turns into a double-headed arrow • Drag the right boundary to the right so that the entire contents of the City column appear Microsoft Office 2007: Complete Concepts and Techniques - Windows Vista Edition
Resizing Columns Microsoft Office 2007: Complete Concepts and Techniques - Windows Vista Edition
Conditionally Format Controls • Click the Current Due field on the first record to select the field • Click the Conditional button on the Format tab to display the Conditional Formatting dialog box • Click the box arrow to display the list of available comparison phrases • Click greater than to select the greater than operator • Type 0 as the greater than value Microsoft Office 2007: Complete Concepts and Techniques - Windows Vista Edition
Conditionally Format Controls • Click the Font/Fore Color button arrow for the format to be used when condition is true to display a color palette • Click the dark red color in the lower corner of the color palette to select the color • Click the OK button in the Conditional Formatting dialog box to change the formatting Microsoft Office 2007: Complete Concepts and Techniques - Windows Vista Edition
Conditionally Format Controls Microsoft Office 2007: Complete Concepts and Techniques - Windows Vista Edition
Filtering Records in a Report • Right-click the Amount Paid field on the second record to display the shortcut menu • Click Does Not Equal $0.00 on the shortcut menu to restrict the records to those on which the Amount Paid is not $0.00 Microsoft Office 2007: Complete Concepts and Techniques - Windows Vista Edition
Filtering Records in a Report Microsoft Office 2007: Complete Concepts and Techniques - Windows Vista Edition
Printing a Report • Show the Navigation Pane, ensure the Clients by City report is selected, and then click the Office Button to display the Microsoft Office menu • Point to Print on the Office Button menu and then click Quick Print on the Print submenu to print the report Microsoft Office 2007: Complete Concepts and Techniques - Windows Vista Edition
Adding a Field • If necessary, click the Add Existing Fields button on the Format tab to display a field list • Point to the Specialties Needed field, press and hold the left mouse button, and then drag the mouse pointer until the line to the left of the mouse pointer is between the Client Number and Amount Paid fields • Release the left mouse button to place the field • Close the field list by clicking its Close button • Drag the right boundary of the Specialties Needed field to the approximate position Microsoft Office 2007: Complete Concepts and Techniques - Windows Vista Edition
Adding a Field Microsoft Office 2007: Complete Concepts and Techniques - Windows Vista Edition
Including Gridlines • Open the Client Financial Form in Layout vie and hide the Navigation Pane • If necessary, click Format on the Ribbon to display the Format tab • Ensure a field in the form is selected, then click the Gridlines button on the Format tab to display the Gridlines menu • Click Both on the Gridlines menu to specify both horizontal and vertical gridlines Microsoft Office 2007: Complete Concepts and Techniques - Windows Vista Edition
Including Gridlines Microsoft Office 2007: Complete Concepts and Techniques - Windows Vista Edition
Adding a Date • Be sure the Format tab appears • Click the Date and Time button on the Format tab to display the Date and Time dialog box • Click the option button for the second date format to select the format that shows the day of the month, followed by the abbreviation for the month, followed by the year • Click the Include Time check box to remove the check mark • Click the OK button in the Date and Time dialog box to add the date to the form Microsoft Office 2007: Complete Concepts and Techniques - Windows Vista Edition
Adding a Date Microsoft Office 2007: Complete Concepts and Techniques - Windows Vista Edition
Changing the Format of a Control • Click the Date control to select it • Be sure the Format tab appears • Click the Font Color arrow on the Format tab to display a color palette • Click the white color in the upper-left corner of the Standard Colors section to change the font color for the date to white Microsoft Office 2007: Complete Concepts and Techniques - Windows Vista Edition
Changing the Format of a Control Microsoft Office 2007: Complete Concepts and Techniques - Windows Vista Edition
Moving a Control • Point to the Date control so that the mouse pointer changes to a four-headed arrow and then drag the Date control to the lower boundary of the form heading Microsoft Office 2007: Complete Concepts and Techniques - Windows Vista Edition
Moving a Control Microsoft Office 2007: Complete Concepts and Techniques - Windows Vista Edition
Moving Controls in a Control Layout • Click the control for the Client Type field to select it • Hold the SHIFT key down and click the control for the Specialties Needed field to select both fields • Press the left mouse button and then drag the fields to the position • Release the left mouse button to complete the movement of the fields Microsoft Office 2007: Complete Concepts and Techniques - Windows Vista Edition
Moving Controls in a Control Layout Microsoft Office 2007: Complete Concepts and Techniques - Windows Vista Edition
Summary • Create reports and forms using wizards • Group and sort in a report • Add totals and subtotals to a report • Resize columns • Conditionally format controls • Filter records in reports and forms • Print reports and forms • Add a field to a report or form • Include gridlines • Add a date • Change the format of a control • Move controls Microsoft Office 2007: Complete Concepts and Techniques - Windows Vista Edition