Download
1 / 17
350 likes | 1.1k Views
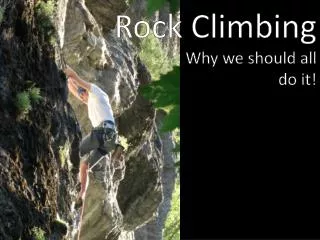
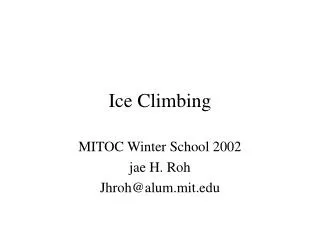
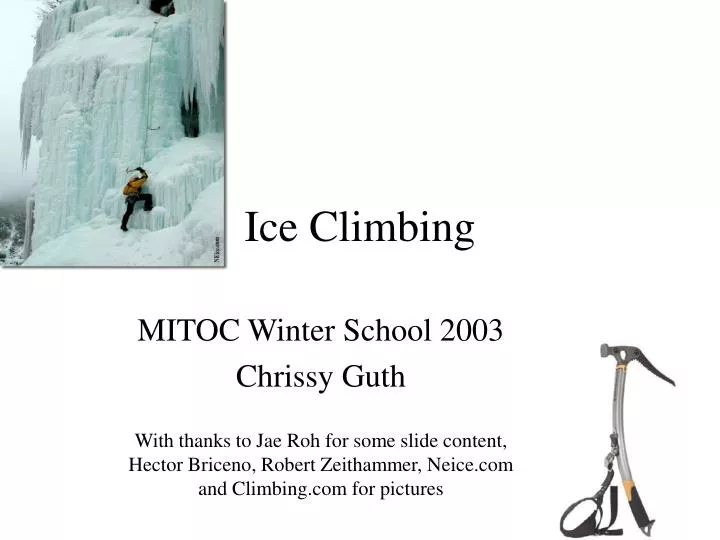
Ice Climbing. MITOC Winter School 2003 Chrissy Guth With thanks to Jae Roh for some slide content, Hector Briceno, Robert Zeithammer, Neice.com and Climbing.com for pictures. Ice Climbing Overview. Why you should not ice climb Basics Crampons and Ice Tools Taking Care of Yourself

E N D
Ice Climbing MITOC Winter School 2003 Chrissy Guth With thanks to Jae Roh for some slide content, Hector Briceno, Robert Zeithammer, Neice.com and Climbing.com for pictures
Ice Climbing Overview • Why you should not ice climb • Basics • Crampons and Ice Tools • Taking Care of Yourself • Basic techniques • Common mistakes • Safety • Efficiency • More Gear • Snow Climbing
Hazards of Winter Climbing • Winter, snow, cold, etc. • Ice fall, rock fall, ice dams • Crappy protection, long runouts • Crampon catches during fall • Bludgeoned or impaled by ice tools • Avalanche
Basics • Alpine Ice vs. Waterfall Ice • Ratings • New England Ice Scale (NEI)- difficulty • Grade 1 through 5+…. • Commitment Grade- time • I through VII • Mixed • Does this really mean anything?
Gear – Ice Tools • Alpine- straight shaft, longer (60-80cm) • Technical- may have bent shaft, shorter (50cm +/-10cm) • Picks • Reverse curve • Normal curve (“classic”) best for self arresting and snow climbing • Hammer vs. Adze
Gear – Crampons • Most important to check fit with YOUR boots. • Multiple sizes, different shapes • Technical: rigid or semi-rigid vertical front point – better for hard waterfall ice • Alpine: flexible or semi-rigid, horizontal front point – better for glaciers or snow • Double front points more stable; Mono points for thin or mixed • Avoid extra attachment points (e.g. Mako “lacerator”) • Anti-balling plates are good
Gear - Clothing • Leave your fancy Gore-Tex at home • Bring extra gloves • Fit your harness over all your layers- adjustable leg loops • Hat should fit under helmet
Taking Care of Yourself – Staying Warm • Two climbers can share one parka • Hands • Experiment w/ handling gear with gloves • Practice! w/ gloves in living room • Knots, tying in, belaying, clipping gear • Keep hands below heart, relax grip • Feet • Don’t bury your feet in snow • Too many socks = too tight = poor circulation = cold feet
Basic Climbing Technique - Pick • Aim: Look for a pick placement • Indentations or seams • Not bulges – they break off • Reach high to maximize efficiency • Fire: Swing from shoulder, elbow, then finish with wrist snap • Or simply Hook on features • Listen!
Basic Climbing Technique – Crampon • Look for foot placement • Balanced position • Smaller steps than rock climbing • Look for stems, ledges, other features • Front pointing • Heel down, to place all front points • Place foot, then don’t move – lifting shears out points • Flat foot, aka French technique • Stomp down, engaging points on bottom
Common Mistakes • Moving on sketchy placements – the tools and crampons are your self belay • Pushing instead of swinging the tools – let the tool do the work • Heels too high – drop heels for solid crampon placements • Moving feet after setting crampons • Butt in too close to ice – hang off tools, butt out to kick • Over gripping tools – hang, rather than hold
Climbing Safely • Wear a helmet at all times • Turn away from falling ice • Keep your face away from the tools • Where will the tool go if it pops out? • Remove a stuck pick by working up and down only • Don’t “stack” your feet • Where will your crampon go if it slips? • Don’t glissade with crampons on
Climbing Efficiently • Minimize tool placements • Reach high to place tool, climb up until its below your head • Stagger tool placements – also avoids “dinner plating” and cold hands • Exercises • Climb with 1 tool • Climb with no tools
Gear - Ice Screws • Brands- Black Diamond Express, Grivel 360 • After removing an ice screw • Clear the ice core immediately so it doesn’t freeze in • Tap the head of the screw or blow in • Don’t hit the threads or sharp end
Taking Care of your Gear – Rope • Watch the rope when you swing a tool or kick • The rope may also be behind you (top roping) • Belayers: don’t pull in just as the climber is swinging • Keep the rope off the snow • Wet rope = frozen rope • Keep gear clipped – things fall quietly on snow
Snow Climbing • Snowshoes, Crampons or Nothing? • Ascending • Kicking Steps • Marching on a Z • Duckwalk • Descending • Plunge Step • Glissading
Where to Climb • Guidebook: Rick Wilcox, An Ice Climbers Guide to Northern New England 2 ed. (3 ed. Due this season) • Conditions: • http://www.neice.com • http://www.chauvinguides.com