Download

1 / 20
200 likes | 207 Views
Access the TxEIS Purchasing Application, learn how to create and modify requisitions, view and edit existing requisitions, and receive purchase orders.

E N D
TxEIS Requisition Training Handbook Purchasing Department
TxEIS Login • Type in your User Name and Password that was provided by the Business and Finance Department. • County/District Number: 015905 • Click on Login
Purchasing Application Under My Applications or Application Directory, click on the Purchasing application.
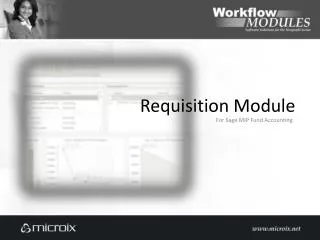
Create/Modify Requisition This page is used to create new requisitions, modify or filter existing requisitions. You can only view and edit requisitions that you create. Click onMaintenance Create/Modify Requisition from the dropdown menu. To modify an existing requisition, enter the req. # in the Requisition Nbr: box then click Retrieve. To Modify Create New
Create/Modify Requisition…continue If you do not remember the requisition number, you may search for the requisition from the same menu. Click on Directorythen click Search. A populated list of “Not submitted” requisitions will be displayed. Click on the blue 6-digit number to retrieve the requisition.
Entering data to your requisition Insert a “Note” to the vendor if applicable AWALYS enter “Comments” that will provide a brief description for the purchase, travel, etc. Quote # or Travel dates Leave blank Type your 3-digit organizational code – complete name will populate Visit Purchasing website or type PREPAY + date check is needed if applicable Always enter a reason Type vendor name Item number or date(s) of travel
Comments and Vendor Notes Insert a note to the “Vendor” if applicable. When complete, click OK to save the comments. AWALYS insert comments that supports the requisition. Example: Required to implement Campus Improvement Plan strategy. If traveling, comments shall support the travel request. Example: Registration for John Doe who will be attending the TASBO conference in Austin, Texas, January 5-8, 20XX.
Budget Codes “Uniform Acct Distr” Click to distribute amounts. This module is used to split costs for a requisition item. The percentage split does not have to be the same for each fund, but the sum of all percentages must total 100%. Click OK to apply the amounts or Cancel to close without applying the amounts. Type the account code to be charged. Type the percent to charge the fund. If using only one budget code then insert 100% Type the amount to be charge per fund or as a whole. Click here if ADDING more than one budget code. Click to populate the Percent based on the entered amount. Click to populate the Amount based on the entered amount.
Budget Code will be displayed… Budget Code will appear under “Account Code” for each item. Click on each line item and you will see the budget code and the cost for each item. Budget Code will be displayed
Submitting your Requisition Click Submit to continue the process of the requisition. A window is displayed indicating that the requisition process is completed, and prompts you to print the Requisition Report. Click Yes to continue and print the report. Click here to submit. If done, review and click SAVE prior to submitting your requisition.
Printing your Requisition Always SAVE or PRINT your requisition for your records. The requisition can be viewed and saved in PDF file format. Click the to save and print the requisition. If prompt to a PDF view, click on the printer icon to print the requisition. Click to close the report window. Some reports may have to Close Report or ExitApplication button instead. Click to Print.
Requisition Status Inquiry From the Purchasing Application, go to Inquiry then click on Requisition Status Inquiry. Type in the requisition number and click Retrieve. Click Retrieve. Type your ReqNbrin the required field. Click Retrieve to display the status of the requisition.
Viewing your Requisition Status Top grid. The page consists of three grids: • The top grid displays requisitions or purchase orders. • The middle grid displays items included on the requisition. • The bottom grid displays a list of the approvers in the sequence of their approval. Middle grid. The bottom grid lets you view the current status of your requisition; who is next on the approval path pending approval. Buttom grid.
Exiting your Requisition Status When done viewing the status of the requisition, click Exit Application to return to the main menu.
Receiving Purchase Orders From the Purchasing Application, go to Maintenance Receiving. Under Retrieval Options: Type the purchase order number to be retrieved. Click Retrieve. Requisition will be displayed. If the PO # or requisition # is not known, click Directory and select requisition. Type the PO # to be retrieved. Click Retrieved
Receive and Save Purchase Orders Click to SAVE The requisition information and items are automatically populated after you click the Retrieve button. You may receive each line item separately or click Receive All to automatically receive all the items on the requisition. Click to Receive All items… …or type the number of items received. Click SAVE to process the selected PO. The Date Received is automatically populated with the current system date. You can edit the date that the items were received.
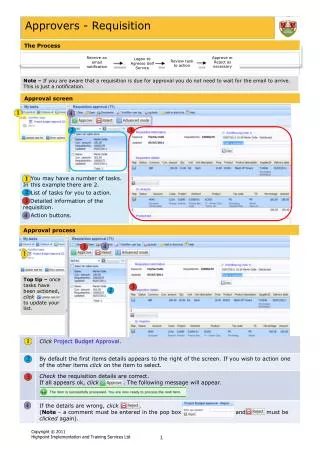
Approving Purchase Order’s From the Purchasing Application, go to Maintenance Approve Requisition. Only users who have permission to approve requisitions can access this page. This page is used to approve/disapprove individual requisitions, if necessary, return requisitions to the originator. Requisitions will automatically be displayed. Review all information and comments prior to approving. Click Approve to have the requisition move forward to the next approver in the path. Click OK. Click Skip to continue to the next requisition without taking action on the current requisition. Click Return to disapprove the requisition to the originator. The originator can edit and resubmit the requisition. Otherwise, click Cancel to close the Approve Requisition page for the selected requisition without processing any changes to the requisition.
Approving PO’s - Comments Approver’s may add or view comments for the requisition. If there is a paper clip icon text to the Comments button, a requisition comment exists. In the Requisition Comments window, you may type additional comments about the requisition. Review comment and add additional comments if desire… • Click OK to save the requisition comment and close the window. • Click Cancel to close the window without saving the comment. … or Approve requisition without additional comments.
Exiting your Approving Requisition When done approving, skipping, or returning requisitions, click Exit Application to return to the main menu.
Logout of TxEIS System It’s IMPORTANT for you to Log Out, click the Logout button from MY Applications located on the upper right corner of the screen. *Any data not saved will be lost when you log out. Confirmation Logout is displayed.