Download
1 / 59
680 likes | 1.26k Views
NUR 113 - Welcome to SKILL 22-1 Preparing Injections: Ampules & Vials – along with a brief description on mixing insulin. PARENTERAL MEDICATIONS. Before we begin, Let’s review some things about Parenteral Medications

E N D
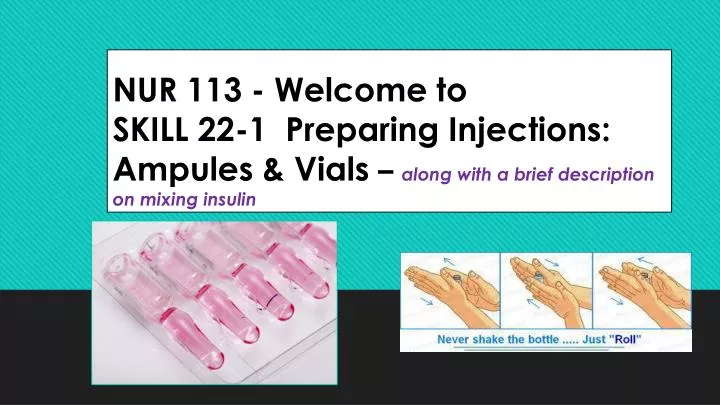
NUR 113 - Welcome to SKILL 22-1 Preparing Injections: Ampules & Vials – along with a brief description on mixing insulin
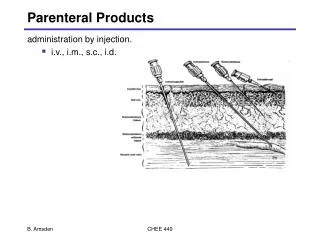
PARENTERAL MEDICATIONS • Before we begin, Let’s review some things about Parenteral Medications • The route of medication administration is the path by which a drug comes in contact with the body. • Parenteral means administered in a manner other than through the digestive tract. • Medications administered by the parenteral route enter the body tissues and the circulatory system by injection. • Injected medications are more quickly absorbed than oral medications; and parenteral routes are used when patients are vomiting, cannot swallow, and / or are restricted from taking oral fluids. • Unfortunately, when I enlarge the pictures, the wording becomes slightly blurry!
PARENTERAL MEDICATIONS – CONT’D • There are four routes for parenteral administration: • 1.SUBCUTANEOUS INJECTION: Injection into tissues just under the dermis of the skin. • 2.INTRAMUSCULAR INJECTION (IM): Injection into the body of a muscle. • 3.INTRADERMAL INJECTION (ID): Injection into the dermis just under the epidermis. • 4.INTRAVENOUS INJECTION (IV) or INFUSION: Injection into the vein.
PARENTERAL MEDICATIONS – CONT’D • Failure to inject a medication correctly results in complications such as inappropriate drug response (e.g., too rapid or too slow), nerve injury with associated pain, localized bleeding, tissue necrosis, and sterile abscess. • Over 16 billion preventive and curative injections are administered each year.
PREVENTING INFECTION DURING AN INJECTION: • Prevent Contamination of Solution: Ampules should not sit open and medication should be removed quickly. • Prevent Needle Contamination: Avoid letting needle touch contaminated surface (e.g., outer edges of ampule or vial, outer surface of needle cap, you hands, countertop, or table surface). • Avoid touch the length of the plunder or inner part of the barrel. Keep tip of syringe covered with a cap or needle. • Prepare the Skin: Wash skin soiled with dirt, drainage or feces with soap and water. Use friction and a circular motion while cleaning with an antiseptic swab. Swab from center of site and move outward in a 5 cm (2 inch) radius. • Reduce transfer of microorganisms: Perform Hand Hygiene for a minimum of 15 seconds.
DIFFERENT TYPES OF MUSCLES: • VENTROGLUTEAL MUSCLE: • Deep & situated away from major nerves & blood vessels • Easily identified by prominent bony landmarks • Preferred site for medications that are larger in volume, more viscous and irritating • Less painful than vastus lateralis • Recommended as pediatric IM injection site for children of all ages.
VASTUS LATERALIS • Absence of major nerves & blood vessels • Drug absorption rapid • Site used for immunizations in children • Recommended as pediatric IM injection site for infants up to 12 months of age.
DELTOID MUSCLE • Easily accessible but not well developed in most patients • Used for small volumes of medication • Faster absorption rate • May be used as vaccination site for adults, based on development of muscle. • Recommended as pediatric IM injection site for children 18 months and older.
SAFETY GUIDELINES for administering an IM • Patient safety in administering medication involves following the six rights of medication administration. • 1. Right Medication • 2. Right Dose • 3. Right Patient • 4. Right Route • 5. Right Time • 6. Right Documentation
SAFETY GUIDELINES – CONT’D: Remember to try and avoid distractions! • 1. Be vigilant: avoid distractions while preparing an injection. Be sure that your patients receive the appropriate medications. Know why your patient is receiving each medication; know what you need to do before, during and after medication administration; and evaluate the effectiveness of medications and any adverse effects after administration. • 2.Verify that the medications have not expired. • 3.Use at least two identifiers before administering medications and check against the medication administration record. • 4.No interruption Zones have been recommended by the Institute for Safe Medicine Practices
SAFETY GUIDELINES – CONT’D • 5. Minimize a patient’s discomfort when giving an injection • Use sharp, beveled needles in the shortest length and smallest gauge possible. • Change the needle if liquid medication coats its shaft. • Position and flex a patient’s limbs to reduce muscular tension. • Divert a patient’s attention away from the injection procedure. • Apply a vapo-coolant spray (e.g., Flouri-Methane spray on ethyl chloride) or topical anesthetic (e.g., EMLA cream) to an injection site before giving a medication when possible or place wrapped ice on the site for a minute before the injection.
SAFETY GUIDELINES – CONT’D • 5. Minimize a patient’s discomfort when giving an injection (Cont’d from previous page) • Insert the needle at the proper angle, smoothly, and quickly. Do not hesitate and slowly push the needle into the tissue. • Inject the medication slowly, but smoothly. • Hold the syringe steady once the needle is in the tissue to prevent tissue damage. • Withdraw the needle smoothly at the same angle used for insertion. • Gently apply an antiseptic pad (e.g., alcohol) or dry, sterile gauze pad to the site. • Apply gentle pressure at the injection site. • Rotate injection sites to prevent the formation of indurations and abscesses.
NEEDLESTICK PREVENTION TIPS • The most frequent route of exposure to blood borne disease for health care workers is from needle-stick injuries (American Nurses Association, 2010). • Research has shown that most needle-stick injuries occur in patient rooms and the operating room (American Nurses Association, 2010). • These injuries occur when health care workers recap needles, mishandle intravenous (IV) lines and needles, or leave needles at a patient’s bedside. • However, the implementation of safe needle devices can prevent needle-stick injuries (American Nurses Association, 2010). • The Needle-stick Safety and Prevention Act is a federal law that mandates health care agencies to use safe needle devices to reduce the frequency of needle-stick injury. • Employers must update their exposure control plans and seek employee input when evaluating and selecting safer medical devices (OSHA, 2012)
NEEDLESTICK PREVENTION TIPS – CONT’D • A sharp with engineered sharps injury protection (SESIP) is a device that is effective in preventing needle-sticks. • One type of SESIP is a blunt-end cannula; another is a safety syringe equipped with a plastic guard or sheath that slips over the needle as it is withdrawn from the skin. • The guard immediately covers the needle, eliminating the chance for a needle-stick injury. • A variety of other SESIP devices are found in needleless IV line connection systems. • Special puncture-and leak-proof containers are available in health care agencies for the disposal of sharps. • Containers are made so only one hand needs to be used when disposing of an uncapped needle. • In addition, containers must stand upright, not be allowed to overfill, and be colored red or labeled with a biohazard symbol.
PREPARING INJECTIONS: AMPULES & VIALS • Let’s talk about Ampules: • Ampules contain single doses of injectable medication in a liquid form and are available in sizes from 1 to 10 mL or more. • An ampule is made of glass with a constricted, pre-scored neck that is snapped off to allow access to the medication. • A colored ring around the neck indicates where the ampule is pre-scored to be broken easily. • Medication is easily withdrawn from the ampule by aspirating with a filter needle & syringe. • Filter needles must be used when preparing medications from a glass ampule to prevent glass particles from being drawn into the syringe • Do not use the filter needle to administer the medication.
SKILL 22-1: Preparing injections: Ampules & Vials • ASSESSMENT: • Check accuracy & completeness of each MAR or computer printout with prescriber’s written medication order. Check patient’s name, medication name and dosage, route of administration, and time of administration. Recopy or reprint any portion of MAR that is difficult to read. • Assess patient’s medical and medication history. • Assess patient’s history of allergies: Know type of allergies and normal allergic response: In other words, if a person has an allergy, what is the response to this allergy if it occurs? • Review medication reference information for action, purpose, side effects and nursing implications. • Assess patient’s body build, muscle size, and weight if giving subcutaneous or intramuscular medication (IM).
PLANNING: Sometimes things aren’t as easy as they seem • 1. Expected Outcomes following completion of procedure: Proper dose is prepared: • No air bubbles are in syringe barrel. • Air bubbles displace medication. • Elimination of air ensure accuracy of medication dose.
IMPLEMENTATION: • 1.Perform hand hygiene. • 2. Prepare medication • A. If using a medication cart, move it outside patient’s room. • B. Unlock medication drawer or cart or log onto computerized medication dispensing system. • C. Follow agencies “No-Interruption Zone” policy. Distractions can be deadly! Prepare medications for one patient at a time. Keep all pages of MAR’S or computer printouts for one patient together or look at only once patient’s electronic MAR at a time. • D. Select correct drug from stock supply or unit-dose drawer. Compare label of medication with MAR computer printout or computer screen. • E. Check expiration date on each medication, one at a time.
IMPLEMENTATION – CONT’D • F. Calculate drug dose as necessary. Double-check calculation. Ask another nurse to check calculations if needed. Don’t be embarrassed about this! • G. If preparing a controlled substance, check record for previous drug count and compare with supply available. • H. Do not leave drugs unattended. • PREPARED AMPULE: • A. Tap top of ampule lightly and quickly with finger until fluid moves from its neck. • B. Place small gauze pad around neck of ampule • C. Snap neck of ampule quickly and firmly away from hands (this protects your fingers and face from shattering glass).
PREPARING THE AMPULE – CONT’D • D. Draw up medication quickly, using a filter needle long enough to reach bottom of ampule to access medication. • E. Hold ampule upside down or set it on a flat surface. Insert filter needle into center of ampule opening. Do not allow needle tip or shaft to touch rim of ampule. • F. Aspirate medication into a syringe by gently pulling back on plunger. • G. Keep needle tip under surface of liquid. Tip ampule to bring all fluid within reach of needle. • H. If you aspirate air bubbles, do not expel air into ampule.
PREPARING THE AMPULE – CONT’D • I. To expel excess air bubble, remove needle from ampule. Hold syringe vertically with needle pointing up. Tap side of syringe to cause bubbles to rise toward needle. Draw back slightly on plunger and push plunger upward to eject the air. Do not eject the fluid. • J. If syringe contains excess fluid, use sink for disposal. Hold syringe vertically with needle tip up and slanted slightly toward sink. Slowly eject excess fluid into the sink. Recheck fluid level in syringe by holding it vertically. • K. Cover needle with its safety sheath or cap. Replace filter needle with regular sharps with engineered sharps injury protection needle.
PREPARING THE AMPULE: VIDEO TO WATCH • Please note that your book does not provide you with a video on how to prepare injections on Ampules & Vials. • I have chosen one for you via YOUTUBE. • Please remember, this video was not provided by the school, but by me! • Not all videos are going to be interesting, but I tried to choose the best one possible, for the required skill. • DRAWING UP MEDICATION FROM AN AMPULE: • http://www.youtube.com/watch?v=rMrJ4MKpHRw
PREPARING THE VIAL CONTAINING A SOLUTION • A. Remove cap covering top of unused vial to expose sterile rubber seal. If a multi-dose vial has been used before, cap is already removed. Firmly and briskly wipe surface of rubber seal with alcohol swab and allow it to dry. • B. Pick up syringe and remove needle cap or cap covering needleless access device. Pull back on plunger to draw amount of air into syringe equivalent to volume of medication to be aspirated from the vial. • CLINICAL DECISION POINT: Some medications and agencies require use of a filter needle when preparing medications from vials. Check agency policy or medication reference. If you use a filter needle to aspirate medication, you need to change it to a regular SESIP needle of the appropriate size to administer the medication.
PREPARING THE VIAL – CONT’D • C. With vial on flat surface, insert tip of needle or needleless device through center of rubber seal. Apply pressure to tip of needle during insertion. • D. Project air into air space of vial, holding onto the plunger. Hold plunger firmly; plunger is sometimes forced backward by air pressure within vial. • E. Invert vial, while keeping firm hold on syringe and plunger. Hold vial between thumb and middle fingers of non-dominant hand. Grasp end of syringe barrel and plunger with thumb and forefinger of dominant hand to counteract pressure in vial. • Inverting vial allows fluid to settle in lower half of container. Position of hands prevents forceful movement of plunger and permits easy manipulation of syringe.
PREPARING THE VIAL – CONT’D • F.Keep tip of needle or needleless device below fluid level. • G.Allow air pressure from vial to fill syringe gradually with medication. If necessary, pull back slightly on plunger to obtain correct amount of medication. • H. When you obtain desired volume, position needle in needleless device into air space of vial; tap side of syringe barrel gently to dislodge any air bubbles. Eject any air remaining at top of syringe into vial. • I. Remove needle or needleless access device from vial by pulling back on barrel of syringe.
PREPARING THE VIAL – CONT’D • J. Hold syringe at eye level at 90 degree angle to ensure correct volume and absence of air bubble. Remove any remaining air by tapping barrel to dislodge any air bubbles. Draw back slightly on plunger; then push it upward to eject air. Do not eject fluid. Recheck volume of medication. • K. If you need to inject medication into the patient’s tissues, change the needle to the appropriate gauge and length according to route of medication administration. • L. For multi-dose vial make label that includes date of opening, concentration of drug per milliliter, and your initials. • PREPARED VIAL CONTAINING A POWDER: • A. Removed cap covering vials or medication and diluent, swabbed both seals with alcohol, and allowed to dry.
PREPARING THE VIAL – CONT’D • PREPARED VIAL CONTAINING A POWDER: (Cont’d from previous page) • B. Draw up manufacturers suggestion for volume of diluent into syringe. • C. Insert tip of needle or needleless device through center of rubber seal of vial of powdered medication. Inject diluent into vial. Remove needle. • D. Mix medication thoroughly. Roll in palms. Do not shake. • This ensure proper dispersal of medication throughout solution and prevents formation of air bubbles. • E. Reconstituted medication in vial is ready to be drawn into new syringe. Read label carefully to determine dose after reconstitution. • F. Draw up reconstituted medication into syringe. Insert needleless device/needle into vial. Do not add air. Then follow steps 4 e through 4j.
PREPARED VIAL CONTAING A POWDER – CONT’D • 6. Compare label of medication with MAR, computer screen, or computer printout. • 7. Dispose of soiled supplies. Place broken ampule and/or used vials and used needle or needleless device in puncture-and leak-proof container. Clean work area and perform hand hygiene. • EVALUATION: • Compared MAR with label of prepared drug, compared dose in syringe with desired dose. • Identified unexpected outcomes
UNEXPECTED OUTCOMES • Air bubbles remain in syringe • Incorrect dose of medication is prepared: • Related interventions: • Expel air from syringe and add medication to it until you prepare correct dose. • Discard prepared dose • Prepare correct new one.
END OF SKILL 22-1 FOR PREPARING INJECTIONS; AMPULES & VIALS • This is the end of this skill. • Your book has not provided a video for this, but I did provide some videos, that I found on You-Tube at the end of this power-point presentation. • Please remember, I’m not affiliated with the school, so while you are more than welcome to watch the videos, please follow the instructions in your book.
PROCEDURAL GUIDELINE 22-1: MIXING PARENTERAL MEDICATIONS IN ONE SYRINGE
Mixing Parenteral Medications in One Syringe - Introduction • Some medications need to be mixed from two vials or from a vial and an ampule. • Mixing compatible medications avoids the need to give a patient more than one injection. • Most nursing units have medication compatibility charts.
MIXING PARENTERAL MEDICATIONS IN ONE SYRINGE – CONT’D • Compatibility charts are in drug reference guides, posted within patient care areas, or available electronically. • If you are uncertain about medication compatibility, consult a pharmacist. • When mixing medications, you must correctly aspirate fluid from each type of container. • When using multi-dose vials, do not contaminate the contents of the vial with medication from another vial or ampule.
PROCEDURAL GUIDELINE 22-1: MIXING PARENTERAL MEDICATIONS IN ONE SYRINGE • Remember: Mixing compatible medications avoids the need to give a patient more than one injection. • When you mix medications from a vial and an ampule, you prepare medications from the vial first. • Then you withdraw medication from the ampule using the same syringe and a filter needle. • When mixing medications from two vials, do not contaminate one medication with another, ensure that the final dose is accurate and maintain aseptic techniques. • For example, insulin, which is required to manage a patient’s diabetes, can be mixed within the same syringe if they are compatible.
PROCEDURAL GUIDELINE – CONT’D • Give special consideration to the proper preparation of insulin, which comes in vials. • Insulin is the hormone used to treat diabetes mellitus. • Insulin is classified by rate of action, including short duration, intermediate duration, and long duration. • Often patients with diabetes mellitus receive a combination of different types of insulin to control their blood glucose levels.
PROCEDURAL GUIDELINE – CONT’D • Before preparing insulin, gently roll all cloudy insulin preparations (Humulin-N) between the palms of your hands to re-suspend the insulin (Lehne, 2010). • If more than one type of insulin is required to manage the patient’s diabetes, you can mix them into one syringe if they are compatible. • Always prepare the short or rapid acting insulin first to prevent it from being contaminated with the longer-acting insulin (Lehne, 2010). • In some settings insulin is not mixed.
RECOMMENDATIONS FOR MIXING INSULINS • When mixing insulins, always prepare the short or rapid acting insulin first to prevent it from being contaminated with the longer acting insulin. • Patients whose blood glucose is well controlled on a mixed-insulin dose should maintain their individual routine when preparing and administering their insulin doses. • No other medication or diluent should be mixed with any insulin product unless approved by the prescriber. • Do not mix insulin glargine (Lantus) or insulin detemir (Levemir) with any other types of insulin and do not administer them intravenously. • Inject rapid-acting insulins mixed with NPH insulin within 15 minutes before a meal. • Verify insulin dosages during preparation with another nurse.
PROCEDURAL STEPS • 1. Check accuracy and completeness of MAR or computer printout with prescriber’s written medication order. Check patient’s name, medication name and dosage, route of administration and time of administration. Recopy or reprint any portion of MAR that is difficult to read. • 2. Review pertinent information related to medication, including action, purpose, side effects, and nursing implications. • 3. Assess patient body build, muscle size, and weight if giving subcutaneous (intramuscular) IM medication.
PROCEDURAL STEPS – CONT’D • 4. Consider compatibility of medications to be mixed and type of injection. • 5. Check expiration date of medication printed on vial or ampule • 6. Perform hand hygiene. • 7. Prepare medication for one patient at a time following the six rights of medication administration. Select an ampule or vial from the unit-dose drawer or automated dispensing system. Compare the label of each medication with the MAR or computer printout. IN the case of insulin, ensure that correct type (s) of insulin are prepared. This is the first check for accuracy.
MIXING MEDICATIONS FROM TWO VIALS • MIXING MEDICATIONS FROM TWO VIALS: • Please see page 550 in Perry, Potter & Ostnedorf for a picture of Vial A & Vial B! • A. Take syringe with needleless device or filter needle and aspirate volume of air equivalent to first medication dose. (Vial A). • B. Inject air into vial A making sure that the needle or needleless device does not touch solution. • C. Holding onto plunger, withdraw needle or needleless device and syringe from Vial A. Aspirate air equivalent to second medication dose (Vial B) into syringe.
MIXING MEDICATIONS FROM TWO VIALS – CONT’D • D. Insert needle or needleless device into Vial B, inject volume of air into vial B, and withdraw medication from vial B into syringe. • E. Withdraw needle or needleless device and syringe from vial B. Ensure that proper volume has been obtained. • F. Determine on syringe scale what the combined volume of medications should measure.
MIXING MEDICATIONS FROM TWO VIALS – CONT’D • G. Invert needle or needleless device into Vial A, being careful not to push plunger and expel medication within syringe into vial. Invert vial and carefully withdraw the desired amount of medication from vial A into syringe. • H. Withdraw needle or needleless device and expel any excess air from syringe. Check fluid level in syringe for proper dose. Medications are now mixed. • I. change needle or needleless device for appropriate size needle if medication is being injected. Keep needle or needless device capped until administration time. • Clinical Decision Point: If too much medication is withdrawn from second vial, discard syringe and start over. Do not push medication back into either vial!
MIXING INSULINS • A. If patient takes insulin that is cloudy, roll bottle of insulin between hands to re-suspend insulin preparation. • B. Wipe off top of both insulin vials with alcohol swab. • C. Verify insulin dose against MAR. • D. If mixing rapid or short acting insulin with intermediate or long-acting insulin, take insulin syringe and aspirate volume of air equivalent to dose to be withdrawn from intermediate or long acting insulin first. If two intermediate or long acting insulins are mixed, it makes no difference which vial is prepared first. • E. Insert needle and inject air into vial of intermediate or long acting insulin. Do not let tip of needle touch solution.
MIXING INSULINS – CONT’D • F. Remove syringe from vial of insulin without aspirating medication. • G. With the same syringe, inject air equal to the dose of rapid or short acting insulin into vial and withdraw correct dose into syringe. • H. Remove syringe from rapid or short acting insulin and remove any air bubbles to ensure accurate dose. • I. Verify short acting insulin dosage with MAR and show insulin prepared in syringe to another nurse to verify that correct dosage of insulin was prepared. Determine which point on syringe scale the combined units of insulin should measure by adding the number of units of both insulins together (e.g., 4 units Regular + 10 units NPH = 14 units total. Verify combined dosage.)
MIXING INSULINS – CONT’D • J. Place needle of syringe back into vial of intermediate or long acting insulin. Be careful not to push plunger and inject insulin in syringe into vial. • K. Invert vial and carefully withdraw desired amount of insulin into syringe. • L. Withdraw needle and check fluid level in syringe. Keep needle of prepared syringe sheathed or capped until ready to administer medication. • Clinical Decision Point: If long-acting insulin glargine (Lantus) is ordered, note that this is a clear insulin, and it should not be mixed with other insulin preparations.
MIXING INSULINS – REVIEW FOR YOU! • What do you do when you have to administer NPH insulin and Regular insulin, in the same syringe? • 1.Push Air into the NPH Insulin First (the cloudy insulin) & then Push Air into the Regular Insulin (the clear insulin) Second! • 2. Then, you draw up the Regular Insulin (the Clear insulin) first and then the NPH insulin (the cloudy insulin) second! • Try & Memorize this, as this is valuable information!