Download
1 / 60
1.03k likes | 2.28k Views
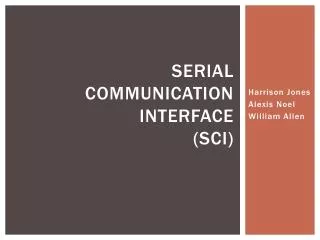
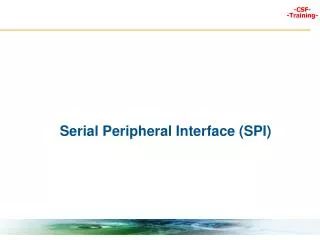
DeltaV Serial Interface. Upon completion of this module you will be able to: Interface DeltaV with serial devices Define Serial Interface wiring connections Define Serial Interface capabilities Configure the Serial Interface. Objectives. DeltaV Serial Interface. Port 1. Port 2.

E N D
Upon completion of this module you will be able to: Interface DeltaV with serial devices Define Serial Interface wiring connections Define Serial Interface capabilities Configure the Serial Interface Objectives
DeltaV Serial Interface Port 1 Port 2 Serial Interface Cable Serial Interface Cable Serial Device Serial Device The Serial Interface provides communication to various serial devices including PLCs using Modbus (Master or Slave) RTU or ASCII protocol. You can configure the Serial Card to support RS232, RS422/485 half duplex or RS422/485 full duplex signals.
Serial Card Terminal BlockPort 1 Modicon Model 984 Controller 9-pin connector 1 (SHIELD) 5 (GND) 2 (RXD) 3 (TXD) 6 (DSR) 4 (DTR) 7 (RTS) 8 (CTS) (GND) 1 (TXD) 3 (RXD) 5 (DTR) 7 (DSR) 8 Port 2 (GND) 9 (TXD) 11 (RXD) 13 (DTR) 15 (DSR) 16 The Serial Card requires a Serial Terminal Block to provide terminations for wiring. The figure below shows the wiring connections for RS232. DeltaV Serial Interface
Serial Card Terminal Block Port 1 PROVOX Intelligent Device Interface (IDI) 7 (GND) 3 (RXD) 2 (TXD) 6 (DSR) 20 (DTR) (GND) 1 (TXD) 3 (RXD) 5 (DTR) 7 (DSR) 8 Port 2 (GND) 9 (TXD) 11 (RXD) 13 (DTR) 15 (DSR) 16 DeltaV to PROVOXRS232 Wiring
Serial Card 2 Ports 500 DSTs OR 3200 SCADA Port Device 1 Device 2 . . . . . . . Device 16 16 Devices Max 16 Datasets/Port 100 Registers-Coils /Dataset Dataset 1 100 Regs/Dataset . . . Dataset 16 Dataset 1 . . . . Dataset 16 RS232 (Pt - Pt) RS422/485 (Multi-drop) Coils 00001 - 0xxxx Input Status 10001 - 1xxxx Input Registers 30001 - 3xxxx Holding Registers 40001 - 4xxxx PLC 1 PLC 2 PLC 16 Serial Interface Capabilities
Serial Interface Capabilities The Serial Interface communicates with a maximum of 250 registers/coils originating in a serial device; translating them to DeltaV Device Signal Tags (DSTs). The Serial card has two communication ports, each port connecting to a single serial device using RS232 wiring. As an option, the ports may be wired using RS422/485 wiring and connected to as many as 16 devices each. The Serial Interface exchanges data with serial devices through a dataset; a collection of DeltaV parameters that correspond to registers/coils in the serial device. You configure the dataset to determine the type of registers as well as the starting address and how many registers will be read or written. You can create as many as 16 datasets for each Serial Card port. These 16 datasetscan be allocated to the serial devices in several ways. For example, you can configure one serial device with 16 datasets or you could have 16 devices on the port with one dataset each.
Workstation Serial Interface Dataset Register Type Register Address Number of Registers SCADA or Coils 00001 - 0xxxx DSTs Control Module Input Status 10001 - 1xxxx Parameters Hierarchy Displays Input Registers 30001 - 3xxxx Alarms Holding Registers 40001 - 4xxxx Conditionals Algorithms Module Serial Device I/O Serial Interface Configuration
Serial Interface Configuration The figure above shows the flow of data from a PLC to the DeltaV controller. The Serial Interface requests data from the PLC through it’s serial port. The data type, number of registers and starting address to be requested are all part of the dataset configuration. The dataset, with the registers and their respective values, are available to the DeltaV system as DSTs or SCADA tags. Configuration of the Serial Interface requires the following steps: Step 1. Plug the Serial Interface in the appropriate slot Step 2. Configure the Serial card in the appropriate slot Step 3. Define port(s) properties Step 4. Define the Serial Device and address Step 5. Define the Dataset(s)
Serial Card Configuration The Serial Card is one of the card types in the DeltaV Explorer. You configure it as you would any other card. You can plug the card into a vacant I/O carrier slot and auto-sense it or you can configure a placeholder for the card before connecting the actual card. To configure a placeholder for the card, select the following from the DeltaV Explorer: Physical Network Control Network I/O New Card
Access the Serial Port’s properties from DeltaV Explorer by selecting: Physical Network Control Network I/O P01 Properties The PO1 Properties dialog box appears with the Porttab selected. The Properties dialog box contains such information as the port’s: Description - the description which appears when viewing port properties from the DeltaV Explorer. Enabled - causes the port to scan for input data and transmit outputs when the box is checked. Serial Port Properties
Clicking the PO1 Properties dialog box’s Advanced tab permits you to change advanced communication properties such as: Protocol Type - RTU is a standard binary data communications mode while ASCII transmits messages as ASCII strings. Mode - determines whether this port acts as a Modbus Master or a Modbus Slave. Retry Count - determines the number of times the Serial Card retries a failed message. When the Serial Card issues a Modbus request to a device it expects a response to be returned, the Serial Card retries the failed message the number of times configured in the Retry count property. Message time out - determines the amount of time the Serial Card waits for a response from the serial device after sending a request message. Transmit Delay - determines the amount of time the Serial Card delays between requests for input data and/or requests to write output data to the Modbus Device. This value is used to slow down requests that are going to a heavily loaded Modbus Device. Send outputs on startup - determines whether the Serial Card sends all current output values to the serial devices on power-up, reset or after a download. Serial Port Properties
Serial Port Properties • Clicking the PO1 Properties dialog box’s Communications tab permits you to define communication properties such as: • Port type - determines the port type to be used for the serial connection, RS232, RS422/485 Full Duplex or RS422/485 Half Duplex. • Baud rate - select the baud rate to match the serial device. (300 - 115 Kbaud) • Parity - select the parity to match the serial device. • Data bits - select the number of data bits to match the serial device. • Stop bits - select the number of stop bits to match the serial device.
Adding a Serial Device Each port can communicate with as many as 16 serial devices. Therefore, once a port is enabled, you must define the address of the serial device(s) it will communicate with. Add a serial device from the DeltaV Explorer in the following manner: Physical Network Control Network I/O P01 (right click) New Serial Devices The new serial device’s Properties dialog box appears. Enter the serial device’s address and click the OK button to continue.
A Dataset defines a set of consecutive registers to be mapped into DSTs. To define a Dataset from DeltaV Explorer select: Physical Network Control Network I/O P01 DEV01 (right click) New Dataset The Create Dataset dialog box appears with the General tab selected containing: Description - description appearing when viewing the Dataset from the DeltaV Explorer. Data Direction - defines whether this dataset sends DeltaV data to a serial device (output) or receives data from a serial device (input). Output mode - controls how the Serial Card transmits output data. If the Output Mode is complete block, the card sends all data values when any value in the dataset changes. If the Output Mode is single value, the card sends single data values (register or coil) as the values change. Output read back - determines whether the output dataset should read back registers that have been changed from within the serial device. If this box is checked, the Serial Card reads back the values during the card’s next input scan. The values that are read back update the current output values. If this box is not checked, no output read back will be performed. Dataset Definition
Dataset Definition The DeltaV tab permits you to configure the DeltaV Data Type and the Dataset Tag. • DeltaV data type - determines the type of data this dataset contains (Boolean, Discrete, Integer, and Floating Point). This field value creates storage space for the dataset and determines how the DeltaV System accesses the data. • Dataset Tag - identifies the Dataset Tag (i.e., COILS) associated with this dataset. • For example, COILS/R17 would be a parameter in the dataset that could be associated with a Discrete Output or Device Control block IO_OUT parameter to manipulate a coil in a PLC.
Dataset Definition The PLC tab permits you to define PLC information such as: • PLC data Type - defines which data table to read from or write to in the serial device. • PLC base register address - indicates the PLC register address corresponding to the first value in the Modbus device for the configured data type. • PLC register offset - identifies the starting register that maps to the first dataset parameter. • Number of values - determines the number of Modbus values (registers or coils) to be read from or written.
Assume a PLC is reading a flow transmitter and the value is stored in Holding register 40001. By bringing this value into DeltaV as a DST, you can use a control module for higher level control and alarming. This is accomplished by: Step 1. Configure a new module with a PID function block. Module Configuration
Step 2. Modify the IO_IN parameter to use a Dataset Tag from the PLC. Module Configuration
Step 3. Browse. Module Configuration
Step 4. Select R40001 as the parameter for the PID’s input. Module Configuration
Modules MTR-MODICON FIC-MODICON Port 1 RS232 Cable Coil 00001 Motor Starter Holding Register 40001 Flow Rate 40002 Valve Output 40003 Motor Status Serial Device Modicon 984 FY FT = 40001 40002 40003 Workshop - Serial Interface Modbus (Master) 00001
You must configure the motor control module MTR-MODICON in the DeltaV controller. The motor’s I/O is located in a Modicon PLC requiring you to configure the Serial card and two Datasets in order to receive the necessary I/O data from the PLC. Coil 00001 in the PLC will start the motor when energized. The motor’s status is reflected in Holding Register 40003. You must also configure the flow loop FIC-MODICON in the DeltaV controller. The I/O for this loop is located in the Modicon PLC requiring you to configuring two additional Datasets to receive the necessary I/O data from the PLC. Holding Register 40002 contains the output to the valve and Holding Register 40001 contains the current flow rate. Workshop - Serial Interface Modbus (Master)
Complete the control strategy workshop in the following manner: Step 1.Insert the Serial Card and Termination block in slot 5. Step 2. Configure the Serial Card. Step 3. Define Serial Card Port 1 Properties. Step 4. Define a Serial Device. Step 5. Define a Dataset referencing a coil. Step 6.Define three Datasets referencing Holding registers. Step 7. Configure a motor control module using PLC registers. Display the module using a dynamo. Step 8. Configure a regulatory module using PLC registers. Display the module using a dynamo. Workshop - Serial Interface Modbus (Master)
Workshop - Configure & Download The Serial Card Step 1. Insert the Serial Card and Termination block in slot 5. Step 2. Connect the PLC Serial Interface cable to the Serial Termination block in slot 5. Step 3. Add the Serial Card from the DeltaV Explorer by selecting: your controller I/O defining the Serial Card in the slot 5 Define Port 1 Properties Define Port 1 properties using the DeltaV Explorer by selecting: the Serial Card Port 1 Properties
Step 3. Define the port properties as follows: Port Tab Check Enabled Advanced Tab Protocol Type - RTU Mode - Master Retry Count - 1 Message time out - 1000 (ms) Transmit Delay - 0 Send outputs on startup - your choice Communications Tab Port Type - RS232 Baud Rate - 9600 Parity - even Data bits - 8 Stop bits - 1 Workshop - Configure & Download The Serial Card
Workshop - Configure & Download The Serial Card Define a Serial Device Define the Serial Device from the DeltaV Explorer by selecting: Port 1 New Serial Device Define Serial Device Address at 10 Define Four Datasets Define four datasets, shown below, from the DeltaV Explorer by selecting: DEV01 New Dataset Define all four datasets in the same manner.
Name DS01 DS02 DS03 DS04 Dataset Tag FY_MODICON FT_MODICON MTR_MODICON MTR_STAT Data Direction output input output input PLC Data Type holding registers holding registers coils holding registers PLC Register 1 0 0 2 Offset Number of Values 1 1 1 1 DeltaV Data Type 16 bit Int w/status 16 bit Int w/status Boolean w/status 8 bit uint w/status 40002 40001 00001 40003 Actual PLC Number Workshop - Configure & Download The Serial Card
Workshop - Configure MTR-MODICON • Configure MTR-MODICON from DeltaV Explorer in the following manner: • Step 1. Drag ‘n drop MTR-11 Module Template from the Library to PLANT_AREA_A. • Step 2. Rename the Module MTR-MODICON. • Step 3. Launch Control Studio and modify the I/O parameters on the Device Control block as follows: • IO_IN_1 MTR_STAT R40003 • IO_OUT_1 MTR_MODICON R1 • Step 4. Assign to the Controller. • Step 5. Save and download the Module.
Step 6. Launch DeltaV Operate (Configure) and add the pump dynamo DL_PMP_HL_R from the frsModules dynamoset to an existing picture HINT: Enter THISNODE.MTR-MODICON when prompted for Dynamo Properties. Step 7. Save the display. Step 8. Switch to DeltaV Operate (Run). View the picture with MTR-MODICON and verify that you can START and STOP the motor. Workshop - Configure MTR-MODICON
Workshop - Configure FIC-MODICON • Configure FIC-MODICON in the following manner using the DeltaV Explorer: • Step 1. Drag ‘n drop the PID_LOOP Module Template from the Library to PLANT_AREA_A. • Step 2. Rename the Module FIC-MODICON • Step 3. Launch Control Studio and modify the I/O parameters on the PID block as follows: • IO_IN FT_MODICON R40001 • IO_OUT FY_MODICON R40002
Workshop - Configure FIC-MODICON Step 4. Assign to the Controller. Step 5. Save and download the module. Step 6. Launch DeltaV Operate (Configure) and add the loop dynamo PID_LOOP_1_ from the frsModules dynamo set to an existing picture. Hint: Enter THISNODE.FIC-MODICON when prompted for Dynamo Properties. Step 7. Save the display. Step 8. Switch to DeltaV Operate (Run). View the picture with FIC-MODICON and verify that the loop controls.
Workstation Serial Interface Dataset Register Type Register Address Number of Registers SCADA or Coils 00001 - 0xxxx Control Module DSTs Input Status 10001 - 1xxxx Parameters Hierarchy Displays Input Registers 30001 - 3xxxx Holding Registers 40001 - 4xxxx Alarms PROVOX Conditionals Algorithms Module I/O Workshop - Serial Interface Modbus (Slave)
Workshop - Serial Interface Modbus (Slave) The Serial Interface may be configured as a Modbus Slave. As such, the Serial Interface does not generate Modbus requests; it responds to requests generated by a Modbus Master. The above illustration uses the PROVOX IDI as the Modbus Master and the DeltaV Serial Interface as the Modbus Slave. This permits the exchange of data between the two control systems.
Workshop - Serial Interface Modbus (Slave) Modules PROVOX-AGIT FIC-102 XVSTAT-101 Port 2 PROVOX PV:LOOP FST F-C-C PV:DI FST F-C-C Analog Input F-C-C Discrete Input F-C-C Holding Register 40010 Flow Rate Coil 00001 Agitator Status Holding Register 40001 & 2 Flow Rate Coil 00002 Block Valve Status Intelligent Device Interface (IDI) The following datasets will be configured to pass variables between PROVOX and DeltaV • Dataset 1 will receive an analog variable from PROVOX • Dataset 2 will receive a discrete variable from PROVOX • Dataset 3 will send an analog variable to PROVOX • Dataset 4 will send a discrete variable to PROVOX
Workshop - Serial Interface Modbus (Slave) Complete the control strategy workshop in the following manner: Step 1. Define Serial Card Port 2 Properties. Step 2. Define another Serial Device. Step 3. Define two Datasets referencing Coils. Step 4. Define two Datasets referencing Holding Registers. Step 5. Use a Data Link to display an IDI Holding Register. Step 6. Configure a monitoring discrete module template using an IDI Coil and display the module using a Data Link. Step 7. Modify FIC-102 to pass the PV to a Holding Register. Step 8. Modify XVSTAT-101 to pass the Out_D to a Coil.
Workshop - Configure & Download The Serial Card Connect the IDI Serial Interface cable to the Serial Termination block in slot 5. Define Port 2 Properties Define Port 2 properties from DeltaV Explorer by selecting: Serial Card Port 2 Properties
Workshop - Configure & Download The Serial Card Step 3. Define the port properties as follows: • Port Tab • Check Enabled • Advanced Tab • Protocol Type - RTU • Mode - Slave • Communications Tab • Port Type - RS232 • Baud Rate - 38400 • Parity - even • Data bits - 8 • Stop bits - 1 Important: This must match the settings on the IDI.
Workshop - Configure & Download The Serial Card Define a Serial Device Define the Serial Device from DeltaV Explorer by selecting: Port 2 New Serial Device Define Serial Device Address at 1. Hint: The device address must match the device address of the IDI Define Four Datasets Define four datasets, shown below, from DeltaV Explorer by selecting: DEV01 New Dataset Define Dataset 1 as shown below.