Download
1 / 14
140 likes | 240 Views
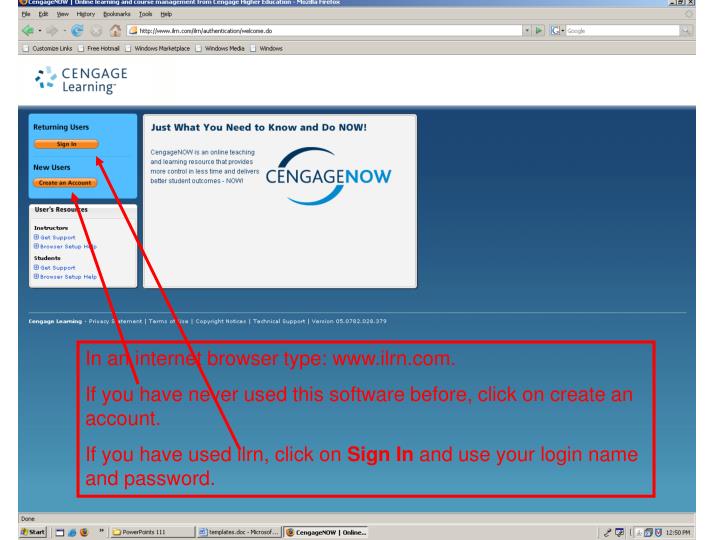
In an internet browser type: www.ilrn.com. If you have never used this software before, click on create an account. If you have used ilrn, click on Sign In and use your login name and password.

E N D
In an internet browser type: www.ilrn.com. If you have never used this software before, click on create an account. If you have used ilrn, click on Sign In and use your login name and password.
The first time, select INDIANA from the drop down menu and PURDUE UNIVERSITY for the School Name. Then click Search.
Select the first option, PURDUE UNIVERSITY (West Lafayette, IN). Then Click Continue.
Select the first option, since you are given a Course Key on your handout. This course key is ‘case sensitive. Type it exactly as it is seen, capital letters. Click Continue at the right.
Fill in all the information except Student ID. Leave it BLANK. Use your full Purdue email address. Passwords must be at least 6 characters. Select a password you will remember and write it down. Select ‘I Agree’ to the License Agreement and click Continue.
Your account is now ready. Click ‘Enter CengageNOW’ to begin!
Note: When you sign in again as a returning user, you only have to enter your e-mail address and password that you’ve selected.
This is the home page. Your first few assignments should be listed. ALWAYS ENTER ASSIGNMENTS, HOWEVER, FROM THE ASSIGNMENTS/TESTS TAB AT THE TOP.
Select the assignment and click Take. You will notice the due dates on the left. Make sure you select the correct assignment.
After your assignment has ‘loaded’, click on Start Assignment Now.
Your first problem appears. You will notice all problems are listed in the left column. After entering your answer, click Enter Answer at the bottom right. Always Submit your Assignment for Grading before exiting the program. Your assignment is automatically submitted once the deadline passes.
If all parts of your answer are correct, you receive feedback saying Correct. Then you can select another problem from the left. Problems do not have to be done in consecutive order. You may try to get a correct answer as often as necessary until you are correct. If you exit the system and return, a different problem may be generated for those with incorrect answers.
REMEMBER • You do not have to work all problems in one setting. You may ‘submit’ what you’ve finished and return later until the assignment is due. • When you do exit and return, any problems with previously incorrect answers may be generated as different problems. • You have an unlimited number of tries to get the correct answer prior to the deadline. • Problems may be completed in any order.
You are told if any parts of your answer are incorrect. Try again. Your goal should be to understand how to work the problem, not just to get a correct answer.