Download
1 / 36
360 likes | 499 Views
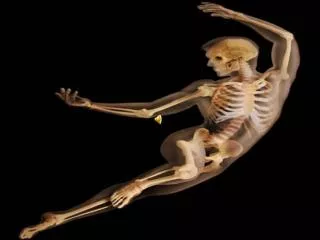
Chapter 16 The Musculoskeletal System. Joint Structure and Function: Anatomical Terminology. Articular structures: include joint capsule and articular cartilage, synovium and synovial fluid, intra-articular ligaments, and juxta-articular bone

E N D
Joint Structure and Function:Anatomical Terminology • Articular structures: include joint capsule and articular cartilage, synovium and synovial fluid, intra-articular ligaments, and juxta-articular bone • Extra-articular structures: include periarticular ligaments, tendons, bursae, muscle, fascia, bone, nerve, and overlying skin • Ligaments: ropelike bundles of collagen fibrils that connect bone to bone • Tendons: collagen fibers connecting muscle to bone • Cartilage: collagen matrix overlying bony surfaces • Bursae: pouches of synovial fluid that cushion the movement of tendons and muscles over bone or other joint structures
Types of Joint Articulation: Synovial, Cartilaginous, and Fibrous Synovial joint • Joint is freely movable • Bones are covered by articularcartilage • Bones are separated by synovial cavity • Synovial membrane secretessynovial fluid that lubricates joint movement • Examples: shoulder, knee
Types of Joint Articulation: Synovial, Cartilaginous, and Fibrous (cont.) Cartilaginous joint • Joint is slightly movable • Bones separated by fibrocartilaginous discs • Discs contain nucleus pulposus that cushions bony movement • Examples: vertebral bodies of the spine
Types of Joint Articulation: Synovial, Cartilaginous, and Fibrous (cont.) Fibrous joint • Joints have no appreciable movement • Bones separated by fibrous tissue or cartilage • Example: sutures ofthe skull
Musculoskeletal System:Tips for Assessing Joint Pain • Ask the patient to “point to the pain” • This saves considerable time since patient descriptions of the location of the pain may be vague • Clarify and record the mechanism of injury, particularly if the joint pain is caused by trauma • Determine whether the pain is: • Localized or diffuse • Acute or chronic • Inflammatory or noninflammatory
Techniques of Examination:Overview for Each of the Major Joints* • Inspect for joint symmetry, alignment, or any bony deformities • Inspect and palpate surrounding tissues for any skin changes, nodules, muscle atrophy, or crepitus • Assess any degenerative or inflammatory changes, especially swelling, warmth, tenderness, or redness • Perform range of motion; use joint-specific maneuvers to test: • Joint function and stability • Integrity of ligaments, tendons, and bursae * Includes shoulder, wrist and hands, spine, hips, knees, and ankles. For examination of the temporomandibular, elbow, and foot joints, refer to Chapter 16 in the textbook.
Important Bones of the Shoulder • Review bony anatomy
Shoulder: Examination • Inspect for swelling, deformity, muscle atrophy or fasciculations, or abnormal positioning • Palpate over the three bony landmarks and any areas of tenderness • Check range of motion: flexion, extension, abduction, adduction, and internal (hands behind small of back) and external (hands behind neck) rotation • Perform maneuvers to assess: • Acromioclavicular joint • Subacromial and subdeltoid bursae • Overall shoulder rotation (Apley scratch test) • Rotator cuff
Question A patient presents to you with shoulder pain after falling during an ice storm. On examination, he exhibits localized shoulder pain when you perform the “crossover test” (arm moved across the chest toward the opposite side while extended at the elbow). Which of the following is the most likely site of injury? • Rotator cuff • Bicipital tendon • Glenohumeral joint • Acromioclavicular joint
Answer • Acromioclavicular joint • Localized tenderness or pain with adduction suggests inflammation of the acromioclavicular joint
Wrist and Hand: Examination • Inspect for smoothness of motion, surface contour, alignment of wrist and fingers, and any bony deformities • At rest, the fingers should be slightly flexed and aligned almost in parallel • Palpate • Distal radius and ulna at the wrist, the eight carpal bones, and the MCP, PIP, and DIP joints for swelling or tenderness • “Anatomic snuffbox” just distal to the radial styloid process with lateral extension of thumb away from hand
Wrist and Hand: Examination (cont.) • Check range of motion • Wrist: flexion, extension, ulnar (abduction) and radial (adduction) deviation • Fingers: flexion, extension, abduction (fingers spread apart), adduction (fingers back together) • Thumb: flexion, extension, abduction (thumb moves away from palm), adduction (thumb moves toward palm), opposition (thumb touches each finger) • Test handgrip strength • Test sensation on the palmar and dorsal surfaces innervated by the median, ulnar, and radial nerves
Wrist and Hand: Carpal Tunnel Syndrome • Clinical features • Pain or numbness of the first three fingers of the hand, but not in the palm, especially at night • Loss of sensation in distribution of the medial nerve: palmar surface of thumb, index, middle, and medial 4th fingers • Assess • Weak abduction of the thumb: most sensitive test • Tinel’s sign: tingling with tapping over the median nerve as it enters the carpal tunnel • Phalen’s sign: numbness or tingling with pressing backs of hands together in acute flexion for 60 seconds
Question A patient who presents to clinic complaining of hand pain says she was told by a friend that it is most likely carpal tunnel syndrome. Upon assessing the patient, you note the following findings. Which would be suggestive of carpal tunnel syndrome? • Hand pain when holding both hands in acute extension • Numbness and tingling when tapping over the course of the radial nerve • Symptoms related to compression are evident in all of the fingers • None of the above
Answer • None of the above • The symptoms of carpal tunnel syndrome are: • Numbness or tingling with pressing backs of hands together in acute flexion for 60 seconds • Tingling with tapping over the median nerve as it enters the carpal tunnel • Pain or numbness of the first three fingers of the hand, but not in the palm
Spine: Anatomy of Representative Cervical and Lumbar Vertebrae • 7 cervical, 12 thoracic, and 5 lumbar vertebrae are stacked on the sacrum and coccyx • Review the anatomy below:
With patient in gown, directly inspect: From the side Cervical, thoracic, and lumbar curves From behind Upright spinal column Alignment of the shoulders, iliac crests, and the gluteal folds Skin markings, tags, or masses Spine: Examination — Inspection
Palpate With patient standing or sitting Spinous processes of each vertebrae Facet joints in the neck Lower lumbar area for vertebral “step-offs” or tenderness Paravertebral muscles for tenderness or spasm Sacroiliac joint Spine: Examination — Palpation
Spine: Examination — Range of Motion • Neck • Flexion and extension: chin to chest, look up at ceiling • Rotation and lateral bending: look over one shoulder and then the other; bring ear to shoulder • Spine (support the patient during exam if necessary) • Flexion and extension: bend forward and try to touch toes; bend backward • Rotation and lateral bending: rotate trunk (pull shoulder and then the opposite hip posteriorly); bend to side from waist
Hip: Examination — Inspection • Inspect two phases of gait • Swing (foot moves forward, non-weight bearing) and stance (foot on ground, weight bearing) • Assess width of base (2-4 in. heel to heel), shift of the pelvis (smooth and continuous), and flexion of the knee (flexed throughout stance phase) • Inspect anterior and posterior surfaces of the hip for muscle atrophy or bruising
Hip: Examination — Palpation • Palpate bony landmarks • Anterior aspect: iliac crest, iliac tubercle, anterior superior iliac spine, greater trochanter, pubic symphysis • Posterior aspect: posterior superior iliac spine, greater trochanter, ischial tuberosity, sacroiliac joint • Inguinal ligament
Hip: Examination – Range of Motion • Assess • Flexion – bend knee to chest and pull against abdomen; check for flexion deformity (opposite knee goes into flexion) • Extension – leg extends posteriorly with patient carefully positioned near edge of table • Abduction and adduction – reach across andgrasp opposite hip; grasp ankle and move leg laterally, then medially, toward opposite hip • External and internal rotation – flex hip and knee to 90°, grasp ankle, rotate flexed lower leg medially then laterally
Knee: Review the Anatomy • Identify bony structures on the medial, anterior, and lateral surfaces • Joints • Two condylar tibiofemoral joints • Patellofemoral joint • Trochlear groove • Ligaments • MCL, LCL, ACL, PCL • Medial and lateral menisci
Knee: Examination — Inspection and Palpation • Inspect • Contours and alignment of knees for swelling • Atrophy of quadriceps muscle • Knee action during swing and stance phases of gait • Palpate (patient sitting) • Infrapatellar spaces adjacent to patella • Medial and lateral femoral epicondyles and condyles • Medial and lateral margins of tibial plateau • Insertion of patellar tendon at the tibial tubercle
Knee: Examination — Palpation • Palpate, with the knee flexed, and note any tenderness: • Along the joint line, including menisci and bursae • Along the medial and lateral collateral ligaments (MCL and LCL) • Over the patellar tendon. If tender, compress the patella against the femur and check knee extension • Palpate: • Over the suprapatellar bursa above the knee • Prepatellar bursa over the patella • Pes anserine bursa on posteromedial knee • If swelling, palpate for bulge sign or balloon sign, or “balotte”the patella
Knee: Examination — Range of Motion and Maneuvers • Assess range of motion, with patient sitting: • Flexion and extension • Internal and external rotation – patient rotates foot medially and laterally • If pain or swelling, use maneuvers to test stability of ligaments and integrity of menisci • MCL – abduction or valgus stress test • LCL – adduction or varus stress test • Anterior cruciate ligament (ACL) – anterior drawer sign, Lachman test • Posterior cruciate ligament (PCL) – posterior drawer sign • Medial and lateral menisci – McMurray test
Ankle and Foot: Review the Anatomy Note: Pay particular attention to the bony medial and lateral malleoli, the triangular deltoid ligament medially, and the three less stable ligaments laterally.
Ankle and Foot: Examination — Inspection and Palpation • Inspect the surfaces of the ankles and feet for any deformities, nodules, swellings, calluses, or corns • Palpate • Anterior aspect of each ankle joint for bogginess, swelling, tenderness • Achilles tendon for nodules or tenderness • Heel for tenderness • Medial and lateral malleolus for tenderness • Metatarsophalangeal joints for tenderness • Heads of the 5 metatarsals by compressing between your thumb and index finger
Ankle and Foot: Examination — Range of Motion • Ankle flexion (plantar flexion) • Point foot toward the floor • Ankle extension (dorsiflexion) • Point foot toward the ceiling • Inversion • Bend heel inward • Eversion • Bend heel outward
Ankle and Foot: Examination — Maneuvers • Assess range of motion • Tibiotalar joint (ankle) • Dorsiflex- and plantar-flex the foot at the ankle • Subtalar (talocalcaneal) joint • Stabilize the ankle and grasp the heel; invert and evert the heel • Transverse tarsal joint • Stabilize the heel; invert and evert the forefoot • Metatarsophalangeal joints • Flex toes in relation to the feet