Download
1 / 31
310 likes | 325 Views
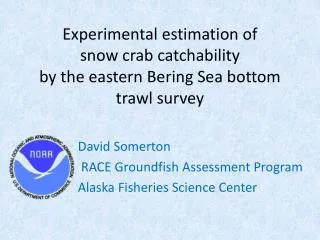
Bottom Trawl Survey Onboard Training Overview for New Users. Objective.

E N D
Objective We hope to provide an overview of methods for some tasks that you will participate in while on the cruise. A quick tour of measuring devices and cutting techniques are also included so you will gain some familiarity with what you will be exposed to. You will also have an opportunity to view a software simulation to get an idea of what you will be seeing on the screens. You are not expected to learn all that you see during the software simulation, as it is a lot to absorb. Prior to the first station of the cruise, your Watch Chief or an experienced member of the staff will demonstrate the software, hardware and how/where to preserve samples. This is a perfect time to ask questions. 2
Views of the Fish Processing Lab Sorting conveyor looking aft. Sampling locations looking aft. 3
Working Spaces of Main Deck Aft Forward 4
Measuring Devices Several types of measuring devices are implemented on the cruise, including: The following slides will highlight measuring techniques. 5
1/3 Measuring Devices: Calipers • Vernier calipers: • The body of the main scale is in cm units with 0.1 cm gradations. • Loosen the screw clamp to slide the jaws open. • The "pointer" is the line on the caliper labeled ‘0’. • Read the values of the stationary bar scale which is to the left and above the ‘0’. • Next, add the value on the scale which exactly coincides with the ‘0’ line on the main scale. • Calipers will be used to measure outer dimensions (lobster carapace and skate claspers) and depths with the stem (skate cloaca depths). pointer 6
2/3 Measuring Devices: Calipers • value on main scale is between 110 and 120 • value on Vernier scale is 4 (where 0 lines up to scale) • 110 + 4 = 114 • measurement = 114 mm 7
3/3 Measuring Devices: Calipers A closer look … Value = 114 mm 8
1/2 Measuring Devices: Scales • There are 2 Marel Motion Compensated scales at each sampling location: • under the fishboard • to the right of the fishboard Scale display heads Measurement units: kg Scale platforms 9
2/2 Measuring Devices: Scales Press RECORD button to send weight electronically to FSCS when platform with organism is stable. 10
1/2 Measuring Devices: Fishboard • Scantrol Electronic Fishboard • Lengths are collected digitally using an electronic measuring board (cm). • The boards include a string of magnetic sensors along the mid-line of the board that are activated by a magnet attached to the operator’s index finger. • Once the magnet touches the board, the length is transmitted to FSCS. Line of Magnetic Sensors Magnet 11
2/2 Measuring Devices: Fishboard • Cautionary note: • Be cognizant of where the magnet is placed when a fish is not being measured. • If the magnet is placed on the magnetic strip (center line) it could trigger a length to be entered into FSCS. Magnetic Strip 12
Methods for Retaining Samples The software will prompt the user for samples and this section will describe how to retain age, histology and feeding ecology samples properly. • Samples may be retained as: • hard structure (scale, otolith) • frozen (Young of the Year (YOY), head, vertebrae) • preserved (gonad tissue – histology, feeding ecology) • live 13
1/4 Method: Age Samples • Hard Structures: Affixing label to Age Envelope • Place the label on the envelope so the flap is to the right. • Tip: Peel labels from backing but do not tear backing at perforations. • Do not seal the envelope. • When finished processing the station, band all envelopes of the same species together with an elastic. • Place banded envelopes in appropriate plastic A&G bins which are labeled by species. • Bins are located in aft of fish lab. 14
2/4 Method: Age Samples • Freezing YOY samples • Do not cut fish. • Fish must remain intact to obtain accurate weight. • Use appropriate sized bag for sample. • Place samples in A&G YOY box in freezer. X X X Atl Mackerel YOY 15
3/4 Method: Age Samples • Freezing Atl. Herring and Atl. Mackerel • The heads of the fish are retained and otoliths removed at the lab. • Cut should be behind the pectoral fins. • Place the head and label in a small ziptop bag. • Label should face out. • Place all samples from that station in a large ziptop bag. • When fish processing is complete, large ziptop bag is placed in appropriate box in freezer. Atl Mackerel X X X 16
4/4 Method: Age Samples • Freezing Ocean Pout and Wolffish Samples • Heads of these fish are retained and otoliths removed at the lab. • Cut should be made behind the pectoral fins. • Place head and label in a small ziptop bag. • Label should face out. • When fish processing is complete, sample is placed in appropriate box in freezer. Ocean Pout sample X O Pout X X 17
1/4 Method: Histology Samples Cutting and Preserving Histology Samples • Cutting the section: • If the protocol requires gonad weight: • Remove both lobes. • Weigh lobes and record weight. • Save ~1cc of gonad tissue as follows depending upon size of gonad: • If very small this may be an entire lobe. • If intermediate in size, a thick cross section (as shown). • If very large, a wedge of tissue that contains the outer membrane . 18
2/4 Method: Histology Samples • Labeling the vial: • Affix FSCS label to the outside of the vial. • After fish workup is complete, vials are taken to the Chem. room where they are filled with 10% formalin. 19
3/4 Method: Histology Samples • Filling the vial: • Wear safety goggles and gloves when handling formalin. • Find them in the Chem. room, next to the fume hood. • Make sure to use the container labeled “For Histology.” • The 10% formalin is pre-measured in the dispensing cylinder. • This amount is needed to properly fix the gonad tissue. • Remove stopper cap. • Press the top of the pump down slowly and steadily until it stops. • Let pump rise up slowly. • It will automatically refill the dispensing cylinder with the correct volume for the next vial. • Recap the discharge tube and tightly recap the vial. 20
4/4 Method: Histology Samples • Note the correct level of formalin. • Lastly, vials are placed back in the cardboard flat and stored inside the appropriate cabinet* for the remainder of the cruise. • *see watch chief for location 21
1/2 Method: Feeding Ecology Samples • Preserve fishes ≤ 12 cm with 5% formalin when prompted by FSCS • At sampling locations: • If fish is ~7+ cm, cut off tail behind vent/stomach cavity. • This improves preservation & sample quality. • Place fish in 4 oz. glass jar with FSCS label INSIDE (do not attach to jar). Cut fish >7 cm ready to be preserved Label inside jar 22
2/2 Method: Feeding Ecology Samples • In hood, don lab gloves and safety glasses. • Dispense just enough 5% formalin from FWDP carboy to cover fish. FWDP Carboy Correctly filled jar • Secure lid on jar, and place jar in box located in stainless steel cabinet under counter. 23
Scale Samples Note that scale samples are obtained from different locations depending upon the species. 24
1/3 Cutting Techniques: Quick View • The following video demonstrates cutting techniques for: • extracting otoliths from a flatfish, American Plaice 25
2/3 Cutting Techniques: Quick View • The following video demonstrates cutting techniques for: • extracting otoliths from a round fish, pollock 26
3/3 Cutting Techniques: Quick View • The following video demonstrates the cutting technique for: • excising a stomach from Goosefish 27
FSCS Data Collection Software The Fisheries Scientific Computer System 2.0 (FSCS 2.0) will be our data collection vehicle during the cruise. The link below will take you to a video which will demonstrate how you will interact with the software under different scenarios. There will also be an overview provided in the lab so you can experience the software prior to the first trawl. 28
Overview of Stock Assessments Stock assessments are critical to modern fisheries management. These scientific studies are based on models of fish populations that require data on abundance, biology, and catch – the ABCs of stock assessment. Stock assessments help managers make the best decisions to ensure sustainable fisheries, healthy ecosystems, and productive coastal communities. Learn about this in the video that follows. Video credit: NOAA Fisheries Northwest Fisheries Science Center 29