Download
1 / 28
310 likes | 767 Views
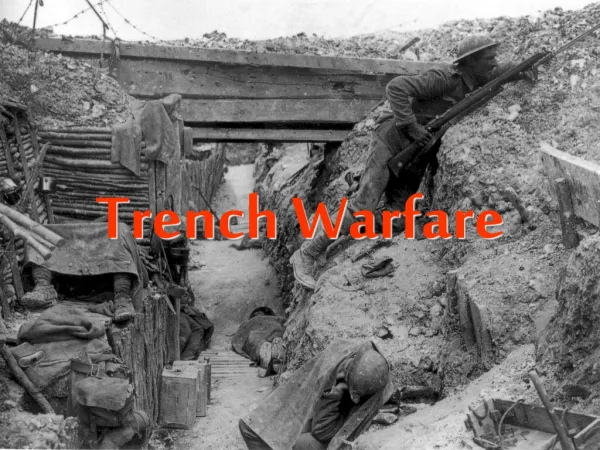
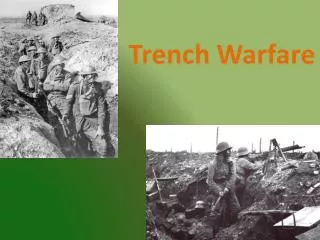
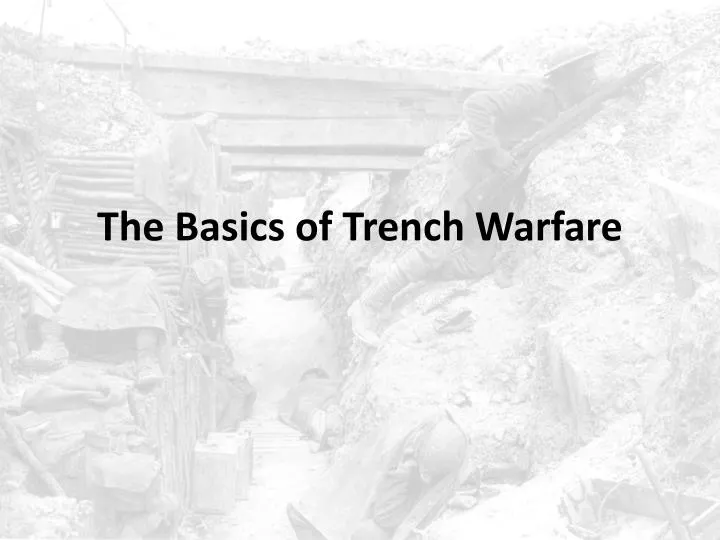
The Basics of Trench Warfare. What is Trench Warfare?. Trench Warfare is a form of defensive warfare The opposing sides have ‘dug in’ and are well protected and supplied In addition, supply lines could usually be stretched without difficulty into controlled territory

E N D
What is Trench Warfare? • Trench Warfare is a form of defensive warfare • The opposing sides have ‘dug in’ and are well protected and supplied • In addition, supply lines could usually be stretched without difficulty into controlled territory • This is a war of attrition
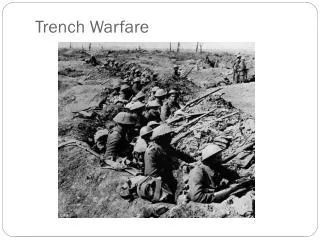
The Lines • The trench line closest to the enemy was known as the Front Line • This was not the only trench that was dug • Behind the Front Line was an intricate system of trenches, bunkers, dugouts, tunnels and command centers • The Front Line however, was the most dangerous and important area of the battlefield
The Offensive Spirit • As this was defensive warfare, the side using offensive tactics was usually at a serious disadvantage • Although effective offensive technology such as long range artillery existed, the accuracy, expense and dependability of such technologies was an issue • Quite often the offense came down to sheer manpower and bravery
Patrols The purpose of a patrol is to find out information through eavesdropping or visually locating the position of the enemy’s artillery and any weaknesses in their defence • One of the most frequent and dangerous types of trench offensives was the patrol • Patrols involved small groups of soldiers crawling through No-Man’s-Land until they were within earshot of the enemy
Trench Raids • A more dangerous version of the patrol was the raid • In a trench raid, the objective is to capture enemy soldiers for interrogation, steal supplies, kill soldiers or destroy equipment and trenches • Raids were usually carried out with less than 30 men
Trench Raids • Soldiers in a raid usually blackened their faces, carried shortened guns, carried knives and were camouflaged • The most dangerous part of a raid was the return, as the enemy would be aware that soldiers were trying to return to their trenches • The most popular time for a raid was at night
Trench Raids • No Man’s Land was not easy to cross • After crawling over the parapet of a trench, soldiers had to fight through barbed wire, huge shellhole craters, mud, rotting bodies and other entanglements
An Account of a Trench Raid • "Suddenly there were footsteps and a German soldier came into view behind the next traverse. He stopped suddenly, struck dumb, no doubt, by our strange appearance. Capturing him was out of the question; we were too far away from home. But before he could pull himself together and spread the alarm, I shot him twice with my revolver - he fell dead. Tanner tore the identification tags off his uniform and I rifled his pockets, stuffing a diary and some papers into my camouflage suit. Now things happened fast. There were sounds of movement on both sides of us, so we scaled the parapet, forced our way through the barbed wire - I have the scars on my right leg to this day - and ran for the nearest shell hole. We had hardly reached it when two machine guns opened a crossfire on us. We lay on the near lip of the crater, which was so close to their lines that it gave us cover. The machine-gun bullets pitted the rear of the crater." • British Soldier Basil Rathbone
Tunneling • The military employed specialists to dig tunnels into No-Man’s-Land • Canadian sappers (tunnel diggers) were usually East Coast miners • The main objective was to place a mine under an enemy trench • When detonated, the mine would create confusion – a perfect time for an attack
Tunneling • Obviously, you wouldn’t want the enemy tunneling under you • Soldiers would place sticks deep into the ground and place the other end between their teeth to feel vibrations - water barrels were also used, if the water rippled there was a good chance someone was tunneling nearby • At times, a sapper would dig into an opposing sapper and an underground fight would occur
Mines • Mines placed in tunnels became increasingly larger as the war went on • The famous Hawthorn Ridge Mine used at the Battle of Beaumont-Hamel contained 24 tonnes of explosives • A mine at Spanbroekmolen created a hole that afterwards measured 430 ft. from rim to rim • Now known as the Pool of Peace, it is large enough to house a 40 ft. deep lake
Attacks & Offensives • Patrols and trench raids were only minor attacks designed to steal information and terrorize the enemy - full scale attacks were called attacks and offensives • An attack was designed to break the enemy line • A break in the line would cause the enemy to scramble to close the gap and redirect their troops • An offensive was designed to not only break the line but hold the positions that had been taken
Attacks & Offensives • An attack would usually involve a division • An offensive is larger and would involve an entire corps • As an offensive requires holding the enemy position, there is more stress on supply lines • Offenses took significant planning and preparation and often resulted in famous battles such as the four major Canadian battles we will be discussing
Organization of a British Army • Section - 10 men • Platoon - 2 or more Sections - 30 men • Company - 3 or more Platoons - 100 men • Battalion - 3 or more Companies - 300 men • Regiment - 3 or more Battalions - 1000 men • Brigade - 2 or more Regiments + Battalions - 3000 men • Division - 3 or more Brigades - 10,000 men • Corps - 2 or more Divisions - 50,000 men • Army - 2 or more Corps - 100,000+ men • ArmyGroup - 2 or more Armies - 250,000+ men
Artillery Barrage • The use of heavy artillery greatly assisted attacks and offensives • Artillery refers to longer range, larger guns that fired heavy shells into enemy territory • Artillery guns were quite heavy and had to be manned by a team of soldiers
Artillery Barrage British 18 pounder • Weighed 2820 pounds • Fired shells that weighed between 10 and 18 pounds • Had a range of almost 6000 meters
Types of Artillery Barrage • Box Barrage • Artillery fire concentrated around a large target area to stop reinforcements from coming in • Pin-Point Barrage • Artillery fire concentrated on a small but deadly area such as a sniper or machine gun post • Counter Battery Barrage • Artillery fire concentrated on opposing artillery
The Creeping Barrage • The creeping or rolling barrage was a later development • This barrage involved artillery being fired just ahead of advancing soldiers • The soldiers would quickly clear the area and then move ahead, just behind the next wave of artillery fire • Of course, there was danger in the artillery hitting friendly troops • In particular, the Canadians perfected this type of attack at the Battle of Vimy Ridge
Use of Artillery Barrages • Artillery barrages were often used to soften up the enemy before an attack or offensive • Barrages were either: • Light - 6-7 shells every ten minutes • Moderate - 30 shells per minute • Heavy - 50 to 60 shells per minute • Before the Battle of the Somme, a British barrage was launched for 8 days • At the Battle of Passchendaele, the British barrage lasted 10 days and fired 4, 283, 550 shells
The Sniper • Of all the weapons and offensive methods, the most devastating was the sniper • A sniper kept the enemy at bay by making them pay for an exposed head or limb • The first snipers were simply good hunters from back home that used their skills on the battlefield • Once it was clear that a good sniper could terrorize a section of a trench, specific training was given
The Sniper • Snipers did not operate out of trenches • They would crawl into No-Man’s-Land, find a good hiding place and sit there, sometimes for days • Snipers did not fire often - when the muzzle flash from their gun was detected, artillery was directed to fire in that area
The Sniper • Snipers were aided by telescopic sights on their weapons • Fake trees were often used as hiding places in No Man’s Land • The Sniper was solitary and could stay alone in No Man’s Land for days • Counter-Snipers were specifically trained to knock these killers out
The Sniper • Snipers were encouraged to keep a running tally of their kills • Many snipers notched the butt of their gun with a mark for every kill • Francis "Peggy" Pegahmagabow, an Ojibwa Indian from Ontario, was the highest-scoring Canadian sniper of WWI with 378 confirmed kills, the highest for the Allies in World War One.