Download

1 / 20
200 likes | 204 Views
Learn how to set up and configure the Profibus communication using S300 and S600 drives with the HMS Master Simulator.

E N D
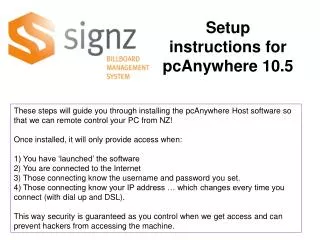
Profibus with S300 and S600HMS Master Simulator Setup Instructions and Overview
Reference Sources Profibus Documentation Manual – “Profibus S300/S400/S600/S700 Communication Profile” Examples – “S600 Profibus – Example Communication Commands” FAQ – “Profibus FAQs_eng” FB10 function block instruction for Siemens S7 PLC – “Description of S7 Handling Function FB10 for Servostar 400/600” http://www.profibus.com Contacts Primary Application Engineer (North America): Jimmy Coleman Primary Application Engineer (Germany): Jochen Karnatz
S300 Communication Settings Set drive address in the drive (ADDR). The controller will reference this drive address. The baud rate is set in the controller. The HMS Master Simulator is fixed at 19.2 kBaud. Set the PPO Type to 2.
S600 Communication Settings Set drive address in the drive (ADDR). The controller will reference this drive address. The baud rate is set in the controller. The HMS Master Simulator is fixed at 19.2 kBaud. Set the PPO Type to 2.
Starting the HMS Master Simulator Select the com port and enter the drive address. Click “Start Search” in the Address menu. After the device is found, click “Stop Search” and close the search window. Click “Easy Start” in the Communication menu and click OK at the warning message.
Check Communication Status Check for “Communication OK” in the Profibus screen of the GUI. Notice the data is filled in. Prior to communication the GUI will show only X’s. Most of the data is zero, because nothing has be set.
Overview of Profibus Telegram The Profibus telegram consists of 20 bytes (10 words of 16 bits each). PKW: First 8 bytes Parameter Channel Used for reading and writing drive parameters. Within the PKW are the PKE, IND, and PWE The PKE consists of two bits to specify to read or write and the PNU number of the drive parameter to read or write. The IND is an index used for PNU numbers greater than 1600 dec. Less than 1600, IND = 0000 hex Greater than 1600, IND = 0100 hex The PWE contains the data that is read or the data to be written. PZD: • Bytes 9 - 20 • Process Data Channel • Used for “real-time” updated commands and status. Output Bytes 9 and 10 are the STW (Control Word), and on the input they make up the ZSW (Status Word). Bytes 11 – 20 are used for “real-time” command and status (feedback) data. The HSW and HIW are also known as PZD2. The Output data is the data output from to Master Controller to the drive. This consists of read/write requests, control word, and setpoints. The Input data is the data input to the Master Controller from the drive. This consists of parameter values that are read, write confirmation, status, and feedback.
Telegram Transmission The telegram is sent from one device to another by setting the differential voltage high or low at specific timing to emulate the bits of the telegram. All signals are sent as differential signals using (connector X12A/B pins 8 and 3). So there are not designated Tx and Rx lines, but the two lines are always used together for a differential signal. The Profibus master has a special master chip and the slaves have slave chips. A slave can never be a master. The master is mastering the complete communication. It will send a telegram to a specific slave and ask the slave to send its answer within a certain time. Then it addresses the next slave and waits for the answer. The slaves all listen to all telegrams but will find their specific telegrams from the address. If you look at the telegrams with a Profibus monitor you will see from the addresses what device is sending the data.
Reading a Parameter The PKE specifies whether you want to read a parameter or write a parameter. The first hex digit (nibble) must be transitioned to a 1 to read or to a 3 to write (PKE bits 12 and 13). The read or write occurs on the transition. The following three hex digits are for the PNU number of the parameter. To read drive parameter ACC (PNU 1601), enter: PKE = 0641h (1601 dec), IND = 0100h, and PWE = 0000 0000h Then set PKE = 1641. The 1 sets bit 12 to specify that the controller will read this parameter (read request). The response of 2641 indicates a successful read. A response of 7641 would indicate unsuccessful. The value is in bytes 5 – 8, and in this case equals 00 00 00 0Ah (10 dec).
Writing to a Parameter To write to drive parameter ACC, enter: PKE = 0641h, IND = 0100h, and PWE = 0000 0032h (value to write to ACC, 50 dec) Then set PKE = 3641. The 3 sets bits 12 and 13 to specify that the controller will write to this parameter. The response of 2641 indicates a successful write. A response of 7641 would indicate unsuccessful. The response also includes the value that was written, 00 00 00 32h (50 dec).
Changing the Operating Mode The operating mode of Profibus is different from the drive parameter OPMODE. Profibus has similar operating modes, but they must be set through Profibus by the master controller. To set the operating mode, use PNU 930 (3A2h). Bit 10 of the Control Word must be set to zero prior to writing to PNU 930 and bit 10 must be set to 1 before the new operating mode becomes active. This must be done before any motion commands can be sent from the controller to the drive. The Profibus Operating mode determines what data corresponds to PZD2 – PZD6 and certain functions of the Control Word. To Set the operating mode to Position Mode (2): Set Control Word (STW) bit 10 = 0. Set PKE = 03A2h, IND = 0000h, and PWE = 0000 0002h Set PKE = 33A2. Confirm it was a successful write. Set PKE to anything other than 3xxx, so that it does not continue to write. This could happen with certain controller settings. Or set PKE = 13A2 if you want to read it for confirmation. Set Control Word (STW) bit 10 = 1.
PZD – Process Data Channel The Process Data Channel is used for high speed, continuously updated command setpoints and status/feedback. The PZD section of the Profibus telegram is divided into PZD1, PZD2, PZD3, PZD4, PZD5, and PZD6. Each of these contain one word (16 bits). The data in each PZD is dependant on the operating mode and certain bits of the Control Word (PZD1/STW). PZD1 Output is called STW, otherwise known as the Control Word. PZD1 Input is called ZSW, otherwise known as the Status Word. PZD2 is also called HSW (Output) and HIW (Input). Example: Positioning (operating mode 2) You can see that PZD2 (Output) contains the motion task number or the jog/homing speed, and PZD2 (Input) contains the actual speed. But if Control Word Bit 14=1, PZD2 (Output) now contains the upper 16 bits of the speed setpoint for the Direct Motion Task (Motion Task 0). The Profibus manual explains the PZD assignments for each operating mode.
Drive Command Parameters To issue a command, such as MH, EN, DIS, etc., enter it as if you are reading a parameter. These commands do not have values associated with them, so you can’t write a value.
Enable Sequence – Control Word Bits Enable Sequence Bringing the drive to an enabled state requires a specific sequence. In the Control Word, set the following bits in the following order: Bit 1 = 1 0002 (hex) Disable “Inhibit Voltage”. Bit 2 = 1 0006 (hex) Disable “Fast Stop – with amp disable”. Bit 4 = 1 0016 (hex) Disable “Fast Stop – with amp enabled”. Bit 5 = 1 0036 (hex) Disable “Pause”. Bit 0 = 1 0037 (hex) Enable amplifier. Bits 3 = 1 003F (hex) Operation enabled. Bit 10 = 1 043F (hex) Enable the PZD channel, if it is to be used. Follow the state diagram and state transition table in the manual for more details.
Enable Sequence – State Diagram The Profibus Instrument Control screen in the GUI shows: the Control Word bits, the operating state of the drive, and the Status Word bits.
Enable Sequence – Drive States State Diagram and Status Word showing an error (this was an F04 fault). Software Enabled Operation Enabled: Required before motion commands can be set to the drive.
Run a Motion Task • To run a motion task: • Set PZD2 to the number of the task to be run. • Toggle Control Word Bit 6 (if 0 set to 1; if 1 set to 0). • The response to the controller will be as follows: PZD2 = actual speed, and PZD3 and PZD4 = actual position. • To run the Direct Motion Task (Motion Task 0): • Set Control Word Bit 14 = 1 • Set PZD2 and PZD3 = Velocity Command • Set PZD4 and PZD5 = Position Setpoint • Set PZD6 = Motion Task Type (O_C parameter). • Toggle Control Word Bit 6 to start motion. • While the motor is moving, set Bit 2 = 0 (Fast Stop with disable) to stop/terminate the task and disable the drive. • While the motor is moving, set Bit 4 = 0 (Fast Stop) to stop/terminate the motion task. • While the motor is moving, set Bit 5 = 0 (Pause) to stop/pause the motion task. Setting Bit 5 =1 again will continue the motion task from where it stopped.
HMS Master Simulator • HMS Profibus DP Master Simulator Instructions • This simulator consists of the HMS RS-232 to Profibus DP cable adapter and the HMS Profibus Master software. It is a simulated controller. • This simulator does not have the capability of running programs or sequences. Data must be manually entered. • To start communications, perform the following steps: • Connect the Serial to Profibus adapter between a com port and the Profibus card in the drive. • In the Simulator software, select the com port that the adapter is using. • Click on “Address” and “Start Search.” After the drive is found, you can stop the search and close the search window. • Click on “Communication” and “Easy Start.” Click OK for the warning. • The rows in the Output Data list are the bytes of the 20 byte Profibus telegram. Click on a row and set the bits (or hex number) in the Edit section. As soon as the bits are set, those bits are sent to the drive. The Input Data list is the bytes that are returned from the drive to the simulator. • Each row is a byte, so rows 1 and 2 make up the first word (PKE) of the Profibus telegram.
HMS Master Simulator Data byte assignments of the HMS Profibus DP Master Simulator Row Bits 1 PKE 16…9 2 PKE 8…0 3 IND 16…9 4 IND 8…0 5 PWE 31…24 6 PWE 24…16 7 PWE 15…8 8 PWE 7…0 9 STW (Control Word) 16…9 10 STW (Control Word) 8…0 11 HSW (PZD2) 16…9 12 HSW (PZD2) 8…0 13 PZD3 16…9 14 PZD3 8…0 15 PZD4 16…9 16 PZD4 8…0 17 PZD5 16…9 18 PZD5 8…0 19 PZD6 16…9 20 PZD6 8…0 Items for using this simulator: S300, S600, or S700 drive Profibus option card Simulator software Adapter – RS-232 to Profibus Serial cable ( 9-pin, straight-through) Drive GUI Communication cable. USB to Serial adapter (With driver) Profibus manual for S300/S600/S700