Download
1 / 31
310 likes | 398 Views
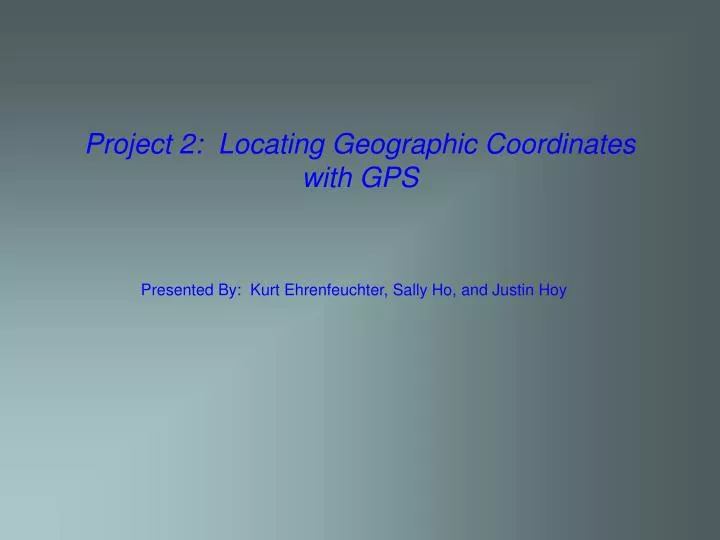
Project 2: Locating Geographic Coordinates with GPS. Presented By: Kurt Ehrenfeuchter, Sally Ho, and Justin Hoy. GPS is a system to calculate a position or coordinate on the Earth’s surface. GPS consists of a “space” component and a “user” component. The “space” component refers to

E N D
Project 2: Locating Geographic Coordinates with GPS Presented By: Kurt Ehrenfeuchter, Sally Ho, and Justin Hoy
GPS is a system to calculate a position or coordinate on the Earth’s surface. GPS consists of a “space” component and a “user” component. The “space” component refers to numerous satellite’s that are constantly orbiting the earth sending coded signals. The “user” component refers to receivers that decode satellite signals and use them to process information (such a distances from the satellite/s). GPS (Global Positioning System)
GPS uses the process of triangulation to approximate the location of where a “user” is receiving a signal on the Earth’s surface. As seen in class, the greater the distance between satellite’s, the more approximate the GPS reading will be. In conjunction with this, the more satellite’s used, the more precise the GPS reading will be. GPS (Global Positioning System)
GPS (Global Positioning System) Although GPS systems are excellent examples of how Technologically advanced we have all become, it does have its down falls that we must be aware of and consider while using GPS software. The first problem with GPS is atmospheric delay. The coded signal being sent by the satellite must travel tremendous distances and “bounces” off things when coming through the ionosphere and troposphere. This increases the time it takes to be received and decreases the accuracy of the GPS reading.
GPS (Global Positioning System) The second problem involves a term known as multipath. Ideally, the signal would come to the receiver in a straight line (thus taking the least amount of time), however, due to reflections in the atmosphere and on the ground the signal can be redirected before reaching the receiver. This interrupts the signal increasing the time it takes to reach the user, as well as decreases the accuracy of the GPS. The third problem is obstruction. This is pretty self explanatory in that sometimes features on the landscape interrupt the ability for signals to be received by GPS instruments. Things such as forests, cities, and steep mountains are all example of obstruction.
Now that we have reviewed the basics of GPS we can get ready to talk about Project 2! However, keep in mind the kinds of things that can interfere with the accuracy of a GPS reading, you may find that you experience some of these inaccuracies when your conducting your work! GPS (Global Positioning System)
Project 2: Locating Geographic Point with GPS Project 2 is divided into two different parts: The first part of the project is referred to as 2a. In this section you will work in groups of 3 to 4 people (no flying solo on this one!), and you will locate two different locations on campus by using a GPS handheld receiver. This will acquaint you with how to read the data on the GPS and get use to using its various settings. So really, your going on a GPS scavenger hunt!!
Project 2: Locating Geographic Point with GPS Part 2a Continued… Once you feel comfortable with the GPS and have located your two locations on campus, you can move onto the second part of 2a. Now you get to learn how to record certain locations within the GPS device. These are called waypoints, by following a simple process that we will discuss in a few slides, you can record points into your GPS for later use. For this part of the project, you and your group must travel around campus and record 4 different locations (make sure they are far enough apart so they can be visible on a map) as waypoints. Make sure every member records a location, and these locations can range from historical landmarks around Penn State to the place you drank your first beer, don’t be afraid to be creative!
Project 2: Locating Geographic Point with GPS Part 2a Continued… Before you embark on part 2a of this project your going to need some supplies. One member of your group is going to need to sign out a GPS handheld receiver from your TA (that’s Missy!). In addition to this, you’ll need to acquire a copy of the handout prepared by Missy, telling you the latitude’s and longitude’s of your locations on campus to find using your new GPS receivers.
Part 2a Continued… Your GPS receiver is a Garmin GPS 12 Personal Navigator, which comes in a carrying case and a copy of the owner’s manual for the unit. I would strongly recommend reading pages 5-11 of the owner’s manual before turning on the GPS unit to get familiar with how it works and to save batteries. Although we will go through some of the basic features of the GPS receivers. Project 2: Locating Geographic Point with GPS
Project 2: Locating Geographic Point with GPS Using the GPS receivers: The first step to using any electronic device is to turn it on! The power button for the unit is located on the left hand-side above the screen between the “GOTO” and “QUIT” buttons (it has a red light bulb on it). Once the GPS receiver is powered up it will take you to the first of 5 possible screens, the first being the Satellite Page. Your most likely going to have to wait a few minutes for the receiver to communicate with the satellite/s (our first experience with atmospheric delay) and show you which one’s it can establish a connection with.
Project 2: Locating Geographic Point with GPS Using the GPS receivers: Once you are connected with the satellite/s push the “PAGE” button located on the upper right. This takes you to the Position Page. This page gives you valuable information such as your position (i.e. latitude and longitude) as well as your elevation, heading, time, and even speed at which you are traveling. This is the screen you will primarily use for the first part of 2a (locating your two mystery points).
Project 2: Locating Geographic Point with GPS Using the GPS receivers: Now since we are a nice leadership team and don’t want you running around aimlessly looking for your points we are going to save you some confusion that we bumped into when we started searching. If you look at your Position Page on your GPS you’ll see that the lat. and long. are recorded in degrees, minutes, and seconds. This normally isn’t a problem except that on your worksheet your lat. and long. are in decimal degree format. An easy fix to this problem is to go to the website: http://www.fcc.gov/mb/audio/bickel/DDDMMSS-decimal.html and type in your coordinates. (Your welcome!)
Using the GPS receivers: Now that you have coordinates in the same format as your GPS receiver you can begin to locate your two mystery locations. Be sure to bring your owner’s manual and extra batteries incase you run into any problems along the way. You will also need your worksheet to document where your coordinates take you! Project 2: Locating Geographic Point with GPS
Project 2: Locating Geographic Point with GPS Using the GPS receivers: As discussed earlier, this part of the project involves recording 4 different locations around campus (be sure they are far enough apart that they can be easily viewed on a map). These can be anywhere on the campus map provided (i.e. between Walker and the HUB) and they can be your houses, where you work, historical sites, or even where you drank your first beer, etc. Each member of your group should record one point in the GPS receiver. Recording points in the GPS receiver is an easy process that we will illustrate now for you….
Project 2: Locating Geographic Point with GPS Using the GPS receivers: Once you get to the location that you wish to record onto your GPS, push the “MARK” button (the middle right button) and it will take you to a new screen that says waypoint at the top. At this screen you should see the latitude and longitude of the point you want to store, this means that the GPS has recognized your location, but before you move on make sure you save the point by highlighting the “save” option on the lower right and hitting “ENTER”. You need to get 4 waypoints and each member of your group should have a turn to record a point. (Before you actually begin this process it might be a good idea to go into the waypoint screen and delete any previously marked waypoints to save time later!)
Project 2: Locating Geographic Point with GPS Project 2b: Now that you have found the two mystery points and have plotted your own 4 locations, it’s time to move on to the last part of the project. Your group will have to go to the Walker Building computer lab (room 208), and get a special cord to connect your computer to the GPS. Once you are connected you will have to download your data using the waypoint software, format it correctly in Microsoft Excel, and then use Excel to import and plot your points onto a map in Arc View. This portion of the project is fairly detailed, so if you would like to follow along with the description of this section o the project you may do so by going to: http://www.geog.psu.edu/courses/geog121/projects/proj2b.html
Project 2: Locating Geographic Point with GPS Project 2b continued…. Step 1 is to hook your GPS up to the computer via a special cable provided in Walker building. Once connected you must open up the waypoints program located under the Geog121 tab found in the START menu. Step 2: Once the program is up and running you have to download your waypoint from the GPS onto the computer. To do this, just simply go to the “GPS” tab, select the “download from GPS” from the pull down menu, and from there select “waypoints. Step 3: Once your waypoints are highlighted go to File and select “configuration”, in “configuration” change your settings to Decimal Degrees and Statute Miles (this is the default settings for the program, they must be in this sequence because the datum you will have to use is measured in feet and any other setting will distort your map).
Project 2b continued…. Step 4: Next you have to select what datum you are going to want to use, to do so you must go to File and on the pull down tab select “Datum”. This project requires that you use the “WGS84” datum located towards the bottom of the list, because this datum corresponds to the map you will need to plot your waypoints on. Step 5: Is to simply save your progress thus far, to do so go to File on the pull down tab select “Save” and then “waypoint”. Project 2: Locating Geographic Point with GPS
Project 2: Locating Geographic Point with GPS Project 2b continued… Step 6: You will now need to open your newly saved waypoint file into Microsoft Excel. To do so, open Microsoft Excel, select File and “open”, make sure the file type menu is set to either “text file” or “all files” otherwise you will not be able to view your file. When you do this you will be prompted by a pop-up screen to “delimit” your data, just simply follow the onscreen instructions to NOT delimit your information.
Project 2: Locating Geographic Point with GPS Project 2b continued… Step 7: Once you have followed all of the “delimiting” instructions your information will open in Excel. Your latitude and longitude for your various points will be listed, along with extra information such as the date, time, etc. You only need the information listed under tabs C, D, and E (latitude, longitude, and waypoint number). After you delete all the other information except the required fields, you can rename them as “waypoint”, “latitude”, and “longitude”. We will demonstrate this for you on the next slide.
Project 2: Locating Geographic Point with GPS Project 2b continued… Step 8: Once you have formatted your file, you must save it. Be sure you save your file as a text file (.txt) because you can’t use Excel files in Arc View. Step 9: Next you will have to go to angel and download the zipped Penn State Campus map. This file is listed on angel as “Project 2b: Campus Map Data” and follow the instructions given on angel for properly downloading the file. Step 10: Once you have downloaded and unzipped the Map file open Arc View and select a new map. To import the Penn State map form angel, you need to select he button located to the left of the scale (it looks like a yellow street sign with a plus sign on it). You will need to load each layer (i.e. mask, roads, etc) individually. Make sure you load the mask layer first, followed by the others.
Project 2b continued… Step 11: After you have loaded all the layers and can view the map, you have to verify your coordinate system. To do so, right-click on the layers page (left side) and select “Data Frame Properties”, when this opens go to the “coordinates” tab and make sure your coordinate system is set to the “NAD_1983_State Plane_Pennsylvania_North…..”. You must use this coordinate system because it is currently the most up to date system in this program. Project 2: Locating Geographic Point with GPS
Project 2: Locating Geographic Point with GPS Project 2b continued… Step 12: The next step involves loading your GPS waypoints onto your newly created map in Arc View. To do this, go to the “Tools” tab, select “Add XY Data” from the pull down menu, and a new screen will appear showing you the settings for your data. At this point you should put in your table from excel. From here you need to tell ArcMap what Datum you are going to use, so where it says “Spatial Reference of Input Coordinates” find the edit button and it should take you to another menu. From this menu go to select, that will then take you to the folder with coordinates systems in it. There are a lot of different choices in here but the one we are looking for is WGS 1984. So you want to go to the “Geographic Coordinate Systems” then choose the “World” folder, and in the World folder you should see the WGS 1984.prj Datum. (last one in the list)
Project 2: Locating Geographic Point with GPS Project 2b continued… Step 13: Once you have verified your data, hit ok and upon doing so a new layer called “waypoints” will appear under your layers listing. This will display your waypoints on the map! Step 14: The final step just involves saving your map as a screen capture so you can load it onto your webpage at a later date. To do this, just locate your “Prnt Scrn” button, it may be located in the upper right, or as a function key depending on what kind of computer you are using. While in the screen you want to save, simply press “Prnt Scrn”, then go to whatever you are going to save the image to and paste it. Congratulations! Your almost there!
Project 2: Locating Geographic Point with GPS Project 2: Now that you have successfully made your map consisting of your GPS points, you can go on to the final stage of the project. If you would like to see an example of how your finished project should look like, you may do so at the following webpage: http://www.geog.psu.edu/courses/geog121/projects/proj2b_example.html The final copy of Project 2 requires your name, the image of the screen capture you saved, followed by a description of the points you plotted, experiences, and the equipment used. This will then need to be uploaded onto your personal webpage and hyperlinked under “Project 2”.
Project 2: Locating Geographic Point with GPS References: Baxter, Ryan. Lectures 6 & 7 – GPS. Class notes for Geog 121, Penn State University, 2006. Degrees, Minutes, Seconds and Decimal Degrees Latitude/Longitude Conversions. http://www.fcc.gov/mb/audio/bickel/DDDMMSS-decimal.html. Accessed 6 October 2006. Geography 121 Project 2b (Example) .http://www.geog.psu.edu/courses/ geog121/projects/proj2b_example.html. Accessed 6 October 2006. Geography 121 Project 2b. http://www.geog.psu.edu/courses/ geog121/projects/proj2b.html. Accessed 6 October 2006.
Project 2: Locating Geographic Point with GPS Contact Page: Kurt Ehrenfeuchter, kre5003@psu.edu, cell (717)-571-5168 Sally Ho, hwh5018@psu.edu Jason Hoy, jeh5003@psu.edu, cell (814)-883-6737 http://www.personal.psu.edu/jeh5003