Download
1 / 43
430 likes | 435 Views
Learn the basics of image editing, including cropping, resizing, and adjusting brightness/contrast. Discover the power of Photoshop and explore various techniques for photo manipulation and retouching. Develop the skills to become a proficient image editor.

E N D
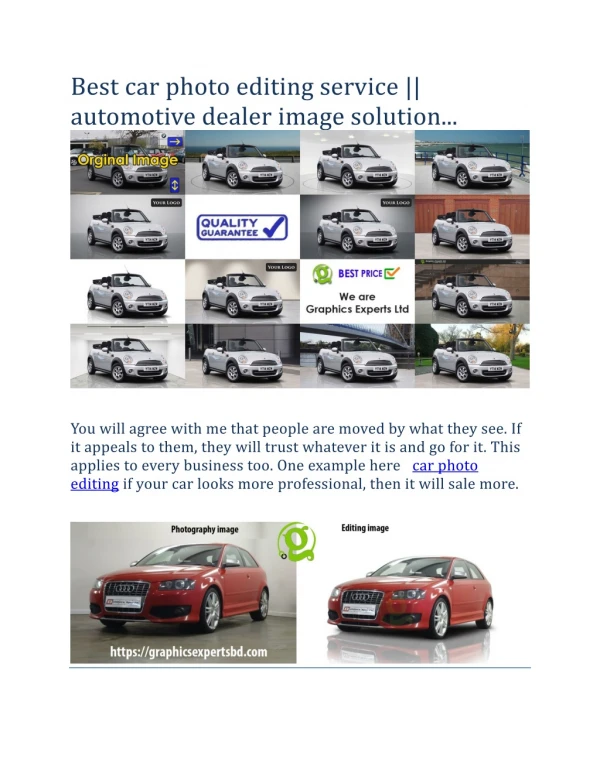
What comes into your mind when you hear the word IMAGE EDITING?
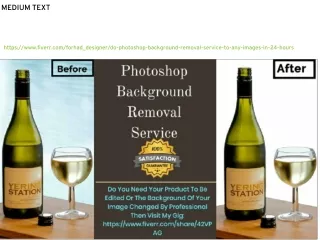
IMAGE EDITING - The process of altering, changing, modifying, whether they are processed photographs, traditional analog photographs or illustrations
Basic of Photo Editing1. Cropping – a technique where you cut out distracting background or a clutter of irrelevant objects around an image.
Basic of Photo Editing2. Resizing /Resampling Resizing – changing the size of the image depending on the usageRemember! Save a copy of your image before you resize it so that you use it at a different size in the future.
Basic of Photo Editing2. Resizing /Resampling To learn further about the resizing, try to look at the following terms:PixelResolutionHave you encountered these words before?Can you tell the class about them?
Basic of Photo Editing3. Adjusting the Brightness/ContrastBrightness – the amount of light of an imageContrast – defines the separation between the darkest area and brightest areas of the image.
Basic of Photo Editing3. Adjusting the Brightness/ContrastIncrease in contrast and you increase the separation between the dark and the bright, making shadows darker and highlights brighter. Example of Contrast:
PHOTOSHOP - An image editing software developed and manufactured by Adobe Systems Inc. Photoshop is considered one of the leaders in photo editing software. The software allows users to manipulate, crop, resize, and correct color on digital photos. The software is particularly popular amongst professional photographers and graphic designers. • Drawing • Vector Art • Web Designing • GIF • 3D Animation • Photo Editing • Photo Retouching • Photo Manipulation • Graphic Designing • Layout
hardware • RAM – One of the resources that Photoshop loves that affects your work in the application is the amount of RAM on your machine. The recommended RAM to run Photoshop is 1 GB, the amount of RAM usage depends on the size of the files you open. Each file you open in Photoshop uses RAM equal to about 4 times its size • Scratch Disk – a virtual memory; Photoshop takes part of your hard disk and uses it as virtual memory to handle files and tools, especially large files and memory-intensive Photoshop features. When your system is out of RAM allocated for Photoshop, it starts to use the assigned space on the hard disk as memory. External hard disks and network hard disks are not recommended, because they will not be as fast as virtual memory. • “Out of RAM” Errors – an error message when memory requirements exceed the available memory limit. Solution: free up some memory by closing the unwanted files and clear or limit your saved history steps.
PIXEL – a single point color in a digital display. It is composed of varying degrees of three colors: RED, GREEN & BLUE or (RGB). The image size in pixels refers to the number of the number of vertical and horizontal rows of pixels that make up the image. • IMAGE RESOLUTION – the number of pixels per inch used to create an image. An image that measures 10x8 inches at a resolution of 300 pixels per inch (ppi) has pixel dimensions of 3000 x 2400. • RESOLUTION required depends on its purpose or use 72-for WEB 300-PRINTING purposes. • MEGAPIXEL – the unit of measure for the number of pixels captured by a digital camera image sensor, is a million pixel. An 8.0-megapixel camera is capable of creating images with a maximum image size of 3456x2304 pixels(a total of 7,962,264 pixels). The maximum image size of your camera determines the maximum size image you can print. (To determine the maximum print size of the 8.0-megapixel camera, divide the number of pixels by the image resolution. For example, if the camera has an image resolution of 240 ppi, and you shoot a picture with an image size of 3456x2304 pixels, you can print a photo-quality image that is 14.4x9.6 inches. • PIXELATED • TARP CONVERT TO INCHES COLOR MODE • RGB • CMYK • GRAYSCALE
WORKSPACE • menu bar – You will probably already be familiar with the menu bar from other programs. This runs across the top of your Photoshop window, and contains various menu options for Photoshop’s tools. • options bar – The options bar sits beneath the menu bar and holds contextualized options for different tools. It also contains the workspace menu, where you can save and load arrangements of palettes. • toolbox – By default, the toolbox sits to the left of your Photoshop window, and contains shortcuts to Photoshop tools. • palettes – Individual “panes” that hold information or options for working with your file, known as palettes (or panels), float on the right-hand side. Each palette is labeled with a tab, and can be minimized, closed, grouped with other palettes, or dragged in and out of a panel dock. In the example that follows, the Navigator palette contains a thumbnail of the image that allows you to zoom in or out of the image quickly, and to change the part of the image displayed on the screen. • document windows – Each open document has its own document window with a status bar along the bottom. The status bar sits to the right of the zoom percentage displayed in the bottom left-hand corner, and displays information that’s specific to the document.
Creating New Documents Opening Files • Ctrl-O Saving Files • Ctrl-S Saving Files for the Web There are three formats for web graphics: GIFs, JPEGs, and PNGs • GIF. The GIF format (pronounced “jiff” or “giff” depending on which side of the tracks you grew up) can have a maximum of 256 colors. GIF files support transparency and animation, and work best with graphics that have large areas of the same color, as shown in the logo below. • JPEG. The JPEG format (pronounced “jay-peg”), works best with photographic images or images that have more than 256 colors and gradients, such as the flower on the opposite page. Images saved in JPEG format are compressed, which means that image information will actually be lost, causing the image to degrade in quality. • PNG. The PNG format (pronounced “ping”) is similar to the GIF format in that it supports transparency and works best with solid-color images but it’s superior to the GIF format as it has the ability to support true levels of transparency for colored areas.
PHOTOSHOP LAYERS - Layers are a powerful feature of Photoshop that allow you to work on one part of an image without disturbing the rest of it. While the concept of layers may seem intimidating at first, once you get the hang of using layers you’ll wonder how you ever survived without them!You can show and hide each layer in an image by clicking on its corresponding eye icon in the Layers palette, as shown at the bottom of the following page To organize your layers, you can arrange them into layer groups by going to Layer > New > Group…. Each layer group displays in the same way as any ungrouped layers on the Layers palette. A layer group is signified by a folder icon. You can collapse or expand layer groups by clicking on the triangle to the left of the folder icon, and nest layer groups within each other by dragging one folder icon into another.
Selection Tools • The Marquee Tools are used for selecting objects such as rectangles, squares, and ellipses. • The Move Tool is used to move selections, objects, and layers. • There are several Lasso Tools which are used to make irregular selections. There is a polygonal lasso tool for polygon selections, and a magnetic lasso tool which automatically follows edges of objects. • The Magic Wand Tool selects an area of similar colors in a single click (such as the white in the cloud logo). • The Crop Tool allows users to redefine their active image area but not resize the ENTIRE image. It’s sort of like cutting out a smaller picture from a larger photo with a pair of scissors.
Retouch Tools • There are several healing tools in Photoshop which are used to repair imperfections in images, or handle blemishes and red-eye. • The Dodge Tool lightens parts of an image while the Burn Tool darkens. The Sponge Tool is used to saturate, or desaturate parts of an image. • The Sharpen Tool is used to sharpen edges in an image, while the Blur Tool burs edges. The Smudge Tool smudges an image, similar to using fingerpaint. • The Eraser Tool can be used to erase parts of an image, selection, or layer. • With the Clone Stamp Tool, a user may select a source starting point somewhere on an image, and then paint elsewhere using that starting point as a reference, effectively cloning the source.
Painting Tools • The Brush and Pencil tools are used to paint strokes in graphics. These tools can be highly customized for very effective painting. • The Fill Tools are used to fill entire layers, selections and areas with a solid color, or gradient.
Vector Drawing & Type Tools • Cutom Shapes are vector objects that can be created on the fly from a list of presets (including user created shapes). • The Type Tools are used for creating and setting type in an image. Both vertical and horizontal type can be created. • The Pen Tools are used to create clear shapes and paths which can be used as vector objects that can be scaled to any size.
Foreground / Background Color • A foreground color and background color can be set to be used to paint with, color text, and fill objects among other things. This view provides an easy way to see what colors are currently selected, and allows for easy switching between two different colors. The Power of Layers • Layers allow you to stack different objects and images to keep your work separated, ordered, and easily editable. Adjustment Layers • Adjustment layers in Photoshop provide a quick, non-destructive way to edit and make changes to your photos. In this tutorial we will cover some of the different types of adjustment layers and how they work. You can use adjustment layers individually or combine them to create compound effects. Levels • You can use the Levels dialog box to correct the tonal range and color balance of an image by adjusting intensity levels of image shadows, midtones, and highlights. Curves • The Curves dialog box or Levels dialog box to adjust the entire tonal range of an image. Color Balance • Color balance is used in removing unwanted color casts caused by incandescent light, florescent light, mercury vapor lighting, or odd color casts from hazy, smoggy, cloudy, or foggy weather conditions.
Brightness and Contrast • The Brightness/Contrast command doesn’t always do a great job of brightening (making an image darker or lighter) or adding or deleting contrast. The problem with the Brightness/Contrast command is that it applies the adjustment equally to all image areas. • When using the Brightness/Contrast command, select only the areas that need the correction. Black and White • Using the black and white adjustment layer allows you to add tints to your photos. Hue / Saturation • The hue/saturation adjustment layer allows you to target specific colors and change them. Channel Mixer • The channel mixer adjustment layer allows you to create a black and white image from your color image, with far more options than going to image>grayscale. Gradient Map • The gradient map adjustment layers can add subtle or not so subtle color effects to your photos. Photo Filter • The photo filter adjustment layer has several different options. The warming filter takes out some of the blue in the photo and adds some orange. The cooling filter does the opposite – it adds more blue and takes out the orange. The warming filter also makes a great sepia tone affects for black and white photos. Posterize • The Posterize adjustment layer flattens the colors in the image and allows you to set a number of levels of colors to allow. This filter gives the photo a sort of illustrated effect.
Basic Formatting How to Use the Free Transform Tool • The free transform tool can be daunting if you don’t know how to use it. The tool has a lot of hidden options that make it quite powerful. Warp Transform Tool • This tool ads a grid over the shape and allows you to distort and warp specific points of the shape.
Creating your own Effects and Styles • A. Style Presets – List of the Style Presets. • B. Effects – The various effects that can be used in a layer style. It’s important to note that by clicking on the name of any of the effects will enable that effect, and display the options for the individual effect. • C. Options / Settings – When the name for an effect is checked, it’s options will be shown here. When Blending Options is selected, settings such as Opacity, Fill, and other advanced options will be displayed. • D. Layer Style Preview – A preview of the Layer Style. • Effects (B) can be enabled by checking them, and likewise, disabled by unchecking them. To edit an effect, you need to click the name (rather than checkbox). The effects settings will be displayed in the Options area (C), where they can be easily adjusted. To apply a set of effects and options, simply press OK. • To add your own layer effects, and create your own styles, go to Layer > Layer Style > Blending Options, or Right Click your Layer, and select Blending Options. This will bring up the Layer Style Options.
Layer Effects Styles can be built with the following effects: • Drop Shadow – Creates a shadow behind the layers contents. • Inner Shadow – Creates a shadow on top of the layers contents. • Outer Glow - Creates a glow behind the layers contents. Cannot be distanced like the drop shadow. • Inner Glow – Creates a glow on top of the layers contents. Again, cannot be distanced like the inner shadow. • Bevel and Emboss - Used to create unique highlight and shadow effects on a layers contents. • Satin - Gives the layer contents a satin-like, glossy appearance. • Color Overlay - Fills the layer contents with a solid color. • Gradient Overlay - Fills the layer contents with a gradient. • Pattern Overlay - Fills the layer contents with a pattern. • Stroke - Creates an outline on layer contents using a solid color, gradient, or pattern.