Download
1 / 23
230 likes | 355 Views
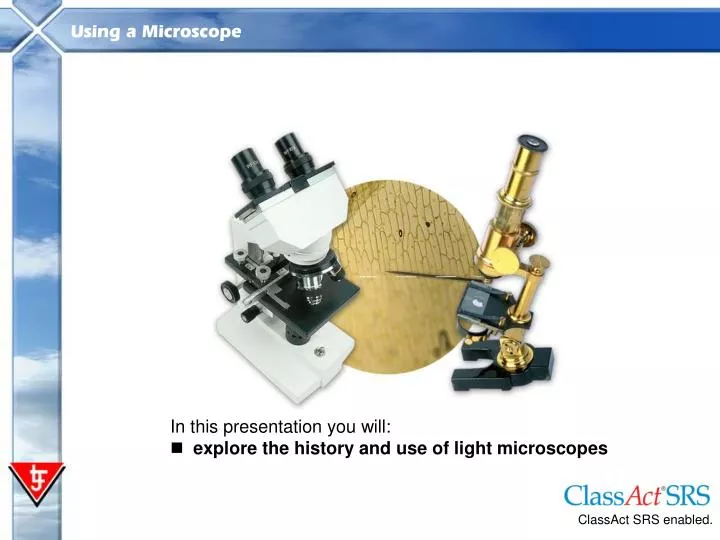
ClassAct SRS enabled. In this presentation you will: explore the history and use of light microscopes.

E N D
ClassAct SRS enabled. • In this presentation you will: • explore the history and use of light microscopes
In this presentation, you will explore the history of microscopes. You will learn about how the light microscope works. You will also learn how to create biological drawings from things you see under the microscope. Next >
Janssen – Lenses in a Tube Around 1590, two Dutch spectacle makers, Hans Janssen and his son Zacharias, reputedly discovered that nearby objects appear greatly enlarged if they are viewed through several lenses in a tube. In 1609, the Italian inventor and scientist Galileo Galilei developed his first occhiolinoor compound microscope. This included both a convex and a concave lens. Next >
Robert Hooke – the English Microscopist In the mid-17th century, the English microscopist Robert Hooke made a series of improvements upon Galileo’s design. Hooke noticed that samples of cork were made up of microscopic box-like units. He called them cells. We now know that there are thousands of different types of cells in animals and plants. Next >
Leeuwenhoek – the Father of Microbiology The Dutch scientist, Anton van Leeuwenhoek, developed new methods for grinding and polishing tiny lenses about ten years after Hooke’s discoveries. These lenses could magnify objects up to 270 times their normal size. Leeuwenhoek was the first to be able to see and describe bacteria, yeast and blood cells. He also saw and described microscopic plants and animals, which he called “animalcules”. Next >
Question 1 Which of the following microscopists first defined the cell? A) Janssen B) Leeuwenhoek C) Hooke D) Spencer
Question 2 Which microscopist first developed lenses that could magnify up to 270 times? A) Janssen B) Leeuwenhoek C) Hooke D) None of the above
The Parts of the Light Microscope 1. Slide/Slide micrometer 2. Eye piece micrometer 3. Eye piece lens 4. Course adjustment dial 5. Fine adjustment dial 6. Objective lens nose 7. Base 8. Clips 9. Stage 10. Diaphragm 11. Power supply and switch 12. Light and condenser Next >
What the Parts of the Light Microscope do 1. Eye piece micrometer 2. Eye piece lens 3. Objective lens nose Eye piece lens magnifies image Diaphragm – adjusts circumference of light source Base is weighted to keep steady Rotating nose – For changing objective lens being used Eye piece micrometer magnifies objects Coarse adjustment for large focus movement Fine adjustment for small focus movement Stage – for supporting specimen slide Condenser focuses light through the stage Clips – to retain specimen slide to stage 4. Clips 5. Coarse adjustment dial 6. Fine adjustment dial 7. Stage 8. Diaphragm 9. Base 10. Light and condenser Next >
Question 3 What is the purpose of the diaphragm on a light microscope? A) It magnifies the specimen B) It holds the glass slide in place C) It changes the objective lens being used D) It adjusts the amount of light that is directed through the specimen
Guidelines for Using the Light Microscope Microscopes are expensive instruments. They must be handled with care in order to avoid damage. Keep the instrument in a box or under a cover when not in use. Use only the supporting arm of the microscope to lift it. Next >
Guidelines for Using the Light Microscope Always support the microscope with one hand underneath. Keep the lenses clean by wiping with lens tissue. Never touch lenses with fingers. Always handle slides at the edges. Next >
Total Magnification The total magnification of an image is equal to the magnifying power of the eye piece lens, multiplied by the magnifying power of the objective lens. For example, if a ×10 objective lens is used, assuming the eye piece magnification is ×10, the total magnification of the image will be (×10) × (×10) = ×100. Next >
Select the Lowest Power Objective Lens It is normal practice to look at a specimen at the lowest available resolution first, then to look more closely at the specimen under a higher resolution. To do this, put the ×4 objective lens in place and position the nose piece so that it lies directly above the hole in the stage. The magnifying power of a lens is usually inscribed on its barrel. Next >
Placing the Slide on the Stage Place the slide on the stage, so that the specimen is over the middle of the hole on the stage. Make sure that light is shining through it and then secure it in place with the clips. This will help to prevent the slide from being dislodged when you are viewing it. Next >
Lowering the Objective Lens Look at the stage and the slide from the side. Then lower the objective lens using the coarse focus dial. Lower the lens until it is about 5 mm above the slide. This is to ensure that the slide is not crushed and damaged by the objective lens. Next >
Getting the Specimen into Focus Looking through the microscope eye piece, use the coarse focus dial to move the objective lens slowly upwards (never downward, as you could easily crush and break the slide). Do this until the specimen comes into focus. Try to keep both eyes open. This will help to prevent eye strain and headaches. Next >
Adjusting the Diaphragm The diaphragm can be adjusted to let different amounts of light through the specimen. This is because specimens vary in thickness. Finding the amount of light that produces the best viewing results for each specimen is often a matter of trial and error. Next >
Minor Focusing Adjustments The fine focus dial alters the height of the stage more accurately than the coarse focus dial. You may need to make minor adjustments to the objective lens using the fine focus dial to get your specimen into sharp focus. Next >
Question 4 What part of the microscope is used to make the final focusing adjustments? A) The diaphragm B) The coarse focusing dial C) The fine focusing dial D) The objective lens
Biological Drawings There are two main reasons why it is useful to make drawings of biological specimens: • As a record of what you have seen • As a way of studying the specimen in more detail Next >
Question 5 Which of the following is NOT a guideline for preparing a biological drawing? A) A scale line should be added to the drawing B) Drawings should not have annotations C) You should draw what you see D) Labels should be neat.
Summary After completing this presentation you should be able to: • show knowledge and understanding of the history of light microscopes • show knowledge and understanding of how a light microscope should be used End >