Download
1 / 23
240 likes | 474 Views
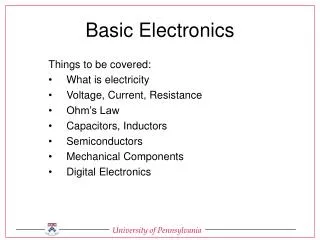
Basic Electronics- DC. Soldering & Circuit Fabrication. Presentation Overview. Terms and Definitions Soldering Tools & Materials and their Uses Cleaning Before & After Soldering Stripping and Tinning Soldering Procedure Characteristics of a Good Solder Connection

E N D
Basic Electronics- DC Soldering & Circuit Fabrication
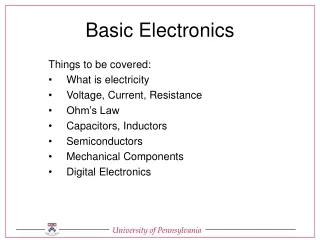
Presentation Overview • Terms and Definitions • Soldering Tools & Materials and their Uses • Cleaning Before & After Soldering • Stripping and Tinning • Soldering Procedure • Characteristics of a Good Solder Connection • Types of Poor Solder Connections & Causes • Types of Soldered Connections
Terms and Definitions • Oxides- Films and impurities which form on the surface of metals when exposed to air or water and which , if not cleaned off, will prevent a good bond between the surfaces and solder • Rosin- A material obtained from pine trees which is used during soldering to help ensure a good bond between the solder and the solder and the metal surfaces • Wetting- The ability of molten solder to flow over and fuse completely with the metal surfaces to which it is applied (NOTE: Dirt, grease, and oxides prevent good wetting during soldering.) • Stripping- Removing insulation from electrical conductors
Terms and Definitions (cont’d) • Tinning- The application of a small amount of solder to surfaces to be soldered to help ensure good wetting during soldering • Flux- A liquid or solid which when heated cleans and protects surfaces to be soldered • Crimping- Applying mechanical pressure to compress a sleeve-type or cup-type electrical terminal to ensure a good electrical connection between the sleeve and the conducting wires it contains • Land- Printed wiring attached to the surface of a printed circuit boards
Soldering Tools & Materialsand their Uses (A) • Soldering Iron, 100 watt- For soldering large electrical connections • Soldering Pencil, 10 to 35 watt- For soldering small electrical connections • Soldering Gun, 100 watts- For soldering large electrical connections where better heat control is required • Resistance Soldering Unit- For soldering many connections in close spaces • Adjustable Power Source-For controlling soldering iron tip temperature (NOTE: Variac is a commonly used adjustable power source.) • Soldering iron stand- For supporting a hot soldering iron when not in use • Heat sink- For drawing heat from soldered connection to prevent damage ot components • Mechanical wire strippers- For cutting and pulling insulation from ends of connectors • Thermal wire strippers- For removing wire insulation by heating and melting the material; prevents removing wire strands, but cannot be used on insulation that will not melt, such as glass braid or asbestos • Crimping Tool- For making a strong mechanical connection to certain sleeve-type terminals • Nail Nippers- For use in clipping component leads flush with surface
Soldering Tools & Materialsand their Uses (B) • Component lead cleaner- For removing oxides and other films from component leads • Typewriter eraser- For removing oxides and other films from terminals to be soldered • Isopropyl Alcohol- For removing oil, grease, and flux from conductors and terminals both before and after soldering • Solder-For making electrical connections; most common type is 60/40 rosin-core solder containing 60% tin and 40% lead, with a center core of rosin flux to allow simultaneous application of both solder and flux • Long nose and Needle nose pliers- For making mechanical connection prior to soldering; may also be used as heat sink during soldering • Diagonal cutting pliers- For cutting conductors • Flux- For ensuring a good electrical connection by cleaning and wetting all surfaces during soldering; not required if the solder contains a rosin core • Solder sucker- For removing melted solder from a terminal to be re=soldered (NOTE: There are many different brands available including Soldawick and Soldavac, etc.) • Spaghetti-sleeve insulation- For preventing electrical connections from becoming shorted to adjacent connections • Heat-shrink insulation- Sleeve-type insulation which, when heated, shrinks to form a snug fit over a soldered connection
Cleaning before and after soldering (CAUTION: Use safety goggles or glasses when soldering) • Oil, grease, and dirt- Wipe with isopropyl alcohol and clean cloth • Old Solder- Heat with soldering iron, and wick away, or suck up by means of a solder sucker • Oxides 1. Component leads- Use component lead cleaner • Terminals- Use typewriter eraser • Rosin flux- Wipe or brush with isopropyl alcohol or flux cleaner (CAUTION: Use alcohol only in well-ventilated spaces and do not permit open flames in the vicinity.)
Stripping and Tinning • Make clean cut at wire end by cutting off small length with diagonal cutting pliers • Lay wire in proper size slot of wire strippers and strip approximately one inch of insulation from wire end (CAUTION: If too small a slot in wire strippers is used for stripping, the strippers will cut off some of the wire strands. This could result in an electrical connection of higher resistance than desirable.)
Stripping and Tinning (cont’d) • Care must be taken not to remove wire strands when stripping • If wire strands have been separated, gently re-twist wire in same direction as original twist • After stripping, clean the wire strands with isopropyl alcohol and paper towel • Place heat sink on wire strands immediately adjacent to wire insulation before tinning • Tin soldering iron tip as follows: • Wrap a piece of solder around tip three or four times • Plug in unit and allow it to heat up, adjust variac to point just past where solder melted • Wipe tin with moist paper towel or wet sponge • As soon as tip will melt solder, coat tip with solder; wipe off excess • If rosin-core solder will not be used, wipe small amount of liquid or paste rosin flux on bare strands of stripped wire • Set hot soldering iron in holder or vise
Stripping and Tinning (cont’d) • Melt small bead of solder on iron tip and slowly draw bare wire through solder bead from heat sink toward wire end; apply additional solder as needed (CAUTION: After the wire has been tinned, the outline of the wire strands should be visible. If they are not, too much solder has been applied. Reheat wire and wipe off excess solder. If some strands are still loose, too little solder has been applied. Reheat wire and apply additional solder.) • Remove heat sink from tinned wire • After solder has cooled, clean the tinned wire with isopropyl alcohol and paper towel or clean cloth
Soldering Procedure • Clean all surfaces to be soldered • Strip and tin wires to be soldered • If electrical connection is to be insulated, slide approximately one-inch length of spaghetti insulation onto the tinned wire • If possible, mechanically connect tinned wire to terminal or lug bt means of long nose or needle nose pliers, make sure distance between terminal and wire insulation is no more than 1/32 to 1/8 inch, depending on wire gauge
Soldering Procedurecontinued • If mechanical connection is not possible, make sure component to be soldered is held stationary in vise or clamp to prevent movement during soldering • Select proper soldering iron for the job, depending on: • Size of connection • Heat sensitivity of components • Proximity of other connections and wires • Heat and tin the soldering iron • Attach heat sink as close as possible to connection without interfering with soldering operation
Soldering Procedurecontinued • If rosin-core solder is not to be used, brush small amount of rosin flux on terminal • While making sure that no part of the connection moves, apply hot iron tip to terminal and wire, and apply solder to wire, component, or terminal lead; remove iron tip and solder as soon as solder has flowed freely over, around, and through the connection • After solder has cooled, clean connection with isopropyl alcohol • If connection is to be insulated, slide spaghetti sleeving over connection • If applicable, remove component from vise or clamp
Characteristics of a GoodSolder Connection • Slivery, shiny appearance to solder surface • Good wetting of solder to surfaces • Solder completely covers connection, but contour of connection is still visible
Characteristics of a GoodSolder Connection • Insulation • No burnt areas • No damaged insulation • Gap between insulation and connection is approximately the diameter of the wire insulation • No spilled solder • No pits or holes in the solder surface
Types of Poor SolderConnections and causes • Cold solder joint- Insufficient heat • Disturbed joint- Connection moved before solder solidified • Excessive solder- Too much solder applied • Insufficient solder- Too little solder applied • Dewetted solder joint- Insufficient cleaning or insufficient use of flux • Burnt insulation- Excessive heat or carelessness with iron • Insulation damage- Excessive heat applied, excessive iron application time, or lack of heat sink • Rosin solder joint- Excessive rosin or insufficient heat • Solder short- Excessive solder or carelessness
Types of soldered connectionsA. No mechanical connection prior to soldering
Types of soldered connectionsB. Partial mechanical connection prior to soldering
Types of soldered connectionsC. Full mechanical connection prior to soldering
Presentation Summary • Terms and Definitions • Soldering Tools & Materials and their Uses • Cleaning Before & After Soldering • Stripping and Tinning • Soldering Procedure • Characteristics of a Good Solder Connection • Types of Poor Solder Connections & Causes • Types of Soldered Connections