Download
1 / 166
1.71k likes | 1.93k Views
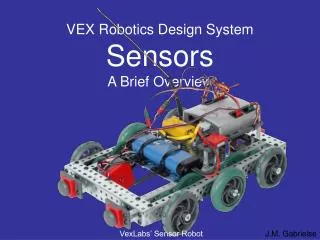
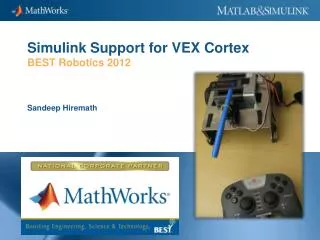
VEX Cortex System Overview. VEX Cortex Microcontroller. VEX Cortex (VEX 2.0) 12 digital ports Touch Sensor, Ultrasonic Rangefinder, Shaft Encoders 8 analog inputs Light Sensors , Line Tracking Sensors, Potentiometers, Accelerometers, Gyroscope 10 motor ports 8 standard 3-wire PWM

E N D
VEX Cortex Microcontroller • VEX Cortex (VEX 2.0) • 12 digital ports • Touch Sensor, Ultrasonic Rangefinder, Shaft Encoders • 8 analog inputs • Light Sensors, Line Tracking Sensors, Potentiometers, Accelerometers, Gyroscope • 10 motor ports • 8 standard 3-wire PWM • 2 new 2-wire motor ports • Built-In VEXnet Connection • Enables Wireless Programming, Wireless Debugging, and Remote Control • Two UART Ports (Serial) • LCD Screen, Other External Devices • One I2C port • Will connect to multiple new smart sensors
Industry Standard Skillsets Java and C++, along with the Eclipse and Visual Studio IDE’s have been used to program: • Microsoft Windows • Mac OSX • US Navy UAV Drones • Flight Simulators • DVD Player Firmware • Video Games • Microwaves • CAT Scanners • Smart Cars • Satellites • Cell Phones • Electronic Toys • ROBOTC! • Much, much more!
Platform Type Allows you to toggle ROBOTC’s programming mode between the VEX PIC and VEX Cortex, will enable features and commands for the system
Sample Programs Over 75 Included ROBOTC Sample programs, organized by robot behavior
Comments • Comments are used to make notes in code for the human programmers • Every sample program contains comments pertaining to robot configuration, ROBOTC commands, robot behavior, ect • // Single line comment – everything after “//” is ignored by the ROBOTC compiler • /* Multi-line comment*/ - everything between the “/*” and “*/” symbols is ignored by the ROBOTC compiler
ROBOTC Help In-depth explanations about the ROBOTC interface, commands, debugger, ect
Function Library Lists the available functions, with a description. List of available functions will expand or shrink depending on the “Menu Level”
Menu Level Customizes the ROBOTC interface and Function Library based on the user’s experience level
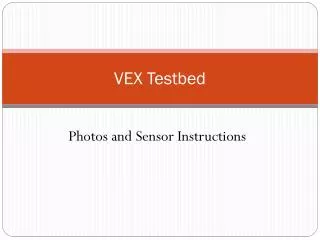
Testbed Motors and Sensor Setup • Configure all Motors and Sensors with one click
VEX Cortex Download Method Allows you to specify: • How programs are downloaded • Whether the Cortex looks for a VEXnet connection when it starts up “Download Using VEXnet or USB” is always the safe choice, but the Cortex will look for a VEXnet connection for up to10 seconds before running code. Use Download Using USB only if not connecting wirelessly.
Connect the Cortex • Connect the Cortex to your computer using the USB A-to-A cable. • Connect the Cortex to a chargedrobot battery • Turn the Cortex ON
ROBOTC Preferences 4. Go to View > Preferences > Detailed Preferences
Platform Type 5. Select Natural Language Library (VEX Cortex) as the Platform Type 6. Select “Automatic Selection” as the Comm Port 7. Press OK to save your changes
ROBOTC Natural Language • The Natural Language is an additional Platform Type in ROBOTC:
Your GTT Testbed • 1 Claw • MOTOR Port 1 • 2 Motors • MOTOR Ports 2 & 3 • 1 Limit Switch • DIGITAL Port 1 • 1 Bumper Switch • DIGITAL Port 2 • 1 Green LED • DIGITAL Port 12 • 1 Line Tracking Sensor • ANALOG Port 1 • 1 Potentiometer • ANALOG Port 2
GTT Standard Model Use the Standard Robot Model Configuration for the GTT Testbed OR…
GTT Testbed Wiring Guide Follow this diagram and the next several slides to configure the Test bed motors and sensors
Configuring Inputs and Outputs Begin by opening the PLTW Template Then save your program under a new name.
Configuring Inputs and Outputs Then open the Motors and Sensors Setup Window to configure the motors and sensors connected to your Testbed
Digital Sensors Note: Digital Sensors can be configured as both inputs (touch sensors) and outputs (LEDs).
Naming Conventions • The names of your motors and sensors follow the same conventions as variable names (which you will learn more about later on): • Must be all one word (leftMotor, frontLight, etc.) • Cannot contain any special characters (%, ^, #, etc.) • Cannot already be a ROBOTC “Reserved Word (while, motor, task, etc.)
#pragma statements • The Motors and Sensors Setup will automatically generate configuration pragma statements. • Only configuring the motors and sensors you need in a program is generally a good practice.
ROBOTC Debugger • The ROBOTC Debugger allows you to view and manipulate all of the values of your motors, sensors, timers, and variables. • Now that we’ve configured the motors and sensors, let’s view their values using the ROBOTC Debugger.
ROBOTC Debugger • Make sure your robot is connected to your computer and turned on, and download the program. • When the Program Debug Window appears, press the Start button and make sure the Refresh Rate is set to Continuous.
ROBOTC Debugger • Open the Sensor Debug window by going to Robot > Debug Windows > Sensors
Sensor Debug Window • The Sensor Debug window will appear, and display all of the values of the configured sensors.
Behavior Based Programming • A behavior is anything your robot does: • turning on a single motor, moving forward, tracking a, navigating a maze • Three main types of behaviors: • basic behaviors – single commands to the robot (turn on a motor) • simple behaviors – simple task performed by the robot (move forward, track a line) • and complex behaviors – robot performs a complex task (solve the maze) • Complex behaviors can always be broken down into simple behaviors, which are then broken down into basic behaviors
Pseudocode • Pseudocode is a shorthand notation for programming which uses • informal programming structures (if touch1 is pressed…) • verbal descriptions of code (move forward, stop) • Emphasis is placed on expressing the behavior or outcome of each portion of code rather than on correct syntax (it should be reasonable, though). • Your lines of Pseudocode should also be listed in the same order as they will appear in the ROBOTC Program
Pseudocode • Sample Pseudocode:
Pseudocode • Additional Details: • Pseudocode is used to outline a program before translating it into proper syntax. • Helps in the initial planning of a program, by creating the logical framework and sequence of the code. • An additional benefit is that it can be translated into different programming languages and is therefore somewhat universal.
Putting it all Together • Effective Program Planning is essential to writing correct code. Carrying out that plan is equally important! • Once you have your plan, don’t try to implement it all at once! • Systematically add sections of code, testing at every step!
ROBOTC Natural Language • New, developed specifically for PLTW • Goal is to lower the barrier of entry into syntax-based programming by simplifying the code and using more “natural” command names • Lines of code for common robot behaviors are consolidated into single commands • forward(); • lineTrackforTime(); • stop(); • untilBump();
ROBOTC Natural Language • The Natural Language is an additional Platform Type in ROBOTC:
ROBOT Motion • Commands that cause the entire robot to perform a behavior
Setup • Allows you to specify what type of robot configuration you have from pre-specified models (RECBOT, Swervebot)
Movement • Commands that allow you to control individual motors
Special • Commands that control the more unique VEX Hardware – LED’s
Until • Commands that allow you to create behaviors where the robot acts “until” a certain event • Button Press • Line Tracker Value • Potentiometer Value