Download
1 / 47
470 likes | 479 Views
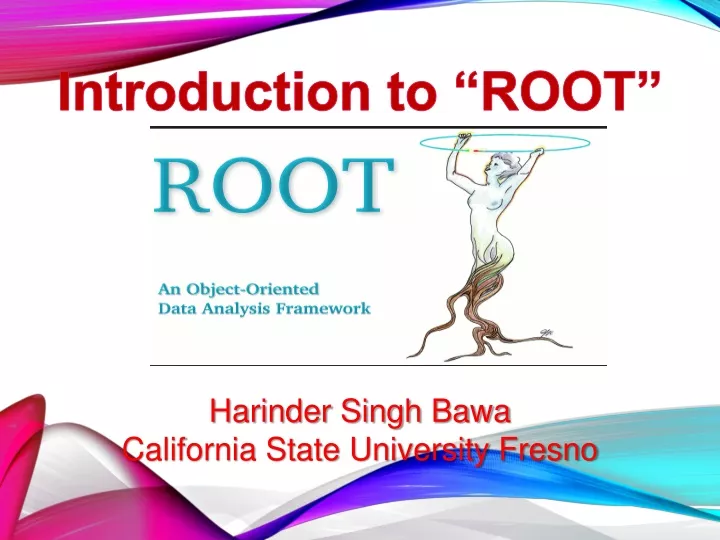
Introduction to “ROOT”. Harinder Singh Bawa California State University Fresno. Outline . Revision of Linux environment (First two weeks) Introduction to CERN ROOT Installation of CERN ROOT Browsing ROOT. Before we Proceed: Week2: scp command.

E N D
Introduction to “ROOT” Harinder Singh Bawa California State University Fresno
Outline • Revision of Linux environment (First two weeks) • Introduction to CERN ROOT • Installation of CERN ROOT • Browsing ROOT Dr. Harinder Bawa
Before we Proceed:Week2: scp command • Exercise: Transfer a file from your computer to lxplus account. • Log-in to lxplus and move it to /tmp/username • Transfer a file from /tmp/username to your current working dir. => Probably not clear: You need to exit from lxplus and then do last point. Sol: scp file.txt bawa@lxplus.cern.ch:. (. Or ~/. Means it transfers file to home dir) sshbawa@lxplus.cern.ch > mv file.txt /tmp/bawa/. Exit scpbawa@lxplus.cern.ch:/tmp/bawa/file.txt . Dr. Harinder Bawa
Shells • The shells is a part of the interface for control of linux • There are a number of options, the two most common are: • tc (or c) shell (tcsh) • bourne shell (bash) • Change your shell with chsh • Pick a shell and stick to it, but can be useful for a new account somewhere. Dr. Harinder Bawa
Environment variables • Much of your linux environment is set by environment variables • These are access via the $sign • eg $HOST • To view your environment use env • Prints out all your environment variables • Use echo to view an individual one • Echo $HOST Dr. Harinder Bawa
Setting environment variables • You can set your environment variables using • setenv(tc shell) • setenv ROOTSYS /user/local/root • export (bash shell) • export ROOTSYS=/user/local/root • This creates the variable if it doesn’t already exist or updates if it does • Typically the environment variables you set yourself will be to tell programs where to find things. Dr. Harinder Bawa
Your PATH • Your path is an environment variable • $PATH (check by echo $PATH) • It contains all the directories that your OS will look in to find the programs you want to run • The path should contain “.” to ensure that you don’t need to specify it while running local program • Entries are separated by “:” • Update your path with setenv PATH /newdir:$PATH Dr. Harinder Bawa
Introduction to ROOT Dr. Harinder Bawa
What is ROOT? • ROOT is an object oriented framework • It has a C/C++ interpreter (CINT) and C/C++ compiler (ACLIC) • ROOT is used extensively in High Energy Physics for “data analysis” • Reading and writing data files • Calculations to produce plots, numbers and fits. WHY ROOT ? • It can handle large files (in GB) containing N-tuples and Histograms • Multiplatform software • Its based on widely known programming language C++ • Its free Dr. Harinder Bawa
ROOT and C++ • As with everything in this course there is good documentation on the WEB • In the case of ROOT there is one specific place. http://root.cern.ch • This is the place to download root from should you need it. • There is lots of documentation and examples. • Few examples are in $ROOTSYS/tutorial Dr. Harinder Bawa
Object Oriented COncepts • Class: the description of a “thing” in the system • Object: instance of a class • Methods: functions for a class Members: a “has a” relationship to the class. • Inheritance: an “is a” relationship to the class. Dr. Harinder Bawa
ROOT Installation • Installation of Root is little tricky. One need to follow exact instructions but not guaranteed(Depends upon version of ROOT and Ubuntu(Linux)) • Before we start ROOT Installation, we need to install pre-requisite and make sure it installs that ! • https://root.cern.ch/build-prerequisites Dr. Harinder Bawa
From ROOT Webpage: Use sudo apt-get install _package_ or use the graphical "Synaptic Package Manager" program. Required packages: sudo apt-get install gitdpkg-dev cmake g++ gccbinutils libx11-dev libxpm-dev \ libxft-dev libxext-dev Optional packages: sudo apt-get install gfortranlibssl-dev libpcre3-dev \ xlibmesa-glu-dev libglew1.5-dev libftgl-dev \ libmysqlclient-dev libfftw3-dev libcfitsio-dev \ graphviz-dev libavahi-compat-libdnssd-dev \ libldap2-dev python-dev libxml2-dev libkrb5-dev \ libgsl0-dev libqt4-dev Dr. Harinder Bawa
Download ROOT in mainly 2 ways * https://root.cern.ch/downloading-root • Sources from released versions: • ROOT's sources can be downloaded for each of the releases and unpacked with • $ wgethttps://root.cern.ch/download/root_<ver>.source.tar.gz • $ tar -zxf root_<version>.source.tar.gz * Source: https://root.cern.ch/get-root-sources Dr. Harinder Bawa
Using GIT Repository • The purpose of Git is to manage a project, or a set of files, as they change over time.Git stores this information in a data structure called a repository • Direct Git repository access: • The main advantages of using the trunk are: • You get the most recent features • You can easily benefit from bug fixes should you find one • To fix or extend ROOT you can change ROOT's sources yourself and send the changes (git diff) as feedback • The entire ROOT source can be obtained from our public Git repository: • $ git clone http://root.cern.ch/git/root.git Dr. Harinder Bawa
Following steps will work on all systems • Next we will move to the directory where we will install ROOT: • $ cd /usr/local/ (Recommended) • To download the ROOT files run the following command: • $ sudogit clone https://github.com/root-mirror/root.git • Next we will change the ownership of the folder root with: • $ sudochown -R "username“:”groupname” root Or command line magic • $sudochown -R $(whoami):$(id -g -n $(whoami)) root Dr. Harinder Bawa
Sometime Life is not so easy : Dr. Harinder Bawa
Building ROOT: cd root ./configure --all Dr. Harinder Bawa
Building ROOT: • make Dr. Harinder Bawa
Not everytime, We are lucky • Root we downloaded using “git” check out the latest version of root. • Sometime, Ubuntu/linux is old enough to be compatible with libraries. For eg : cmake needs to be higher than 3.8 but Ubuntu 14.04 have 2.8 • One can choose little older version(specific tag) of ROOT • $ cd root • $ git tag -l • $ git checkout -b v6-04-02 v6-04-02 Dr. Harinder Bawa
Env. Variables Dr. Harinder Bawa
Env. Variables New SHELL Dr. Harinder Bawa
Setting up ROOT • You need to have the environment variable ROOTSYS set to the root install directory. export $ROOTSYS=/usr/local/root (Typical path) • Set root in our PATH export PATH=$PATH:$ROOTSYS/bin • Also need to use LD_LIBRARY_PATH • This tells programs where to look for libraries export LD_LIBRARY_PATH=$ROOTSYS/lib:$LD_LIBRARY_PATH • You may define your root settings in ~/.rootlogon.C • History of all commands are stored in ~/.root_hist Dr. Harinder Bawa
Put permanently in shell(bash) Dr. Harinder Bawa
The Framework Organization Dr. Harinder Bawa
Launching and Quiting ROOT • To launch root: simply root • You should see a splash screen appear, and then root start up in your terminal • root –l (without logo) • root –b(without browser) *Used in running root remotely (using ssh) • To quit root, simply type “.q” Dr. Harinder Bawa
User Interfaces Dr. Harinder Bawa
Setup ROOT IN ATLAS Dr. Harinder Bawa
Setup ROOT IN ATLAS Dr. Harinder Bawa
GUI: Browsing a file • To easily browse a file we use TBrowser • Command : TBrowser b • This makes a TBrowser object called b and then you can quickly look into the contents of the rootfile by clicking the contents.(can be histograms/tree etc) Ex: open following rootfile in root and look whats inside. http://zimmer.fresnostate.edu/~hbawa/rootfiles/user.bawa.7531825._000086.tree.root Dr. Harinder Bawa
Displaying a Histogram • Open the root file • Browse the file • Display the histograms • The Canvas Divide Canvas Dr. Harinder Bawa
Basic Navigation by Clicking Dr. Harinder Bawa
Draw Panel Dr. Harinder Bawa
FIT panel Dr. Harinder Bawa
Adding object to Editor Editor Adding Arrow Adding Text Dr. Harinder Bawa
Modifying the statbox Dr. Harinder Bawa
Modifying the statbox The Canvas in the Browser • Setting the (7) statistics options – default = 1111 If I use: 111111 then Dr. Harinder Bawa
Range of Histogram Dr. Harinder Bawa
HW Exercise-1(50marks) • Download: http://zimmer.fresnostate.edu/~hbawa/rootfiles/user.bawa.7531825._000086.tree.root a) Open a ROOT Browser and search for a rootfile& Open tree named “outTree”& Plot following variables and save as pdf files. • njets - Save as njets.pdf Marks:10 • Mjj- Save as Invariant Mass Marks:10 • yStar- Save as ystar.pdf Marks:10 • yBoost- Save as yBoost.pdf Marks:10 b) Open a canvas, Divide into 4 parts as (2x2) and draw above 4 plots and save as pdf file named “Canvas.pdf”Marks:10 Dr. Harinder Bawa
HW Exercise-2 (50 marks) a) Plot “mjj” in logY scale and color the line of plot as “red”. Save as “mjj_logY.jpg” Marks:10 b) Open a canvas. Plot “mjj” and “m3j” on same canvas superimposed on each other. Put mjj color as “Green” and m3j as “Blue”. Save as “Superimpose.png” Marks 10 c) Plot “pTjj” and modify StatBox so that it shows Underflow and Overflow bins Marks 10 Teaser: Marks 20 Plot “jet_E” from range 200-3500 GeV. Set Xaxis title as “Jet Energy[GeV]”, Y Axis title as “Events”. Dr. Harinder Bawa
EXTRA Dr. Harinder Bawa
Open/Loading a file • To load a file , type in root prompt: Root> TFile f(“file.root”) • This creates a TFile object called f • The object f is attached to the file “file.root” • F is a real object and therfore you can use all of TFile member functions. • f->Close() close the file • f->ls() list the objects in a file Dr. Harinder Bawa
Data Storage in ROOT • There are a number of ways to store and present data in ROOT: • Graphs • A bit like EXCEL: plot x vs y • Histograms: • Stored as Binned data • Ntuples : Tables • Trees : Extension of ntuples Dr. Harinder Bawa