Download
1 / 18
190 likes | 411 Views
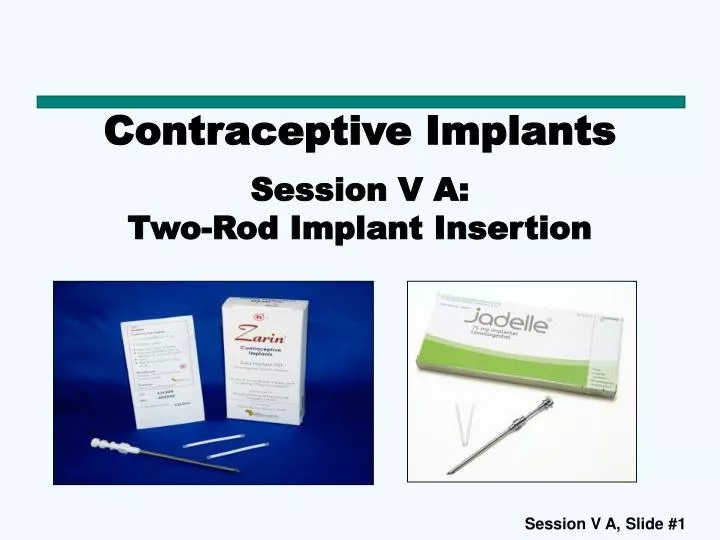
Contraceptive Implants Session V A: Two-Rod Implant Insertion. Two-Rod Implant Insertion: Required Equipment. An examination table Sterile surgical drapes and gloves Antiseptic solution Local anesthetic, needles, and syringe #10 trocar, forceps, #11 scalpel (optional)

E N D
Contraceptive Implants Session V A: Two-Rod Implant Insertion
Two-Rod Implant Insertion: Required Equipment • An examination table • Sterile surgical drapes and gloves • Antiseptic solution • Local anesthetic, needles, and syringe • #10 trocar, forceps, #11 scalpel (optional) • Skin closure, sterile gauze, and compresses
Two-Rod Implant Insertion: Trocar The trocar usually has three marks: • The mark closest to the hub indicates how far the trocar should be introduced under the skin to place the implants. • The middle mark (small arrow), if included on the trocar, should be ignored for two-rod implant insertions. • The mark closest to the tip indicates how much of the trocar should remain under the skin following placement of the first implant.
Two-Rod Implant Insertion: Step 1 • Have the client lie on her back with her nondominant arm flexed at the elbow and externally rotated. • The implants will be inserted subdermally and positioned in a “V” shape.
Two-Rod Implant Insertion: Step 2 • Clean the client's upper arm with an antiseptic solution. • Frame the insertion area with a drape that has an opening.
Two-Rod Implant Insertion: Step 3 • Open the package carefully by pulling apart the sheets of the pouch. • Allow the two implants to fall onto a sterile drape.
Two-Rod Implant Insertion: Step 4 • Fill a 5-ml syringe with a local anesthetic, such as lidocaine (1%). • Insert the needle under the skin and inject a small amount of anesthetic. • Anesthetize two areas about 4.5 cm long, to mimic the V shape of the implantation site.
Two-Rod Implant Insertion: Step 5 • Use a scalpel to make a small skin incision (about 2 mm); many providers prefer to use the implant trocar to puncture the skin.
Two-Rod Implant Insertion: Step 6 • Insert the tip of the trocar beneath the skin at a shallow angle. • Gently insert the trocar while lifting the skin; failure to do so may result in deep placement of the implants and could make removal more difficult. • Advance the trocar to the mark nearest the hub of the trocar.
Two-Rod Implant Insertion: Step 7 • When the trocar has been inserted the appropriate distance, remove the obturator and load the first implant into the trocar using the thumb and forefinger.
Two-Rod Implant Insertion: Step 8 • Gently advance the implant with the obturator toward the tip of the trocar until you feel resistance. • Never force the obturator.
Two-Rod Implant Insertion: Step 9 • Holding the obturator stationary, withdraw the trocar to the mark closest to the trocar tip. • Keep the obturator stationary and do not push the implant into the tissue. • Do not completely remove the trocar until both implants have been placed (withdraw only to the mark closest to its tip).
Two-Rod Implant Insertion: Step 10 • The implant should have been released under the skin when the mark closest to the tip of the trocar is visible at the insertion point. • Release of the implant can be checked by palpation.
Two-Rod Implant Insertion: Step 11 • To place the second implant, align the trocar so that the second implant will be positioned at about a 30-degree angle relative to the first. • Fix the position of the previous implant with the forefinger and middle finger of the free hand, and advance the trocar along the tips of the fingers. • This will ensure a suitable distance of about 30 degrees between implants and keep the trocar from puncturing the previously inserted implant.
Two-Rod Implant Insertion: Step 12 • Leave a distance of about 5 mm between the incision (puncture) and the tips of the implants. • This will avoid spontaneous expulsions.
Two-Rod Implant Insertion: Step 13 • After placement of the second implant, a sterile gauze may be used to apply pressure briefly to the insertion site and ensure there is no bleeding. • Palpate the other ends of the implants to make sure that both have been properly placed.
Two-Rod Implant Insertion: Step 14 • Press the edges of the incision together, and close the incision with a skin closure.
Two-Rod Implant Insertion: Step 15 • Apply a sterile gauze and wrap the arm with a pressure bandage. • Before the client is discharged, observe her for a few minutes for signs of bleeding from the insertion site. • Fill out the user card and give it to the client. • Review post-insertion instructions and other key messages. • Clean or dispose of the instruments properly.