Download

1 / 37
530 likes | 820 Views
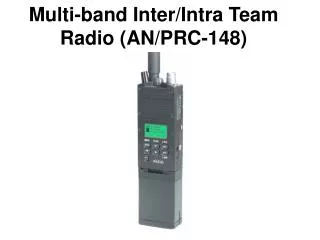
PRC-112B1 Survival Radio. LT R. V. Folga Aerospace Physiologist. This Presentation is: UNCLASSIFIED. Overview. AN/PRC-112B1 System Overview Features Battery replacement Modes Display Hands On Training. System Overview. Use radio IAW CSAR SPINS

E N D
PRC-112B1 Survival Radio LT R. V. Folga Aerospace Physiologist
Overview • AN/PRC-112B1 System Overview • Features • Battery replacement • Modes • Display • Hands On Training
System Overview • Use radio IAW CSAR SPINS • The AN/PRC-112B1 operates in the following modes: • DME • Emergency beacon mode w/ Automatic Direction Finding • 121.5 • 243.0 • Voice communication mode • A & B (225-299.975MHz), 243, 282.8, 121.5 • Encrypted data burst • Position, radio ID, Datum in use, Time, Encryption status, Text Msg • GPS (B1 can track 12 satellites)
ABC 2 DEF 3 1 GHI 4 JKL 5 MN 6 PRS 7 TUV 8 WXY 9 OQZ 0 ENTR SHFT QUIT ENCR DEL PWR LIT 1. Extend radio antenna. 2. Select proper channel on top of radio. 3. Turn radio on (VOL knob). 4. Position unit this side up clear of obstructions. 5. Press GPS ON/OFF button for two seconds. 6. Check Display for at least 3 GPS satellites acquired (A). 7. When 3 satellites lock. ready for interrogation. * If problem occurs, re-cycle GPS power. READY 3D 6 8 12 15 17 23 7 11 S S S S MESG POS NAV MENU QIT LIT MRK SND PWR DEL T A L K HOOK SYSTEM Remote Display Unit on AN/ARS-6(V) equipped rescue aircraft RADIO/TRANSPONDER INTERROGATION/RESPONSE QUICKDRAW INTERROGATION/RESPONSE RELAY RESPONSE AN/PRC-112B OR AN/PRC112B1 INTERROGATOR
AN / PRC-112B1 Radio Vol ON/OFF GPS Antenna Display Menu Keys (soft) Menu Keys (hard) Radio Antenna
Radio Features 112B 112B1 BACKLIGHT Display Only Display and Keypad GPS RECEIVER 8 Channel 12 Channel Time To First Fix 13 min Minimum 45 seconds Minimum 45-60 min Max 6 minutes Maximum Battery Life Radio only - 6 hrs Radio only - 7 hours Radio/GPS - 4 hrs Radio/GPS - 6 hours Waypoints 99 Maximum 250 Maximum Dual GPS/DME Ops Not available Supported - GPS will not power down during DME/PLS operation
Battery Installation/replacement • Step 1. pull, and hold, the battery latch away from the battery pack. • Step 2. rotate the battery pack counterclockwise, and separate from the radio. • Step 3. connect the new battery pack to the battery connectors, and rotate clockwise until flush with equipment. Ensure battery latch is engaged.
Power On/Off • Radio VOL/ON/OFF • Must be turned on in order to be interrogated and TX/RCV voice • CANNOT Send databurst without Radio on • GPS PWR • Turns ONLY the GPS receiver on and off • Setting the Radio VOL/ON/OFF to OFF also turns off the GPS appliqué - will give user 5 sec to abort.
Radio Operating Modes • Voice Mode • Line-of-Site (LOS) • Five selectable freqs • UHF Band: 243, 282.8 • VHF Band: 121.5 • Two programmable frequencies UHF (225-299.975MHz) • Data burst (.5 sec) • Canned and Free-form messages from GPS portion of 112B1 Channel/Mode Selector
LOS Communications • It is a Line of Sight radio • Cone of Silence • Your body will interfere with line-of-sight • Do not ground out antenna • Touching the bolt of the antenna will interfere with transmission • Do not allow anything to touch antenna
GPS Menu Structure POS NAV MENU MESG Display Current Position Change Coordinate Type GEO, GEO 2, UTM, MGRS Display Speed and Heading Waypoint Navigation Read Message Send Message Select Message Main Menu Screen QIT LIT MRK SND PWR DEL Returns to Previous Menu Illuminate Display Marks Current Position Sends Position and Message Turns GPS ON/OFF (Press for 2 Seconds Minimum) Deletes All (Purge) Waypoints Messages and Keys
Radio Loading • Several parameters must be loaded into each AN/PRC-112B1 using the GPS-112 Program loader prior to use: • DME/GPS ID • Encryption Key/ Encryption Status • Radio Frequencies A and B • SAR DOTs and WAYPOINTS
Is the Position Display Current? • Hit POS from main/satellite screen • If the terms OLD or EST appear (vs 3D), the answer in NO • If the Tracking indicator is solid (not flashing) then the position is current • Position Rating: Q1 is best
How Long Will It Take? • Hot Start: Last position fix less than two hours old. • Average TTFF = 20 seconds • Warm Start: Last position fix occurred within one week. (Recommend update almanac every other week) • Average TTFF = 45 seconds • Cold Start: Last position fix more than 6 months or AN/PRC-112B1 has been moved more that 1,000 miles from last position fix. • Average TTFF time is 2 minutes and 30 seconds. Maximum time is 6 minutes • IF ALMANAC UPDATED
18Jul2001 22:07:48Z Battery fuel Gauge Indicator HEADING 000T SPEED 0.0 kt POS NAV SATS Finding Speed and Direction • From the Position display, select SPEED. The following display appears: Current Time Current Date
Battery Status • Step 1. From the Satellite screen, press MENU and then MORE • Step 2. Select 6 Battery Status. The following screen will appear: • These are only ESTIMATES based upon radio usage since last NEW battery installation
B1 Battery Life • Radio only • 7 hours at 10% transmit / 90% receive • Radio and GPS operating • 6 Hours at 10% transmit / 90% receive • GPS only (radio off) • Approximately 24 hours • Beacon mode will drain battery faster than any of above settings
Messages • You can: • Read incoming messages • Select and send outgoing messages • From the satellite screen, select MESG. The following screen appears:
Reading Incoming Messages • Automatically pops up • Select Read Message • “Sorry, no incoming messages” • If multiple messages received, most recent displayed
Selecting Messages • Encrypted messages via a .5 second Data burst • 22 canned messages • Scroll through selections • 60 character free text message
Editing a Free Format Message • Up and down arrows scroll through letters and characters
Canned Messages • 22 canned messages stored in the radio • No, Yes, Standby • Repeat message • Injured and can’t move. No known hostiles. • Injured and can’t move. Hostiles nearby. • Uninjured and can’t move. Hostiles nearby. • Uninjured. No known hostiles. • Injured. Limited mobility. • Life threatening injury. Pickup ASAP. • Abort rescue • Pickup area secure • Low battery Monitoring by SPIN schedule. • Do NOT attempt daytime pickup • I am well concealed • Concealment is difficult Pickup ASAP
1 Send and Delete 2 Send and Save 3 Save Only 1 2 3 EXIT Sending Messages • After a message has been selected, the following screen appears:
Marking a Position • Step 1. On the keypad, press MRK. The following display appearance: • Step 2. Select one of the following keys to: • GOTO - STORE - NAME - CANCEL
Wp 001 PHOENIX GEO Lat N 33° 27’ 33.94” Lon W 111° 54’ 15.26” 001 NAME ENTER Waypoint Directory • Step 1. Select MENU/MORE, then 4 Waypoint Directory • Step 2. From the waypoint Directory, you can: • FIND-Locate a specific waypoint • EDIT-Edit waypoint directory • Add waypoint manually
Wp GEO Lat N 00° 00’ 00.00” Lon W 000° 00’ 00.00” 002 NAME ENTER Entering Waypoints Manually • Step 1. From the waypoint directory, select EDIT then NEW. The following display appears: • Step 2. Change waypoint number • Step 3. Assign a name • Step 4. Select coordinate system • Step 5. Input coordinates • Step 6. Select: ALTER, STORE, or ABORT
Waypoint Navigation 1 • Step 1. From the Satellite menu select NAV: • Step 2. Use arrows and ENTER to select waypoints by number or name
Navigation 1 Screen • SPD (speed over ground) • HDG (course over ground) • RNG (range) • BRG (bearing)
S W N E S STR 12-L RNG 134m NAV3 WAYPT POS SATS Navigation 2 Screen • Graphic Steering Guide • RNG (range) • STR degrees Left or Right of desired track(square) & (triangle) denotes actual track
10 JAN 02 22:40:522 TTG 2 DAYS 1:12 ETA 12 JAN 02 23:52Z NAV4 WAYPT POS SATS Navigation 3 Screen • Date; Time; TTG (time to go); ETA
.2 0 .2 XTE 100 mi NAV1 WAYPT POS SATS Navigation 4 Screen • XTE (cross track error)
Purging Unit • About to be captured? • Waypoints - del • Encryption key - del • Received msgs - del • Queued msgs - del • Alarms and distance limits – off • SAR A, SAR B – keep • DME, Radio ID - keep • Step 1. Press the DEL key on the keyboard • Step 2. Press YES (soft Key) to confirm (~5sec)
Hands On Training • THESE ARE OPERATIONAL RADIOS! • Make sure radio is on A/B • Do NOT transmit on 243, 282.8, or 121.5 • Do NOT Turn radio to either beacon mode • Please Do Not purge radio • Please ensure radio and GPS are turned off when finished