Download
1 / 52
520 likes | 563 Views
Microscopy. Learning Objectives. Identify cells that can be seen with a light microscope Use of light microscope to view prepared slides and own slides State the meaning of magnification and resolution Work on units of length and magnification calculations.

E N D
Learning Objectives Identify cells that can be seen with a light microscope Use of light microscope to view prepared slides and own slides State the meaning of magnification and resolution Work on units of length and magnification calculations
Which components are visible with a light microscope? Cell membrane Nucleus Cytoplasm Components not visible Ribosomes Lysosome Mitochondrion RER Golgi body Nucleolus Nuclear membrane or pore
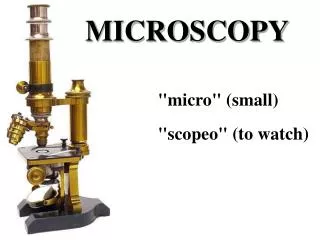
Magnification • This is the increase in the apparent size of an object • The total magnification of a light microscope is worked out by: Magnification of objective lens X magnification of eyepiece (ocular) lens • There is no limit to magnification produced by a light microscope. However above a certain magnification the image becomes blurred. • This limit is known as the resolving power or resolution of the microscope
Resolution • Resolution is the ability to show two objects as separate • A light microscope’s resolution is limited by the wavelength of light • No lens no matter how strong it can magnify can resolve 2 dots that are separated by less than 200nm (half the wavelength of light)
Advantages of a light microscope Specimen can be living or dead Relatively quick and cheap to prepare Relatively cheap Coloured images No vacuum needed Less training needed
Disadvantages of light microscope Low resolution Smaller image
Units of Measurement • Standard SI units used in microscopy are • Metre m = 1m • Millimetre mm = 10-3m • Micrometre μm = 10-6m • Nanometre nm =10-9m • Picometre pm =10-12m
Units of measurement Millimetre (mm) 1/1000th of a m (10-3 m) Micrometre (μm) 1/1000th of a mm (10-6 m) Nanometre (nm) 1/1000th or a μm (10-9 m)
Summary of light Microscopes • Specimens illuminated by light • Focussed by glass lenses and viewed using photographic film or eyes • Specimens can be living or dead • Maximum resolution of 200nm (good enough to see cells but not details of organelles) • Maximum magnification of 1500x • Images are coloured • Cheap and easy to prepare
Calculating magnification I = IMAGE SIZE A = ACTUACL SIZE M = MAGNIFICATON I M A
Mini Quiz • One advantage of using a light microscope • One disadvantage of using a light microscope • What does resolution mean? • How do you calculate magnification? • 5. Convert 3mm into μm • 6. Is 10-6m a micrometre or nanometre?
Learning Objectives Understand the principles by which TEM and SEM work. State the differences between TEM and SEM State limitations of TEM and SEM
What is the main limitation of the light microscope? • Poor resolution due to the wavelength of light
Main advantages of electron microscopes? • Uses a beam of electrons which has a shorter wavelength than light so has a high resolving power (1nm) • Magnification up to 500,000x • Revealed the detailed ultra structure of cells • 2 main types of electron microscope: transmission and scanning
Transmission electron microscope (TEM) • TEM essentially looks ‘through’ a thin slice of a specimen • Resolution of 0.1nm
Scanning electron microscopes (SEM) • SEM looks at the surface of a solid object • SEM has a lower resolving power than TEM (20nm) • Advantageous as has ability to image a large area of specimen • Images are often easier to interpret than TEM
Transmission electron microscope (TEM) Parts of the specimen absorb electrons and appear dark, and parts allow electrons to pass through and appear bright.
Principles of TEM • Specimens have to be extremely thin to allow electrons to penetrate • Specimen placed in chamber (under vacuum), as electrons are absorbed by the molecules in air. • Beam of electrons focused onto the specimen by condenser electromagnet • Beam passes through small section of specimen • Parts of specimen absorb electrons (dark) or allow electrons to pass through it (bright) • Image produced on a screen which can be photographed to give photomicrograph ( a 2D image)
Principles of SEM • Similar technique to TEM, but directs beam of electrons onto surface of specimen from above • Beam passes through pairs of scanning coils which deflect the beam horizontally and vertically • Beam scans across portion of specimen in a regular pattern resulting in scattering of electrons and emission of secondary electrons from surface of specimen • Pattern of scattering depends on contours of specimen surface • A 3D image is created from computer analysis • Resolving power of 20nm, (less than the TEM)
Limitations of electron microscopes • Vacuum used to prevent scattering of electrons so only dead specimens can be viewed • TEM sample must be extremely thin • Complex preparation and staining of specimens is required. Image only in black and white. • Image (photomicrograph) may contain ‘artefacts’ which result from the way specimens are prepared e.g. dehydration of specimen may result in distortion of key features
Learning Objectives Understand the principles by which TEM and SEM work. State the differences between TEM and SEM State limitations of TEM and SEM