Download
1 / 11
110 likes | 121 Views
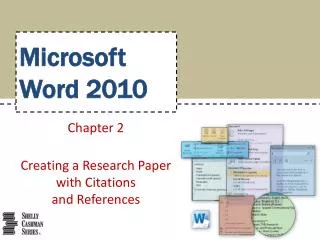
Learning the Basics of Microsoft Word 2010 for Microsoft Windows. Working With Text. In addition to simply typing words into a document, you can highlight, select, copy, cut, and paste items using either standard Windows shortcut methods, or buttons in Word.

E N D
Learning the Basics of Microsoft Word 2010 for Microsoft Windows
Working With Text • In addition to simply typing words into a document, you can highlight, select, copy, cut, and paste items using either standard Windows shortcut methods, or buttons in Word. • To select a block of text, click and hold the left mouse button at the beginning portion of the block you wish to select, and then drag the mouse over the desired text. You will notice that the text will be highlighted as you do this. • Once you have the desired text selected, release the mouse button. • Note that while clicking on another part of the document while you have text selected will deselect it.
Formatting - Margins • To set margins, locate and select the “Page Layout” menu. • Select the “Margins” button. • A number of preset margin settings will drop down in a menu. You can select one of those, or select “Custom Margins” at the bottom of this menu to specify your own. • A dialog box will appear. The basic margin settings are located at the top of this box. • Also note the “Orientation” portion of this menu.
Formatting – Headers and Footers • Options for headers and footers will be located in the “Insert” ribbon menu in the “Header & Footer” section. • To add a header, or footer, press the “Header”, or “footer” button. • A dialog box will appear which will allow you to specify the type of header that you would like to add. • To just add a simple header, select the “Blank” header. • To navigate to or away from the header, just double-click on the area of the document that you would like to move to.
Formatting – Page Numbers • Page numbers are a very commonly used header element. • To add page numbers to your header or footer, first create and select a header or footer. • After you have created a header or footer, locate and select the “Page Number” button located in the “header and footer” portion of the “insert” ribbon menu. • In the dropdown menus that appears, select the location in which you want to place your page numbers.
Non-Text Items - Bullets • To use bulleted lists, find and select the “Home” menu. • Select the bullet button located the “paragraph” section of this menu to start the list. • To create the next bullet in the list, press “enter”.
Non-Text Items - Tables • To insert spreadsheet-like tables, first select the “Insert” menu. • Find and select the “Table” button located in the “Tables” section of this menu. • In the menu that appears, use the table graphic to select the size of the desired table by clicking on the graphic in the appropriate location.
Non-Text Items - Images • To insert an image into your document, first select the “Insert” menu. • Locate and press the “Picture” button in the “Illustrations” section. • In the Dialog box that appears, browse to the photo you wish to insert and press the “Insert” button.
Proofing Tools - Spellcheck • To check your document for spelling errors, use the spell and grammar check feature. • Select the “Review” menu. • Select the “Spelling & Grammar” button in the “Proofing” section of the menu. • Alternatively, press F7 to initiate the check.
Print Options • You will find the options related to printing by selecting the “File” menu, and selecting the “Print” option. The Word window will then be populated with options related to printing. • The most important options are located at the top of the window. • Make sure that you have the desired printer, and the desired number of copies to print selected. • When you are ready to print, press the “Print” button located in the upper portion of the screen.
Closing Documents • To close a document without exiting Word, find and select the “Close” button in the “File” dropdown menu. This will close the document without closing that instance of Microsoft Word • To close the document and the Word program, you can select the “X” in the upper right hand corner of the window, just like any other application in Windows. (keyboard shortcut: “ALT” + “F4”)