Download
1 / 47
470 likes | 761 Views
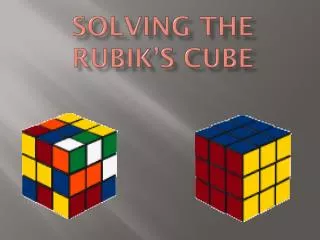
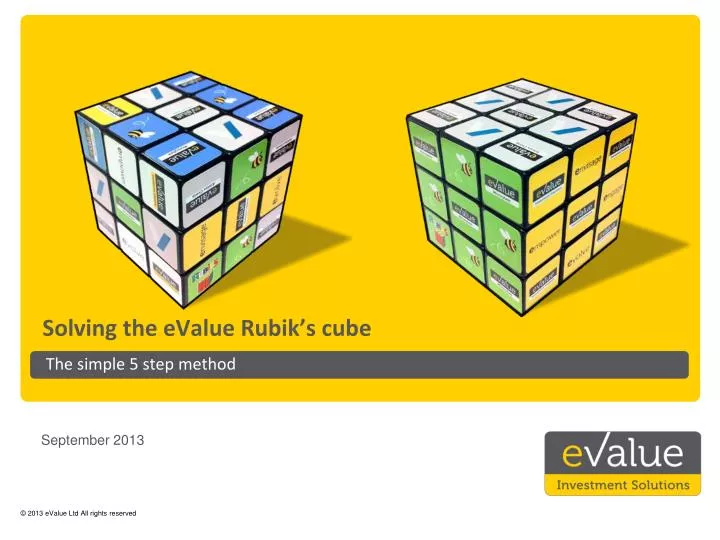
Solving the eValue Rubik’s cube. The simple 5 step method. September 2013. Solving the cube. We’re going to help you solve your eValue Rubik’s cube in 5 simple steps: We’ll take you through every move you need to make to get your eValue Rubik’s cube back to its original position.

E N D
Solving the eValue Rubik’s cube The simple 5 step method September 2013
Solving the cube • We’re going to help you solve your eValue Rubik’s cube in 5 simple steps: • We’ll take you through every move you need to make to get your eValue Rubik’s cube back to its original position. 1. Top edges 2. Top corners 3. Middle 4. Bottom corners 5. Bottom edges Click to move on Back
Preparation – Naming the sides of your cube • We’ll be holding the cube so the white face with the eValue logo is always at the top • You’ll need to turn the cube as you go through the solution so the front and other sides will change colours • As you hold the cube looking at 3 sides, the names we’ll use for these sides are shown below: “K” for Back “L” for Left side “T” for Top “R”for Right side “F”for Front Click to move on “B” for Bottom Back
Preparation – let’s check the moves • We’re going to use some specific ‘cube moves’ in this solution • We’ll use images and letters to represent the moves that look like this: • The picture of the cube will show you which side to move: R-C “R” Right “L” Left “F” Front “T” Top “B” Bottom Click to move on Back
Preparation – let’s check the moves • The arrow will show you which way to move it and how much: • For each side, the direction for clockwise and anticlockwise are as you look at that particular side. • And we’ve included the letters to make it easier to read and remember if you want to Turn twice “2” so the side moves half way round Turn onceclockwise “C” Turn onceanti-clockwise “A” Continue Back
Preparation - About these instructions • You’ll see arrows to take you through the instructions. Click on them once you’ve done on that page. • During the solution, there will be sometimes be more than one choice so just click on the arrow that’s right for you. Arrows look like this: • If you make a mistake there’s a “Whoops” button at the top of each page which will help you go back to any of the previous steps. It looks like this: • And if you need to go back to the start of the step you’re on, use the “Back” arrow in the bottom left of each screen. Next Whoops! I’m ready to start Back
Step 1 – check for the top edges Whoops! • Look at the top middle edges of your cube. It doesn’t matter which way round you hold it. • Answer the question on the right to continue. Are all the top edge cubes in the right place and the right way round? Yes No Back
Step 1 – find the right cube to put it in position Whoops! • Turn the whole cube so that the front top position does not have a properly positioned cube in it. • Find the cube that should be in this Top Front position. It will have the 2 colours for the Top and the Front sides. Click on the cube that shows where your target cube is sitting: Top Front If you can see your target cube immediately click one of these: If you can’t see it immediately, it’ll be at the back of the cube and click one of these instead: Top Top Front Front Front Front Front Front Left Left Top Back Right Front Front Front Front Back
Step 1 – Right Top Whoops! • Make the following moves: Is your target cube the right way round? Yes R-A No F-A Back
Step 1 – Back Top Whoops! • Make the following moves: Is your target cube the right way round? Yes R-A No F-A T-C T-A Back
Step 1 – Top Left Whoops! • Make the following moves: Is your target cube the right way round? Yes No L-C F-C Back
Step 1 – Front Right Whoops! • Make the following move: Is your target cube the right way round? Yes No F-A Back
Step 1 – Front Left Whoops! • Make the following moves: Is your target cube the right way round? Yes No F-C Back
Step 1 – Back Right Whoops! • Make the following moves: Is your target cube the right way round? Yes R-2 R-2 No F-A Back
Step 1 – Back Left Whoops! • Make the following moves: Is your target cube the right way round? Yes No L-2 L-2 F-C Back
Step 1 – Front Bottom Whoops! • Make the following move: Is your target cube the right way round? Yes No F-2 Back
Step 1 – Bottom Right Whoops! • Make the following move: Is your target cube the right way round? Yes No F-2 B-A Back
Step 1 – Bottom Back Whoops! • Make the following move: Is your target cube the right way round? Yes No F-2 B-2 Back
Step 1 – Bottom Left Whoops! • Make the following move: Is your target cube the right way round? Yes No F-2 B-C Back
Step 1 – putting the cube in the right way round Whoops! • To get your cube the right way round, make the following moves: Are all your middle edgecubes now in the right position and the right way round? Yes L-A No F-A T-C T-A Back
Step 2 – Finding the top corners Whoops! • Find a top corner cube, which is not currently in the right place. This is your target cube. • It will either be currently found as one of the top 4 corner cubes, or one of the bottom 4 corners • Choose the next step by answering the question on the right. Is this target cube on the top or the bottom? Top Bottom Back
Step 2 – the target cube is on the top layer Whoops! • Turn the whole cube so your target cube is at the front right. • Make the following moves: • The cube should now be on the bottom layer. R-C R-A Continue B-A Back
Step 2 – move the cube to the right place Whoops! • Now rotate the bottom layer until the target cube is under the target position: • Make the following moves: • The cube should now be in the right position Is this target cube the right way round? Yes, and there areno more to do R-C R-A Yes but there aremore to do No B-A Back
Step 2 – rotate the cube until it’s the right way round Whoops! • Make the following moves: • If the target cube is still not the right way round repeat the above moves once more. Are there any more top corner cubes to complete? R-C R-A Yes No F-C F-A B-2 B-2 Back
Step 3 – Starting point • We’re now going to sort out the middle edges of the cube Continue Back
Step 3 – Middle edge • Find a middle edge cube that’s not in the right position and the right way round • This cube will either be: • on the bottom layer • in the middle layer but in the wrong place • In the middle layer and in the right place, but the wrong way round Is this target cube in the middle or on the bottom? Bottom Middle but in the wrong place Middle, already in the right place but the wrong way round Back
Step 3 – Put middle edge cube on the bottom layer Whoops! • Hold the whole cube so that the middle edge cube you need to move is towards you on the Front Right: • Then make the following moves: • This will move the cube you’re looking to place onto the bottom layer R-C R-A F-C F-A Continue B-C B-C B-A Back
Step 3 – Place the middle edge cube • Rotate the bottom layer so that the colour of the middle edge cube that’s not on the bottom is next to the same colour as the centre cube • Hold the cube so that the matching edges gives one of the following: Where is your middle edge cube now? It’s on the right hand side Top Top Front Front It’s on the front Back
Step 3 – move the cube up from the right hand side Whoops! • Make the following moves • Then the following moves: • You should now have the middle edge cube in the right place and the right way round: Are there any more middle edge cubes to put in the right place? R-C R-A Yes F-C F-A No B-C B-C B-A B-A Back
Step 3 – move the cube up from the front Whoops! • Make the following moves • Then the following moves: • You should now have the middle edge cube in the right place and the right way round: Are there any more middle edge cubes to put in the right place? R-C R-A Yes F-C F-A No B-C B-C B-A B-A Back
Step 4 – Bottom corners • We’re now going to sort out the bottom corners of the cube Continue Back
Step 4 - Check of now many cubes are in the right place • Pick a corner and rotate the bottom until that corner is in the right place. It doesn’t matter if it’s not the right way round. • You’ll find that once this cube is in the right place, you’ll have one of the following: • All the bottom corner cubes are in the right place • There are 2 out of place cubes, and they’re next to each other • There are 2 out of place cubes, and they’re diagonally opposite Front Right Front Right Bottom Bottom I have this I have this I have this Back
Step 4 – Switching cubes next to each other Whoops! • Hold the cube so the 2 out of place cubes are both on the front of the cube • Make the following moves: • Then the following moves: R-C R-C R-A R-A F-C F-A Continue B-C B-C B-A B-2 Back
Step 4 – Switching cubes diagonally opposite Whoops! • Hold the cube so that one of the out of place cubes is Front Left, and the other is Back Right • Make the following moves: • Then the following moves: R-C R-C R-A R-A F-C F-A Continue B-C B-A B-2 B-2 Back
Step 4 – Position bottom edge cubes the right way round • The pattern on the bottom will now look like one of the following. Turn the cube round to make the Front side match the right diagram for you Front Front Front Front Front Front Front Right Right Right Right Right Right Right Bottom Bottom Bottom Bottom Bottom Bottom Bottom Continue Back
Step 4 – putting the corner cubes the right way round Whoops! • Make the following moves: • Then make the following moves: • If the corner cubes are still not the right way round you may have to repeat this set of moves up to 3 times, repositioning the Front side each time. Are the bottom corners now the right way round? R-C R-C R-C R-A Yes No B-A B-A B-2 B-2 Back
Step 5 – bottom edges • We’re now going to sort out the bottom edges of the cube – the last step! How many of the bottom edges are already in the right place? None Just one All 4 Back
Step 5 – No edges are in the right place Whoops! • Make the following moves (it doesn’t matter which side is the Front): • Then do the following moves: • This will make one edge cube be in the right place R-C R-C R-A R-A L-C L-C L-A L-A F-C F-C B-2 Continue Back
Step 5 – One edge cube is in the right place Whoops! • Turn the whole cube so the one bottom edge cube which is in the right place is at the Front. • Then make the following moves: • Then do the following moves: • All 4 cubes are now in the right place. R-C R-C R-A R-A L-C L-C L-A L-A F-C F-C B-2 Continue Back
Step 5 - Check which way round the bottom edge cubes are • You should now have one of the following patterns on the bottom of the cube. • Turn the whole cube so the cube has the same Front as shown. Front Front Front Right Right Right I have this I have this I have this Bottom Bottom Bottom Back
Step 5 – checked pattern Whoops! • Make the following moves: • Then the following moves: • And finally, the following moves: R-C R-C R-C R-A R-A R-A L-C L-C L-C L-A L-A L-A F-C F-2 F-2 Finished B-A B-2 B-2 Back
Step 5 – “H” pattern Whoops! • Make the following moves, the top of the H as the Front of the cube: • Then the following moves: • And finally, the following moves: R-C R-C R-C R-A R-A R-A L-C L-C L-C L-A L-A L-A F-C F-C F-2 Nearly there B-C B-C B-C Back
Step 5 – “H” pattern continued Whoops! • Make the following moves: • And finally, the following moves: R-C R-C R-A R-A L-C L-C L-A L-A F-C F-C Finished B-C B-2 Back
Step 5 – “Pointing” pattern Whoops! • Hold the cube so that the “point” is Front and to the Right. Then make the following moves: • Then make the following moves: • And finally, make the following moves: R-C R-C R-C R-A R-A R-A L-C L-C L-C L-A L-A L-A F-C F-A F-2 Nearly there B-A B-A Back
Step 5 – “Pointing” pattern continued Whoops! • Turn the whole cube so the one bottom edge cube which is in the right place is at the Front. • Then make the following moves: • Then do the following moves: R-C R-C R-A R-A L-C L-C L-A L-A F-C F-C Finished B-2 Back
Congratulations! • Well done - you have solved your cube! • Tell everyone within shouting distance!
Whoops! • Don’t worry if you’ve made a mistake. You’ll still be able to solve the cube. • If you aren’t able to undo the moves you’ve just done, you’ll need to start from an earlier step and work through again. • Click on the arrow below depending on which step has become undone during your moves 1. Top edges 2. Top corners 3. Middle 4. Bottom corners 5. Bottom edges This one This one This one This one This one