Download
1 / 16
2.16k likes | 4.45k Views
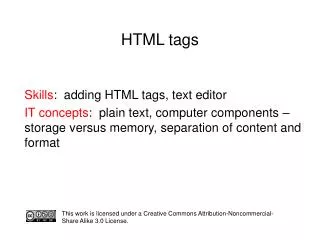
Basic HTML Tags. Basic Tags. <h1> Heading 1 (use 1-6) <p> Paragraph <br> Break Line <b> Bold – Bolds the text <i> Italic – Italicizes the text <U> Underline – Underlines the text <hr> Horizontal Rule – draws a straight line across page. Creating Lists (Bulleted). <ul> Unordered List

E N D
Basic Tags <h1> Heading 1 (use 1-6) <p> Paragraph <br> Break Line <b> Bold – Bolds the text <i> Italic – Italicizes the text <U> Underline – Underlines the text <hr> Horizontal Rule – draws a straight line across page
Creating Lists (Bulleted) <ul> Unordered List <li> List Item </li> <li> List Item </li> <li> List Item </li> </ul> • Cars • Motorcycles • Trucks
Creating Lists <ol> Ordered List (instead of ul) <li> List Item </li> <li> List Item </li> <li> List Item </li> </ol> • Cars • Motorcycles • Trucks
Text Alignment • To center lines on the page requires adding the attribute "align" inside your tags. • <h6 align = "center">This is my title</h6> • Right Align • <h3 align = "right">My right side title</h3>
Font • Size • Use the "font" tag and the attribute "size". • Sizes can be set from 1 to 7 with 7 being the largest. • <font size="3">size 3 text</font> • Face • Many browser don't recognize fancy fonts • Stick to 3 types: Arial, Verdana, and Times New Roman. • Use the attribute "face". • <font face="Arial">This is arial text</font>
Tips on Tags • Tags should always be in lower-case letters • Tags usually have a beginning and an end • Indenting and spacing will keep you sane • Filenames and URLs are almost always case-sensitive.
What About Style? • In modern website design, HTML tags are only used to “structure” the document – to show headings, paragraphs, lists, etc. • A special system called Style Sheets (CSS) are used to describe how tags appear. • That is what we learn in Fundamentals of Web Design
Bgcolor Specifies a background-color for a HTML page. <body bgcolor="#000000"> <body bgcolor="rgb(0,0,0)"> <body bgcolor="black"> Background Specifies a background-image for a HTML page <body background="clouds.gif"> <body background="http://www.w3schools.com/clouds.gif"> Background
Images • Two main types of Web graphic files • GIF (Graphics Interchange Format) • Great for logos, charts, buttons • JPG (Joint Photographic Experts Group) • Great for photographs • <img src="URL of image file"> • Place all images in the same directory/folder where you web pages are
Images • Important points about graphics • Keep graphic files size small: Most users are impatient when it comes to pages loading. • Add ALTernative text to identify graphics in non-graphic browsers. • <IMG SRC=“challengebanner.jpg” ALT=“Tsunami Shelter Challenge Banner”> • Resize the image in a graphic editor rather than sizing the graphic in HTML
Resizing Photos in HTML • IMG Tag Review: <img src=“filename.jpg” height=150 width=200 border=2> • Risk distorting photoand longer load times 50 200 5
Resizing Photo Files • Open photo in Paint • Image | Stretch/Skew (Ctrl-W) • Enter new % size (like 30%), hit OK • File | Save As • Don’t overwrite original file • Give it a meaningful name
Resizing Photo Files Resized in Paint 231 x 308 33.7 KB No Change 768 x 1024 254 KB Resized in HTML 231 x 308 254 KB
Comment Tag • The comment tag is used to insert comments in the source code. Comments are not displayed in the browsers. • You can use comments to explain your code, which can help you when you edit the source code at a later date. • We will use comments in this class to pin steps in assignments and projects
Comment Tag • <!-- … --> • <!--This is a comment. Comments are not displayed in the browser-->