Download
1 / 11
110 likes | 200 Views
Getting Started with Microsoft PowerPoint. Typing Text. The first slide in PowerPoint is always your Title Slide The first box is for your title; the second box is for your name.

E N D
Typing Text • The first slide in PowerPoint is always your Title Slide • The first box is for your title; the second box is for your name. • On the following slides, you’re given a title box, with a larger box for your text—this is your body text placeholder. • Once you start typing, PowerPoint automatically gives you a bulleted list. • At the end of a point, press ENTER and then TAB to get to the next level of indent down.
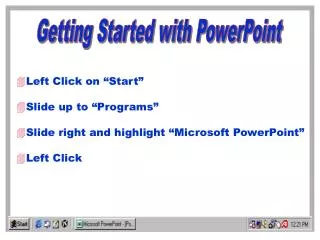
Option A Click on START Highlight Programs Slide your mouse to the right and highlight Microsoft Office Slide your mouse to the right again and click on Microsoft PowerPoint Option B Find the Microsoft PowerPoint icon on the desktop (that’s your basic computer screen, before you open anything) Click on it! Opening the Application Depending on the computer you’re using, do one of the following:
Working with a Slide • Once PowerPoint opens, you see a screen like the one on the left. • (1)You can type directly on the slide by clicking in the middle of the text boxes. • (2)The narrow column to the left is your Slides Pane. It contains a thumbnail, or mini version of the slide you’re working on. Each slide you add will appear here, and you can use this area to rearrange your slides. Source:: Microsoft .com • (3) The area at the bottom is your notes pane. Type notes that you’ll use when presenting.
Option A In the Slides Pane, click the slide thumbnail that you want the new slide to follow, and then press ENTER Option B Right-click the slide thumbnail that you want the new slide to follow, and then click New Slide on the shortcut menu. Adding New Slides There are 2 main ways to add new slides to your presentation:
Ways to navigate: (1) Click the slide thumbnail… (2)…to display that slide, or… OR (3) click the Previous Slide or Next Slide buttons. Navigating between Slides Once you add several slides to your show, you’ll want to go back and forth between them as you add info. Source: microsoft.com
Navigating Between Slides, cont. You may want to change the order of your slides. • Go to the Slides Pane • Click on a slide once. • Then, hold your mouse down until a black line flashes above it. • Drag the slide to its new position in your show. • Release your mouse
(1) Notes pane in normal view. (2) Drag the split bar up to enlarge the notes pane, then type your note text. (3) The notes page layout as seen in notes view or when the notes are printed. Creating Notes Use notes to elaborate on the points on the slide. This helps you keep from overloading the slide with text. Source: microsoft.com
Viewing Your Show Viewing your show is a good way to see any changes that need to be made. • Go to the Menu bar at the top of your screen. • Click on Slide Show • Then click on View Show • Once you’re in Show mode, remember to click your mouse or press your space bar to see the next slide
Congratulations! • You’ve mastered the basics of creating PowerPoint presentations. • Continue on to the next course, PowerPoint II, to learn how to add the bells and whistles that really make your show stand out!
Credits Additional information taken from Microsoft Office Online Training." Microsoft.com. Microsoft. 8 Mar 2007 <http://office.microsoft.com/training/Training.aspx?AssetID=RP011298741033&CTT=6&Origin=RC011298761033>.