Download
1 / 4
40 likes | 46 Views
Neat edges add a beautiful look to your knitting projects. With our tried & tested mindful knitting tricks, get ready for neat edges. Ideal for beginner knitters and experienced knitters alike, you make your baby blankets, scarves and more special.

E N D
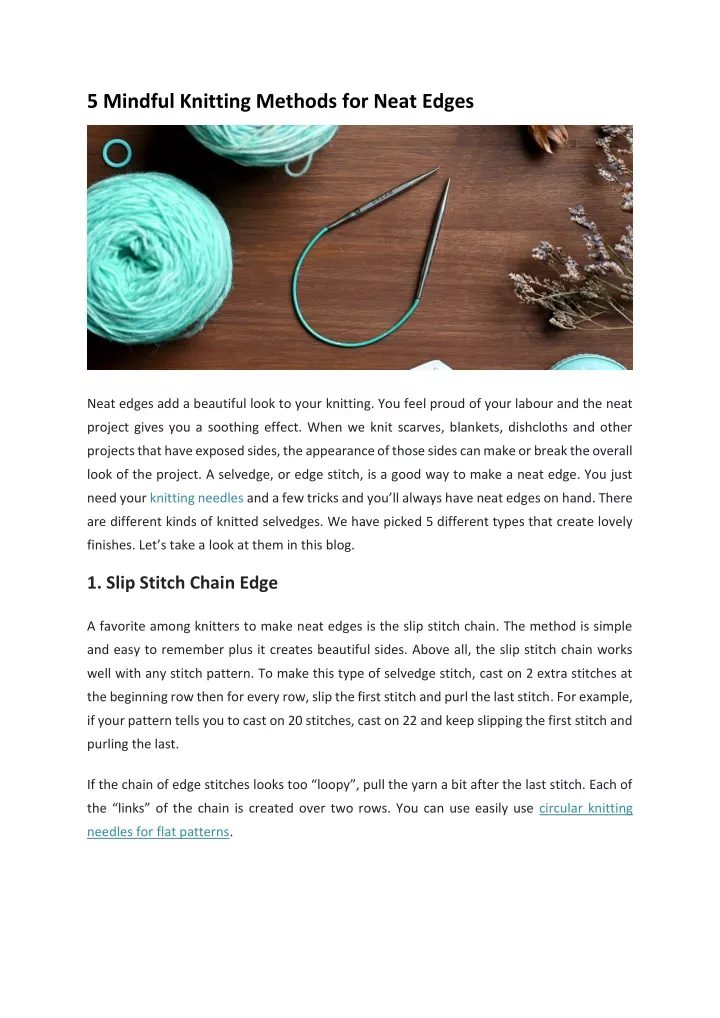
5 Mindful Knitting Methods for Neat Edges Neat edges add a beautiful look to your knitting. You feel proud of your labour and the neat project gives you a soothing effect. When we knit scarves, blankets, dishcloths and other projects that have exposed sides, the appearance of those sides can make or break the overall look of the project. A selvedge, or edge stitch, is a good way to make a neat edge. You just need your knitting needles and a few tricks and you’ll always have neat edges on hand. There are different kinds of knitted selvedges. We have picked 5 different types that create lovely finishes. Let’s take a look at them in this blog. 1. Slip Stitch Chain Edge A favorite among knitters to make neat edges is the slip stitch chain. The method is simple and easy to remember plus it creates beautiful sides. Above all, the slip stitch chain works well with any stitch pattern. To make this type of selvedge stitch, cast on 2 extra stitches at the beginning row then for every row, slip the first stitch and purl the last stitch. For example, if your pattern tells you to cast on 20 stitches, cast on 22 and keep slipping the first stitch and purling the last. If the chain of edge stitches looks too “loopy”, pull the yarn a bit after the last stitch. Each of the “links” of the chain is created over two rows. You can use easily use circular knitting needles for flat patterns.
2. Slip Stitch Knotted Edge These selvedge stitches resemble a string of beads. For the method too, add extra 2 stitches to the cast-on, then slip the first stitch and knit the last stitch of every row. You can get a similar look if you knit the first and last stitches of every row, creating a “garter stitch selvedge”. However, the good thing about the “slip stitch knotted edge” is that it doesn’t stretch as much but holds the shape better. Many knitters believe that makes it a slightly better-looking option.
3. Double Garter Edge This selvedge forms a narrow band of stitches on each side of the project. The double garter edge has an additional bonus – it prevents the edges from curling. The not-so-good thing about it is that it doesn’t work as well with all stitch patterns. For this method of knitting neat edges is, cast on 4 additional stitches, then every row knit the first 2 stitches and the last 2 stitches. Knitting a gauge swatch will make sure you like the look of the double garter selvedge with the main pattern used in your project. 4. Seed Stitch Edge Similar to the double garter stitch, seed stitch selvedge technique creates a narrow band of 2 stitches on each side of the work. This selvedge can be used as a decoration on a delicate project - like lace. Many times, lace patterns edges look neat after blocking. But, for times that you need to make it beautiful as well as neat, this method works best. To make this type of selvedge, cast on the 4 extra stitches besides ones mentioned in the pattern. Every row work the first two stitches and the last two stitches in seed stitch so that the first and the last stitches are knit. Again, to determine the look of this selvedge, knit a swatch before you start working on your project. 5. I-Cord Selvedge This is by far the best way to decorate your projects creating a row end that looks very much like a rolled edge. Edges like these will give your project a sophisticated couture look, so this type of selvedge is worth learning. You can find a detailed description, along with a video online by googling: “I-Cord Edge”. You must follow this through carefully. I cord edges look best when used with a textured pattern like moss stitch, brioche or cables (remember to use reversible cables for scarves and blankets). For this method, you do not need double pointed needles or other tools, just the same knitting needles as the project. The I-cord edge is made on 4 stitches on each side of the work. You will need to add 8 stitches while you cast on. To make sure you remember to treat these groups of 4 stitches as selvedges, separate them from your work with stitch markers. This will save you from tinking (unknitting) or frogging later if you accidentally work the edge stitches in the main pattern.
Now that you know 5 ways to make neat edges, you can avoid uneven and wonky edges. Follow up on these methods with video tutorials to understand and use them on your knitting projects. Keep your edges beautiful! Practice mindful knitting with the Mindful Collection of smooth stainless steek needles, teal cords and a range of accessories. For more information on mindfulness, knitting, tricks, techniques, etc. follow our blog. Source: https://mindful.knitterspride.com/blog-69-5-mindful-knitting-tricks-to-make-neat- edges