Download
1 / 32
320 likes | 479 Views
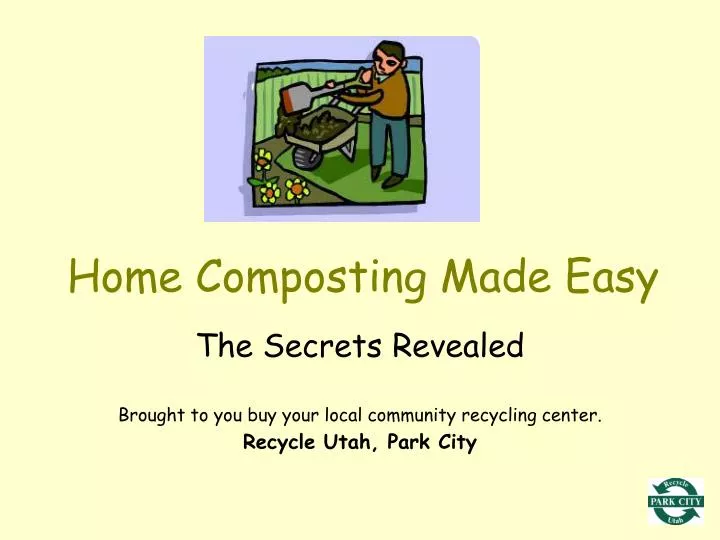
The Secrets Revealed Brought to you buy your local community recycling center. Recycle Utah, Park City. Home Composting Made Easy. Did You Know?. Yard and kitchen waste makes up 30% of the total material that goes into our landfills.

E N D
The Secrets Revealed Brought to you buy your local community recycling center. Recycle Utah, Park City Home Composting Made Easy
Did You Know? • Yard and kitchen waste makes up 30% of the total material that goes into our landfills. Recycle Utah strongly encourages everyone to compost at home. We’re wasting valuable landfill space!
What Is Composting? Composting is the biological decomposition of organic wastes. In other words : Composting is nature’s way of recycling organic material.
Why Compost? • Composting diverts waste from our landfills, saving valuable space for non-recyclable waste. • Compost improves soil structure and tilth. • Holds moisture. • Allows for water drainage. • Slowly releases nutrients. • Moderates soil temperature. • Encourages beneficial microorganisms and suppresses soil-borne diseases. • Replaces the need for commercial soil amendments and fertilizers, creating a healthy ecosystem. In short: It will make your garden grow!
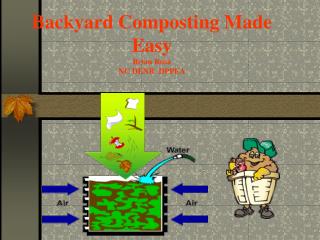
Water Creating a moist environment for organisms to thrive in. The Big Four • Greens Nitrogen rich, green, moist materials that will help provide heat for the decomposition process. • Browns Carbon rich, dry, woody materials. • Oxygen Micro-organisms need to breathe too!
What Materials Can Be Composted? • Vegetable & fruit scraps • Coffee grounds • Tea bags • Egg shells • Grass clippings • Leaves • Young weeds (that have not gone to seed) • Pine needles
What Can’t Be Composted • Meat or bones • Dairy • Greasy foods • Diseased plants • Cat, dog or bird feces. • BBQ ashes • Treated wood or sawdust
Lets Get Started!What Supplies Will I Need? A GREAT ATTITUDE AND A LITTLE FAITH!
Compost Structures A successful compost container can take on many forms. It can be either homemade or store purchased. One Bin System, homemade or store bought. No Bin System, Loose pile w/ no barriers. (Not recommended for kitchen wastes) Hoop System, homemade or store bought. Recycled Wooden Pallets.
Location • Choose a level, well drained area of land • 3 feet x 3 feet • Part sun to part shade location • Allow room for airflow near fences and structures
The bin or pile should sit directly on the ground so rough up the ground surface with a shovel first. This gives the micro-organisms a head start. Prepping the Ground
Adding Materials To Your Bin Start with a 6” layer of: • dry leaves • pine needlesand/or • small sticks This will help the air to circulate up and through the pile.
Layering • Now add about 3” of Grass Clippings • It helps to mix up the layers a little as you go.
Layering • Next, add a shovel of soil or compost to the bin. • This introduces micro-organisms into the bin.
Watering • Each layer should get a good sprinkling of water. • The pile should remain the same consistency as a wrung out sponge.
Turn the pile once a week to once every few months. Make sure to mix the green layers and the brown layers together. • This creates pockets of oxygen that feed the micro-organisms and speeds up the decomposition process. Just Add Oxygen
Continue to Add Materials To Your Bin • As you continue to accumulate both brown and green materials, add them to the pile in roughly equal layers. • Remember to add water periodically, keeping the pile the same consistency as a wrung-out sponge. • Also, remember to turn your pile occasionally.
Trouble Shooting Here is a sure proof way to tell if your compost is progressing well . . . If the pile is composting properly, the interior should heat up to at least 140 degrees Fahrenheit.
Trouble Shooting Symptom: The pile fails to heat-up. NOTE: Composting is still progressing but very slowly and may take six months to a year or more to be completed. Problem: Compost pile is too small. Solution: Collect more material and mix into pile.
Trouble Shooting Symptom: The center of the pile is dry. Problem: Not enough water. Solution: Chop up any coarse material remaining in the pile, add green material, moisten and turn pile.
Trouble Shooting Symptom: The compost pile is wet and sweet smelling. Problem: Lack of nitrogen. Solution: Mix in nitrogen materials (Green Materials) such as grass clippings, food scraps.
Trouble Shooting Symptom: The compost pile has a bad odor. Problem: Pile is too wet and there is not enough oxygen. Solution: Turn the compost and add dry brown materials.
The Pay Off: Black Gold “Finished” compost is called humus. Depending on how often you’ve turned your pile, you can expect to see results in approximately 4 weeks to 1 year.
Now What? What's the best use for your Humus? Your final humus product will be as good as, if not and arguably better than, store purchased soil. This makes it perfect to use in: • Your garden as a soil amendment or mulch • In potted plants • Or as a root stabilizer in transplants
Wait! We have more great composting ideas to share with you!
Trench Composting • Dig trenches in your garden between raised beds and fill them with leaves. • By the next growing season, these trenches will be packed full of nutritious soil.
Compost “Pockets” • Dig a hole in your garden about 18” deep and fill it with kitchen scraps. • Then fill the hole in with dirt.
Compost “Pockets” By the time the next growing season rolls around, those pockets will be nutrient packed and ready for planting.
Feed Your Lawn WithGrass Clippings! Grass clipping are 85% water and decompose quickly. • Set your mower blade to 3” tall • Instead of bagging your clippings, leave them where they fall and let them feed your lawn! • Reap the benefits when you no longer need to fertilize!
Credits • http://aggie-horticulture.tamu.edu/earthknd/compost/compost.html • Composting For Kidshttp://sustainable.tamu.edu/slidesets/kidscompost/cover.html • SOCRRA - Home Composting. Recycle your yard waste the natural way. • Recycle Utah - Compost Benefits for healthy soils and water protection.