Download
1 / 37
370 likes | 379 Views
Introduction to ADO.Net and Visual Studio Database Tools. ISYS 512. Database Processing. Querying database Updating database: Insertion, deletion, modification. Steps to Retrieve Data. Establishes a connection to the database. Executes commands against the database. SQL Select commands

E N D
Introduction to ADO.Net and Visual Studio Database Tools ISYS 512
Database Processing • Querying database • Updating database: • Insertion, deletion, modification
Steps to Retrieve Data • Establishes a connection to the database. • Executes commands against the database. • SQL Select commands • Store data results.
A Simplified View of ADO.Net Objects Ado.Net Data Provider Data Consumer Adapter Dataset WinForm SQL Updates Connection Command WebForm Results of SQL Selects Reader
ADO.NET Objects • Connection Object: Represent a connection to the database. • Command Object: The command object allows us to execute a SQL statement or a stored procedure. • DataReader: It is a read-only and forward-only pointer into a table to retrieve records. • DataSet Object: A DataSet object can hold several tables and relationships between tables. • DataAdapter: This the object used to pass data between the database and the dataset.
Data Providers • ODBC Provider • Open Database Connectivity • A driver manager • Used for relational databases • OLE DB Provider • OLE DB interfaces provide applications with uniform access to data stored in diverse information sources, or data stores. • Access • SQL Server Provider • Oracle Provider • Microsoft’s .NET data provider for Oracle • Etc.
Using ODBC • Windows 7: • Control Panel /Administrative Tools/DataSource(ODBC) • Three types of data source names • User DSN: usable only by you and only on the machine currently using. • System DSN: Any one using the machine can use. • File DSN: Can be copied and used by other computers with the same driver installed. • Demo: • Excel: Data/Get External Data/From other sources • Access: File/Get External Data/Import, then select ODBC data source • Note: For 32 bit software, you have to open the ODBC panel from C:\Windows\SysWOW64\odbcad32.exe
Demo: SAS Reading ODBC Data • proc sql; • connect to odbc (dsn=test32SQLDS); • Create table sasuser.TEST • As select * from connection to ODBC • (select * from customer); • disconnect from odbc; • quit; • proc sql; • select * from sasuser.test;
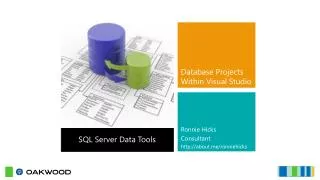
VS Database Tools • Add a new connection to database: • Database connection: • Tools/Connect to database • Add Connection • Server Explorer • Data connections:Right click data connection • Add Connection • Tables, Views • Create new SQL Server Database • Add a new data source: • Data/Add New Data Source • Data/Show Data Source
Working with SQL Server • Starting SQL Server: • Control Panel/Administrative Tools/Services/SQLServer • SQL Server database file extension: mdf • Default database folder: • A SQL Server file: testSQLServer.mdf • C:\Program Files\Microsoft SQL Server\MSSQL10.SQLEXPRESS\MSSQL\DATA\testSQLServer.mdf
Creating SQL Server Database • From Server Explorer, right click data connection and choose: • Create new SQL Server Database • Server name: • LocalServerName\SQLExpress • Ex: David-PC\SQLExpress • Add new table: Right click Tables and choose Add New Table • Define table’s fields • Add rows: Right click the table name and choose Show table data. • Note: After creating the database, you may create an ODBC DSN to connect to it.
Create a New SQL Server Database: EmployeeDB • Add a new table: EmployeeTable • EID Char 10 • Ename Char 30 • Sex Char 1 • Salary Numeric (10,2) • HireDate Date • Enter data
How to create ADO.Net objects? • Automatically generated when creating data bound form. • Form wizard • Using Data Adapter Wizard • Using code: • Example: • string strConn = "Provider=Microsoft.ACE.OLEDB.12.0;Data Source=C:\\SalesDB2007.accdb"; • OleDbConnection objConn = new OleDbConnection(strConn);
Data Binding • Connect a control or property to one or more data elements. • Simple binding: Use simple binding to display a field value in controls that show Data Bindings in the property window, such as text box or label. • Complex binding: Use complex binding to bind more than one field to controls such as DataGrid and list box. Use the control’s Data Source and Data Member to bind the data.
Creating Data Bound Form • Creating a form with ADO.Net objects and data-bound controls to display and update information in a dataset. • Demo: • Add data source: • Data/Add New Data Source • Data/Show Data Source • Click the dropdown list next to the table’s name: • Datagrid view • Details • Drag the table to form.
Items Added to the Form • Table Adapter: click smart tag • Add query • Preview data • Dataset: • Edit in dataset designer • Binding Source • Add query: Add a new tool strip. • Preview data • Binding navigator • Code view: Form load event
Other Data Form Demos • DataGrid View • Add /Modify/Delete records. • Read only form: • Delete AddNew, Delete, Save buttons from navigator bar.
Hierarchical Forms • Parent table/Child table • Add parent table and child table to Data Source • Drag the parent table and the child table to the form. Parent table uses detail view and child table uses dataGrid view • Click Dataset object’s smart tag to choose Edit in Dataset Designer • With the designer, right click the parent table and choose Add/Relation • Change dataGrid’s DataSource property to the relation.
Detail Form with Bound ListBox • Example: Customer table form with CID listbox and displays selected customer information in textboxes. • Choose detail view for the customer table. • Click the dropdown list next to the CID field and click ListBox • Drag the Customer table to the form. • Bind the CID field to the BindingSource: • Activate the Property window and click the listbox • Set the DataSOurce property to BindingSource • Set the Display Member property to CID
Creating A Database Application Without Programming • Creating a database application to display information and update database. • A main form with buttons to open data forms: • DisplayInfo • Enter New • Modify • Exit
Data Adapter Wizard – 2nd Level of Using ADO.Net • Configure Data Adapter and generating a dataset: • From the Data tab of the ToolBox, Drag OledbDataAdapter to the form. • Use the Data Adapter Wizard to configure the Adapter. • Right Click the Adapter to preview data and create dataset. • Note: If OledbDataAdapter is not listed in Toolbox’s Data tab , right click ToolBox Data Tab and select Choose Item; then select OleDbDataAdapter from .Net Framework components.
Creating a Form with Bound DataGridView • Configure Adapter and generate dataset. • Bind DataGridView control to the table: • Data Source property: • DataSet • Data Member property • A table in the dataset • In the Form Load event, use Adapter’s Fill method to load the dataset: • OleDbDataAdapter1.Fill(DataSet11) • Note 1: No navigation capability • Note 2: View adapter’s properties and see the SQL commands.
Creating a Form with Bound Textboxes • Configure Adapter and generate dataset. • Select textbox’s Data Bindings property: • Text: choose field • In the Form Load event, use Adapter’s Fill method to load the dataset: • OleDbDataAdapter1.Fill(DataSet11) • Note: No navigation capability
Using BindingContext to Navigate Records • BindingContext: It is an object that manages a collection of data sources used for binding. • CurrencyManager: It is an object that keeps track of position (the current row) of a data source. Two useful properties: • Position property: is the index of the current row. The index is a 0-based index, the first record has a position of 0. • Count property: The number of rows in the data source.
MoveNext and MoveLast Example • MoveNext: • this.BindingContext[dataSet21, "customer"].Position += 1; • MoveLast: • this.BindingContext[dataSet21, "customer"].Position = this.BindingContext[dataSet21, "customer"].Count-1; • How to MovePrevious and MoveFirst? • Note: The Position property takes care of the end of file automatically.
Using BindingSource Object to Do the Binding and Navigation • It is an object that keeps track of position (the current row) of a data source. • Useful properties: • DataSource • DataMember • Position property: is the index of the current row. The index is a 0-based index, the first record has a position of 0. • Methods: • MoveFirst, MoveLast, MoveNext, MovePrevious • AddNew • AllowEdit • EndEdit • Current • RemoveCurrent
Bind Controls to BindingSource Object • Configure Adapter and generate dataset. • Add BindingSource object to the form • Use BindingSource object’s property window to set its DataSource and Data Member properties to the dataset object and table object. • Set control’s DataBinding property to the BindingSource object.
Use BindingSource Object’s MoveNext, MovePrevious Methods • Add a MoveNext button • bindingSource1.MoveNext(); • Add a MovePrevious button: • bindingSource1.MovePrevious();
Adding AddNew and Save Button AddNew button: Use BindingSource AddNew Method: private void button3_Click(object sender, EventArgs e) { bindingSource1.AddNew(); } Save button: Use BindingSource EndEdit method and Adapter’s Update method: private void button4_Click(object sender, EventArgs e) { bindingSource1.EndEdit(); oleDbDataAdapter1.Update(dataSet2.CUSTOMER); }
Binding ListBox • Example: Bind Customer Table’s CID field to a listbox. • Create a Adapter forCustomer table , and generate the dataset. • Add ListBox and set binding properties: • Data Source: Customer table • Display Member: Field to display in the listbox. • Value Member: the actual values for items in the list box.
Display Selected Record • Bound textbox (same data source as the listbox): • If the Listbox and the textbox are bound to the same BindingSource object, the textbox will automatically displays the record of the selected listbox item. • Unbound textbox • To display the ValueMember • textBox3.Text = listBox1.SelectedValue.ToString(); • To display other fields: • VB with late binding • Textbox1.text = ListBox1.SelectedItem(“Cname”) • C# does not support late binding: No!
ListBox SelectedItem Property • How to display the selected record in unbound textbox? • After binding to a data source, this property return a DataRowView object. • What is DataRowView? • Object Browser: • System.Data • DataRowView: Item property is the default property • To retrieve a column from a DataRowView object (use 0-based index to identity a column): • ListBox1.SelectedItem.Item(1) • Or: ListBox1.SelectedItem(1) • Or: ListBox1.SelectedItem(“Cname”)
Using Object Browser • View/Object Browser • DataSet object model: • System.Data • DataSet • Relations • Tables • Rows • Columns • Use Object Browser to study object’s properties, methods. Ex. System.Data.OleDbDataAdapter
Working with SQL Server Data Adapter • From the Data tab: • Choose: SQLDataAdapter • (If you don’t see it, right-click the Data tab and select Choose Item. Then select it from the .Net components)
DataSet and Data Adapter • DataSet Object: A DataSet object can hold several tables and relationships between tables. • DataAdapter: This the object used to pass data between the database and the dataset. • It is an object with SQL Select, Insert, Update and Delete commands.
Creating Parent/Child Form Using DataAdapter Wizard • Add two DataAdapters to the form: one for the parent table and one for the child table. • Use the parent table’s DataAdapter to generate a dataset; then use the child table’s DataAdapter to generate the child table into the same dataset. • Open dataset’s designer and right-click the parent table and choose Add/Relation to add a relation. • Add and bind textboxes to the parent table; add dataGridView and bind its datasource property to the relation. • Add navigation button’s using parent table’s BindingSource object.