Download

1 / 46
740 likes | 1.6k Views
Phlebotomy. Making an incision or cut in a vein. Bell Work 3-19-18.

E N D
Phlebotomy Making an incision or cut in a vein
Bell Work 3-19-18 1. What disorder is usually due to chronic blood loss caused by excessive menstruation, bleeding into or from the gut as a result of a peptic ulcer, gastritis, or hemorrhoids? This condition is treated with iron supplementation. 2. What is the medical term for abnormal decrease in the number of circulating platelets? 3. What is the medical term for an abnormal increase in White Blood Cells?
Bell Work Answers • Iron- Deficiency Anemia • Thrombocytopenia • Leukocytosis
Diagnostic Medicine Standard 20) Understand principles of and successfully perform skills of a phlebotomist, incorporating rubrics from National HOSA, textbooks, or clinical standards of practice. • a. Distinguish sites and/or veins for blood draws in all populations using the required equipment and safety precautions. • b. Perform collection procedures for microspecimens and venipuncture on a mannequin using appropriate collection containers and identifying factors affecting collection/test results. • c. Provide guidelines for obtaining blood from neonates, pediatrics, and geriatrics. • d. Perform skills of patient/specimen identification and transporting of specimens.
Medical Therapeutics Standard • 10) Demonstrate an understanding of basic medical terminology in order to monitor patient/client status through: a. History and Physical including but not limited to: family, environmental, social, and mental history b. Brief Head to Toe Assessment noting normal vs. abnormal findings c. Vital Signs Assessment (VS) d. Height/weight, BMI /Calculation e. Specimen Collection
Introduction • Phlebotomy means to cut into a vein. • This procedure of cutting or puncturing a vein is performed by a phlebotomist. • The primary role of a phlebotomist is to obtain blood specimens for testing. • Other roles include packaging urine specimens, accepting incoming specimens, and routing specimens to other departments. Chapter 1
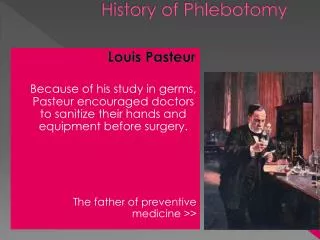
History of Phlebotomy leeches P h l e b o t o m y • Removing blood from veins dates back to about 1400 B.C. when leeches were applied to the skin of sick people. History of Phlebotomy • In the early 1800’s, medicinal leeches were used for the procedure known as bloodletting. • Bloodletting was typically performed by barbers or anyone claiming medical training. Chapter 1
Phlebotomist Chapter 1
Roles and Responsibilities of the Phlebotomist COMPARE ASK VALIDATE PATIENT IDENTIFICATION • Check armband or ID label in acute care settings • Check driver’s license or picture ID in outpatient settings Proper Identification Is a Three-Step Process Chapter 1
Roles and Responsibilities (cont’d) Verbal and nonverbal communication should be appropriate, such as: • Avoiding the use of slang • Speaking in a calm, clear voice • Avoiding inappropriate terms • Maintaining eye contact • Neat, well-groomed appearance • Respecting personal space The phlebotomist must be able to communicate using nonmedical terms. Chapter 1
Roles and Responsibilities (cont’d) When providing customer service: • Be empathetic • Observe the patient’s behavior • Listen to the patient’s concerns • Address any situation promptly • Be flexible Chapter 1
Step-by-Step Approach cont’d 3 Preparing for Venipuncture Patient Identification For Inpatients For Outpatients • Always check the ID band on the arm or ankle • May require verbal verification by a nurse if patient is sedated • Ask the patient to verify information on the requisition form • At least two to three verification items should be asked to ensure proper identification • The most important step in the venipuncture procedure!! • Always ask for the name and date of birth • Always verify at least two patient identifiers before proceeding Chapter 4
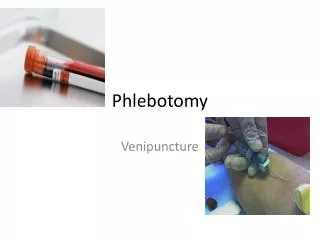
Roles and Responsibilities (cont’d) Venipuncture CapillaryPuncture Insertion of a needle into a vein to remove blood Use of puncture device to obtain capillary blood by pricking the skin Specimen Collection and Handling Physician orders indicate type of specimen and time of collection Most Commonly Used Methods Chapter 1
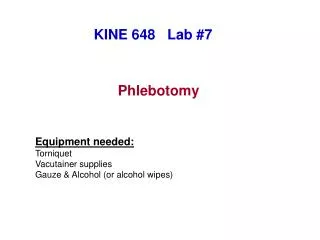
Preparing for Venipuncture Assembling the Venipuncture Equipment Supplies for Venipuncture • Gloves • Tourniquet • Alcohol prep pads • Gauze pads • Needle • Evacuated tube holder or syringe • Appropriate evacuated tubes • Sharps container • Adhesive bandage or tape • Permanent marker or label Chapter 4
Venipuncture Equipment • Evacuated tubes— plastic or glass tubes, contain a vacuum, various sizes, some contain additives (may be preservative or anticoagulant) • Sizes vary by amount of sample needed • Each tube has a color coated top depending of the contents of the tube • Different tests require different tubes
Preparing for Venipuncture Patient Positioning • The patient should be lying supine or sitting in a phlebotomy chair. • A straight chair with an arm is preferable. • If necessary, a pillow or rolled up towel can be placed under the arm for positioning. Chapter 4
Preparing for Venipuncture The tourniquet: • Should not pinch the skin • Should be kept flat against the skin • Should be applied 3 to 4 inches above the venipuncture site Apply the tourniquet, which will make the veins more visible and palpable Chapter 4
Venipuncture Site Selection • Antecubital site: preferred site • Anterior surface of arm • Median cubital vein • Cephalic vein • Basilic vein
Preparing for Venipuncture Special Considerations—Children It is a good practice to ask a child to help with the procedure to decrease the child’s anxiety. Special Considerations—Elderly • Sensory impairment may exist, so extra time may be required • A shallower angle is required during insertion • Skin is fragile and veins tend to roll, so hold the skin taut Chapter 4
Preparing for Venipuncture Special Considerations—HIV or Hepatitis • Use proper PPE to avoid occupational exposure Special Considerations—Psychiatric • Evaluate the patient carefully for any signs that the blood collection process could be difficult • If concerned, ask a staff member to assist Chapter 4
Preparing for Venipuncture Cleansing the Site • Cleaning the site with an antiseptic (70% isopropyl alcohol) helps prevent microbial contamination • Cleanse the site using concentric circles • Allow alcohol to dry completely or use a gauze, but NEVER blow on the site Chapter 4
Use of Alcohol • Be sure to allow the alcohol to dry before attempting the venipuncture procedure. Wet alcohol entering the specimen can affect the laboratory results! Chapter 4
Apply Your Knowledge You are about to draw blood from Mr. Harrell. When you ask him to be seated in the phlebotomy chair, he states “Why do I need to sit down? This should not take long.” Which of the following would be the best response? A. “You are right; this will not take long, so you may continue to stand.” B. “No, this may take much longer than you think, so please be seated.” C. “No, it should not take long, but it is much safer for you to be seated, and sitting will enable you to keep your hand steady. Answer: C. Patients should be seated or lying down for safety. BRAVO! Chapter 4
Petechiae • Petechiae or a hematoma may develop if the tourniquet is left on too long, or if a needle has gone though the vein. • Any form of temporary or permanent disfigurement should be avoided. Be sure to remove the tourniquet in a timely manner. If a hematoma develops, apply firm pressure to the site. Chapter 4
Unsuccessful Venipuncture If the Venipuncture Is Not Successful Causes of Blood Collection Failure • Needle inserted too far • Insufficient vacuum in tube • Bevel on lower wall of the vein • Tourniquet too tight • Poor site selection (vein hard and sclerosed) • Patient fails to maintain “still” positioning Sometimes repositioning the needle will cause blood to flow. Do not “probe” or change the position of the needle while it is inserted. Chapter 4
Disposing of the Needle Disposing of the Needle Dispose of the needle and adapter as one piece Most sharps containers are made of puncture-proof material and display the biohazard symbol. Remember, never overfill a biohazard container! Chapter 4
Labeling the Specimen Labeling the Specimen OR Use a permanent marker to label Computer-generated label Remember for either type of label you must mark the tube after collection with patient name, medical ID #, DOB, date drawn, time and your initials. Chapter 4
Applying the Bandage Applying the Bandage • Check the patient’s arm after about three minutes to see if the bleeding has stopped • Tape or an adhesive bandage can be used to hold the pressure gauze on the site • Do not use tape on anyone with thin, fragile skin or on people with allergies to tape • The patient can remove the bandage after 15 minutes Chapter 4
Patient Preparation • Check requisition for identification, proper tubes and special instructions • Identify patient • Explain procedure • Assist patient into a comfortable position • Place tourniquet on arm • Choose site • Clean site • Perform venipuncture • Release tourniquet • Remove tubes from adapter • Apply gauze and remove needle from the arm • Invert tubes and determine if recollection in required
Dermal Puncture Capillary Puncture Capillarypuncture is the preferred blood collection technique for infants and small children. • It is difficult to locate a vein that is large enough to withstand the vacuum created by the evacuated collection tubes. • Children do not enjoy venipuncture and usually will not remain still for the length of time venipuncture requires. • Capillarypuncture is much easier to perform. • Capillarypuncture is less traumatic for the child. Chapter 4
Dermal Puncture Part 2 Capillary Puncture Selecting the Site for CapillaryPuncture • Heels are the site of choice in infants who are less than 1 year old • Fingers are used in adults and children • Attempt to find an unused area • Area should be warm, pink, and free of scars • Do not use the arch of the foot, the back of the heel, or the plantar area of the foot The site selected for the heel should be well away from the heel bone because puncture of the calcaneus can cause osteomyelitis. Chapter 4
Dermal Puncture Part 3 Capillary Puncture Plantar Surface • For older children and adults, the preferred site is the palm side of the ring or middle finger • Do not cut in the same direction as the fingerprint NOTE: Warming the finger or heel will increase blood flow Chapter 4
Dermal Puncture Part 4 Capillary Puncture • Hold the finger in the proper position Performing a CapillaryPuncture • Clean the site with an alcohol pad and allow to dry completely • Puncture the finger with a properly selected safety device • Apply a steady amount of pressure to the site before and during the puncture Chapter 4
Dermal Puncture Part 6 Capillary Puncture • Be sure to make the puncture deep enough to collect the amount of blood needed • Wipe away the first drop of blood • Use a microcollection device to collect the specimen NOTE: This procedure will cause pain, so be sure to collect an adequate amount of blood initially to prevent repeat sticks. Chapter 4
Capillary Puncture After the CapillaryPuncture • Dispose of the safety lancet in the sharps container • Label the microcontainers • Check the site of puncture and apply a bandage if necessary • Collect and dispose of your supplies appropriately • Dismiss the patient • Transport the specimen to the laboratory Chapter 4
Apply Your Knowledge Which is the site of choice for performing a capillary puncture in an infant under 1 year of age? Chapter 4
Apply Your Knowledge Which is the site of choice for performing a capillary puncture in an infant under 1 year of age? ANSWER: The heel GREAT! Chapter 4
Assignment • Diagnosis of the Day – On Web Site. Put in Notebook under today’s date. Chapter 4
Bell Work Chapter 4
Phlebotomy Children’s Book • Due Friday, March 23 • Time in class to complete • Remaining Today • Avg. 45 minutes on Wednesday • Avg. 30 minutes on Thursday Chapter 4
Bell Work Chapter 4
Phlebotomy Video • https://www.youtube.com/watch?v=uNdCAZZGQvI Chapter 4