Download
1 / 28
1.17k likes | 2.15k Views
Sensors and actuators. Sensors Resistive sensors Voltage-controlling sensors Actuators Analog actuators Pulse width modulation Making sounds. Sensors. Sensors. Allow the microcontroller to receive information about the environment How bright is it? How loud is it?

E N D
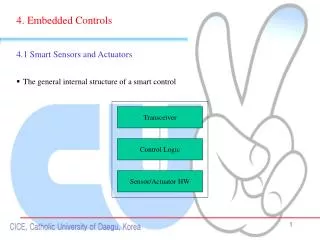
Sensors and actuators Sensors Resistive sensors Voltage-controlling sensors Actuators Analog actuators Pulse width modulation Making sounds
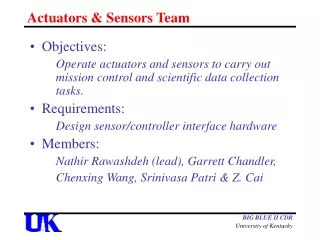
Sensors • Allow the microcontroller to receive information about the environment • How bright is it? • How loud is it? • How far is an object? • Is the button being pressed? • Perform operations based on the state of the environment • Turn on a light if it is dark out • Voice-controlled operation
Sensing the environment • Microcontrollers sense voltage • digitalRead(pin) returns state of a digital pin • analogRead(pin) returns the analog voltage on a pin • Sensor logic must convert an environmental effect into voltage
Reading a pushbutton • Make a pin HIGH when the button is pressed, and LOW when it is not pressed Correct Incorrect
Resistive sensors • Many sensors change resistance • Photoresistors, thermistors, flex sensors, etc. • Connect sensor in a voltage divider • As resistance changes, voltage changes
Photoresistor • As brightness increases, resistance decreases • Resistance = 10K ohms, Voltage = 2.5 volts • Resistance = 5K ohms, Voltage = 3.33 volts
Voltage-controlling sensors • Some sensors control voltage directly Accelerometer: Reports acceleration in 3 axes Gyro: Reports angular velocity in 3 axes Passive infrared sensor: detects motion
Actuators • Devices that cause something to happen in the physical world • Outputs of the devices • Visual: LED, LCD, monitor • Audio: buzzer, speaker • Motion: motors, valve, pump • Tactile: heating, cooling
On-off actuation • The only control is power • Even complicated actuators can be controlled via power • LED, buzzer, monitor • Does not use the full potential of the actuator • On-off control may be all that is necessary • Lights in a classroom
Current limits • Watch out for current limits • LED can only handle 20mA • Be sure to use an appropriate resistor • Arduino can only supply 40mA • Cannot drive a motor that requires 10A • May need to use alternate power supply • Arduino can control access to power without providing power directly
Analog voltage control • Many actuators need an analog voltage for complete control • DC motor speed controlled by voltage • LED brightness controlled by voltage • Heating element temperature controlled by voltage • Arduino cannot generate analog outputs
Digital to analog converter (DAC) • DAC will convert digital number to an analog voltage • Most microprocessors do not have a DAC • Can buy one and attach it, but may be costly
Pulse width modulation • Duty cycle is the percent of time the pulse is HIGH • Increasing duty-cycle increases perceived voltage
analogWrite() • Generates a square wave on a pin, 490Hz • First argument is the pin number • Second argument is the pulse width • 0 is 0% duty cycle • 255 is 100% duty cycle • Pin number must be a PWM pin • Marked on the Arduino with the “~” symbol • Example: analogWrite(3,128); will output 2.5V approximately on pin3
Fade example int brightness=0, fadeAmount=1, led=3; void setup() { pinMode(led, OUTPUT); } void loop() { analogWrite(led, brightness); brightness = brightness + fadeAmount; if (brightness<=0 || brightness>=255) fadeAmount = -fadeAmount; delay(30); }
tone() • tone() can generate a square wave with an arbitrary frequency • analogWrite() has a fixed frequency • Duty cycle is fixed at 50% • Can be used to drive a speaker or buzzer • Two or three arguments • Pin number • Frequency, in Hz • Duration in milliseconds (optional)
Square waves vs. sine waves • Square waves sound bad • Contains many high-frequency components • Square wave is the best we can do with simple digital outputs
Buzzer • Two inputs: signal and ground • Produces a click when a rising edge is applied • Driving with a square wave produces a pitch
Music system void setup() { } void loop() { tone(8, 988, 1000); delay(1000); tone(8,1047,1000); delay(1000); } • Plays two tones, 1 second each • Delay is needed; only one tone at a time
Windscreen wiper • Get your Arduino ready with a touch sensor, a potentiometer, a servo motor, and a breadboard. • You are making a simplified windscreen wiper. • When your Arduino is powered up, your servo motor should head to the rest position (to 0 degree with an appropriate speed) • Your touch sensor is the switch. • While you put your finger on the touch sensor, the servo motor should swing between 0 degree to 90 degrees. • If you put your finger off, the servo motor should head to the rest position. • Your potentiometer is a speed controller. • Rotating the potentiometer should change the wiper’s swing speed.