Download
1 / 58
590 likes | 660 Views
Wilderness Survival Training Troop 806. Wilderness Survival. Wilderness Survival is taking care of yourself in a way that allows you to come home safely. Wilderness Survival Training. …Learn Skills that will keep you alive until the Emergency is over

E N D
Wilderness Survival Training Troop 806
Wilderness Survival Wilderness Survival is taking care of yourself in a way that allows you to come home safely Wilderness Survival Training …Learn Skills that will keep you alive until the Emergency is over …Learn to Work with Nature and NOT against it …Learn to Maintain a Positive Attitude Are You Ready for Wilderness Survival Training?
Wilderness Survival Training Wilderness Survival is part of Scouts and Venturing
Wilderness Survival Merit Badge and Training Wilderness First Aid 7 Priorities for Survival Avoiding Panic – Maintaining High Morale Surviving in different Environments Assemble and use a Personal Survival Kit Improvised Fire Building (3 methods)-no matches Improvised Signaling Techniques Improvised Shelters – Build & Sleep in it 1 night Improvised Protection from Insects & Animals Improvised Water Treatment-Purification Survival Dressing (Hot and Cold Climates) Improvised Food Gathering and Cautions
2 3 1 4
Wilderness Survival Training Wilderness Survival - POP QUIZ………. Name the TWO Primary Reasons why an Emergency Situation escalates into a Wilderness Survival Situation? DENIAL and PANIC
Wilderness Survival Training Emergency Events that cause Denial and Panic Lost Hiking in the Woods Sudden Storm comes up and you wont make your destination Someone is injured and requires immediate medical attention A sick or injured person can not move and requires evacuation Your vehicle breaks down in a remote location Your boat capsizes –gets damaged or suffers engine failure An unplanned swim (stream crossing) causes immediate risk of hypothermia • What Makes things Even Worse? • Responding to an Emergency causes additional Injuries • After dealing with an emergency – darkness falls or severe weather moves in
Wilderness Survival Training Wilderness Survival - POP QUIZ………. Name the SINGLE Most Important tool you must Always take with you into an Emergency Situation….? YOUR BRAIN! Clear-minded thinking-positive mental attitude, skills, deliberate actions, and experience can make the difference between survival and disaster!
Wilderness Survival Training Wilderness Survival - POP QUIZ………. True of False??? Survival is a democratic Process–Everyone has a vote? False! A Survival situation is life-threatening! Pick a Leader who is a clear thinker, determined, is the most experienced
Wilderness Survival Training Task 1: First Aid Show that you know first aid for and how to prevent injuries or illnesses likely to occur in Survival settings, including hypothermia, heat reactions, frostbite, dehydration, blisters, insect stings, tick bites, and snakebites.
Wilderness Survival Training Wilderness Survival - POP QUIZ………. What Would YOU Do??? You thought you had given yourself enough time for the return hike, but suddenly night is overtaking you as you follow your trail back toward camp, which is still a few miles away. The going is slow as you fight your way through dense foliage in the deep canyons. Finally, in utter blackness and feeling the onset of a biting chill, you give-up and decide to make camp. You have nothing but the clothes you are wearing. How will you make it through the night? Camp in the deepest part of the canyon. Climb to the ridge-top and camp there. Climb 2/3rds of the way to the ridge top, find cover and camp there. Find the densest bunch of trees and hunker down for warmth.
Wilderness Survival Training Task 2: Seven Survival Priorities From memory, list the seven priorities for survival in a backcountry or wilderness location. • In Order of Importance: • S.T.O.P. – Stop – Think – Observe – Plan • Provide First Aid • Seek Shelter • Build a Fire • Signal for Help • Drink Water • (Don’t worry about…) Food • The Wilderness Survival Imperatives: • Decide to Survive – “Have the Will to Live” • Anticipate Panic and Denial • Control Peripheral Danger • Be Deliberate and Keep “Doing”
Wilderness Survival Training 1. S.T.O.P. = Stop – Think – Observe - Plan S.T.O.P. To Do WHAT? How to do it: • Relax • Seek Safety (weather-water-animals) • Seek Shelter (cold-rain-heat) • Seek Visibility (so you can be seen) • Drink some water-eat a snack • Stay put if you are lost –(a stationary • Person is easier to find) STOP • Are there immediate dangers? • What went wrong? • How can I help myself? • Can I help others find me? • Don’t make quick decisions • Don’t go anywhere-yet! THINK • Am I hurt? • What equipment do I have? • What is the weather going to be? • How much time do I have? • What hazards are around me? • What natural resources are near? OBSERVE • Assess conditions, crew, gear, location • Develop a new plan based on your • observations • Analyze risk versus benefits of • changing your plans PLAN
Wilderness Survival Training 2. Provide First Aid
Wilderness Survival Training 2. Provide First Aid - Continued
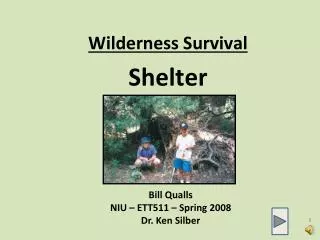
Wilderness Survival Training 3. Seek Shelter Why is this Important? How to Do It? • Keeps you focused on Surviving • Will help maintain body temperature • Protects you from: • WIND • RAIN • SUN • Elements • Find Natural Cover – Caves, Tree Branches, Overhang • Make Cover – Lean-to, Ponchos, Emergency Blanket • Snow Shelter, Garbage Bag • Avoid Low Spots (water puddles) • Avoid areas near water (flooding) • Avoid Fire Hazards • Avoid ant hills, dens, poisonous plants • Next to a clearing • Avoid hill tops (windy, cold) • Near resources – Wood, close to water, plants • THINGS TO CONSIDER • Check Natural Shelters for signs of animals • Don’t place food in the Shelter • Don’t build a fire in your shelter • Put Signals or signs out for rescue Teams
Wilderness Survival Training 4. Build a Fire Why is this Important? How to Do It? • Warmth for comfort and positive mental attitude • Keeps you one place • Smoke for signaling • Heat for purifying water • Protection from animals • Cooking and making tools • Choose a dry location-avoid windy spots • Gather tinder • Place tinder on a dry surface • Windy – build a fire ring • Avoid creek beds or rain run-off points • Dig a shallow pit–protect from the wind • Clear 4 ft around the fire pit • Build a heat reflector (wood/rocks) • Collect fuel (to last the night) • Small fires are controllable • Smoky fires are more visible • Use large logs when available
Wilderness Survival Training 4. Build a Fire
Wilderness Survival Training 4. Build a Fire Ingredients Techniques • TINDER – Dry Material that ignites easily • Cotton char cloth Wax Paper • Dryer Lint Dry Grasses • Cat Tail Fuzz Dry Bark • Cotton Balls with Vaseline • Fungus form birch • Shred bark from birch or cedar tree • Insect repellent – Hand Cleaner • KINDLING – Material that can be added to • burning tinder (Dead and Dry Wood) • Small Sticks • Pine Cones • FUEL – Burns slowly and steadily once • the fire is started (Dead and Dry Wood) • Flint and Steel • Metal Match – or – Fire Striker • Magnesium Bar • Magnifying Glass • Coke Can • Camera Lens-Binoculars • 9 Volt Batter and Steel Wool • Bow and Drill • Hand Drill • An ember from another fire • Butane Lighter • Bug Spray • Hand Cleaner
Wilderness Survival Training 4. Build a Fire
Wilderness Survival Training 5. Signal for Help Why is this Important? How to Do It? • Get your rescuer’s attention • Send a Message • Aircraft Signals: • Rock Wings = Message Understood • Right Hand Circle = Message • Not Received • Cell Phone – (extra batteries) • GPS Transmitter • “3 in a Row” – Universal distress signal • Rifles Shots • Piles of Rocks • Circles in fields/on a Beach • Don’t Yell • Whistle • Change Terrain Features • Scratch out a Message – SOS • Signal Mirror– can be seen for miles • Be Creative!
Wilderness Survival Training 5. Signal for Help V = REQUIRE ASSISTANCE X = REQUIRE MEDICAL ASSISTANCE N = NO Y = YES = Proceeding in This Direction • Take Advantage of Shadows • Sand – Logs – Clothes – Trash • Contrasting Colors
Wilderness Survival Training 6. Drink Water Why is this Important? How to Do It? • Your body loses fluid as a result of heat • Cold, stress and exertion. • To function effectively, you must replace your body fluids • Clean/Safe Sources • Rain • Dew • Solar Still • Lakes • Streams • Cliff Trickles/Run Off • Best Sources: Fast moving Water • Avoid: • Don’t eat Snow • Avoid polluted and Sea water • Cactus Pulp
Wilderness Survival Training 6. Drink Water Making it Safe to Drink • Boiling • Iodine Tablets • Bleach • Pumps and Filters • Tripod Filters • Solar Stills will produce potable water • Improvise – -Collect –Settle - T-shirt
Wilderness Survival Training 7. FOOD Why is this Important? How to Do It? • Only eat what you can identify • Eat small amounts – if you don’t get sick continue to eat from the same source • Grass – its OK. Do not eat too much • Toast Brown or Green Seeds • Nuts – Boil • Pine Needles – chop – boil – make a tea • Study you plants/ areas • In Most Cases – the energy you burn trying to gather food or capture an animal, cleaning it and cooking it would be better used improving your shelter and gathering water.
Wilderness Survival Training 7. Don’t Worry about - FOOD
Wilderness Survival Training 7. Don’t Worry about - FOOD
Wilderness Survival Training Task 3: Desire to Survive Describe ways to avoid panic and maintain a high level of morale when lost, and explain why this is important. Fear - For anyone faced with a wilderness emergency survival situation, fear is a normal reaction. Unless an emergency situation has been anticipated, fear is generally followed by panic then pain, cold, thirst, hunger, fatigue, boredom and loneliness. It is extremely important to calmly assess the situation and not allow these seven enemies to interfere with your survival. Pain - Pain may often be ignored in a panic situation. Remember to deal with injuries immediately before they become even more serious. Cold - Cold lowers the ability to think, numbing the body and reducing the will to survive. Never allow yourself to stop moving or to fall asleep unless adequately sheltered. Thirst - Dehydration is a common enemy in an emergency situation and must not be ignored. It can dull your mind, causing you to overlook important survival information. Hunger - Hunger is dangerous but seldom deadly. It may reduce your ability to think logically and increase your susceptibility to the effects of cold, pain and fear. Fatigue - Fatigue is unavoidable in any situation so it is best to keep in mind that it can and will lower your mental ability. Remember that in an emergency situation this is often the bodies way of escaping a difficult situation. Boredom & Loneliness - These enemies are quite often unanticipated and may lower the mind's ability to deal with the situation.
Wilderness Survival Training Task 4: Surviving in Different Environments Describe the steps you would take to survive in the following conditions:
Wilderness Survival Training Surviving in Different Environments Describe the steps you would take to survive in the following conditions: COLD and SNOW • Hypothermia – Medical Issues • Snow Covers – Fire Wood- Water-Food • Hydration – Melt Snow • Signaling – Good but challenging • Shelters- Good • Movement • Loss of gear in deep snow • Snow Blindness • White Out
Wilderness Survival Training Surviving in Different Environments Describe the steps you would take to survive in the following conditions: Wet Forests • Great Source for Materials – Shelters- • Food and Water Sources • Difficult signaling • Chilly – Cold nights • Fire Starting –difficult • Noise – sound travel • Hard on equipment – moisture • Navigation – with/without maps • Medical issues – wet feet
Wilderness Survival Training Surviving in Different Environments Describe the steps you would take to survive in the following conditions: Hot and Dry Deserts • Hot during Day time • Cold at night • Navigation – with/without maps • Signaling – good • Noise • Water collection – difficult • Shelter – • Medical issues – heat/sunburn/ • Food gathering
Wilderness Survival Training Surviving in Different Environments Describe the steps you would take to survive in the following conditions: WINDY ENVIRONMENTS • Keeps you Cool • Increases water consumption • Cools body • Signaling – noise/smoke/light • Shelters – impact – Where to seek shelter? • Rescue impacts ( aircraft/boats) • Medical Issues- hypothermia – airborne in
Wilderness Survival Training Surviving in Different Environments Describe the steps you would take to survive in the following conditions: Ocean-Lakes-Rivers • Boat Capsizes – engine problems-drift • Safety – Drowning • Medical Issues – Hypothermia • Signaling - types • Rafts/survival at sea – survival kit • Dehydration – don’t drink sea water • Surviving in the water • HELP • Buddy Huddle • Feet First – stay with the boat
Wilderness Survival Training Surviving in Different Environments Describe the steps you would take to survive in the following conditions: Off Road - Motoring • Stay close to the vehicle • Use items in the vehicle to help you • Signaling – Horn, Mirrors, Gas, floor mats • Shelter • Conserve power/batteries • Keep snow/debris off vehicle • Make yourself visible
Wilderness Survival Training Surviving in Different Environments Describe the steps you would take to survive in the following conditions: Flying • Stay close to wreckage • Use equipment on plane to your advantage • Signaling • Shelter • Always prepare a survival kit • Use equipment for signaling – food/water gathering • Medical equipment • Maps
Wilderness Survival Training Task 5: Assemble a Survival Kit Put together a personal survival kit and be able to explain how each item in it could be useful. Personal Survival Kit Wilderness survival kits contain different items than an Emergency survival kit for the home. Items you choose to include in your kit may also need to reflect the area and time of year of your adventure. A personal survival kit is intended to be kept on your person at all times while in the wild and opened only in emergency. In addition to the kit, you should also always have your essential tools listed below. Personal Survival Kit ( Example) Weight = 13oz. 1 Two Piece Aluminum Container, 3 7/16' x 6' x 1 1/16' 1 Signal Mirror 4 Razor knife Blades 1 Spark-Lite Fire starter Flint 10 Spark-Lite 'Fire Tab' Tinder's 10 Windproof/Waterproof Matches and Striker 1 Wire Blade Survival Saw 1 Plastic magnifying Glass (plastic) 8 Safety Pins 8 sq. ft Aluminum Foil 1 Small Pencil 4 waterproof paper (Rite In The Rain) 1 First Aid cards 1 Fishing Kit: 10 hooks, 2 swivels, 6 split shot, 25ft. of 20lb. line, 10 ft. of 8lb. leader 1 Emergency Poncho 25 ft Roll of Snare Wire 1 Mini-compass 3 SPF30 sun block Medical Supplies (in zip-log baggie) 4 Band-Aids, 1 x 3 in. 2 Band-Aids, 2 in. 2 Antibiotic Salve 6 Wound Closure Strips, 1/4' x 2' (butterfly bandage) 2 Povidone Iodine Solution, .6 ml ampoule/swabs 6 Pain killer pills 50 Water purification tablets (Potable-Aqua) 2 1 qt. plastic zip-loc bag 20 ft Nylon Cord (wrapped around kit) 9 ft Electrical Tape (wrapped around kit to seal it) 2 Large Sewing Needles 10 ft Sewing Thread
Wilderness Survival Training Task 5: Assemble a Survival Kit Put together a personal survival kit and be able to explain how each item in it could be useful. Mini Survival Kit Weight = 6oz. 1 Tin container (Altoids) 1 Polished aluminum tape applied to interior of lid, protected by peel-away sheet. 2 Razorknife Blades 1 Spark-Lite Fire Starter (See It) 4 Windproof/Waterproof Matches and Striker 1 Fishing Kit: 6 hooks, 2 swivels, 4 split shot, 25ft. of 20lb. line, 10 ft. of 8lb. leader 20 ft Snare Wire 1 Wire Survival Saw 1 Mini-compass 2 Bandaids, 1 x 3 in. 2 Bandaids, 2 in. 6 Pain killer pills 6 Antibiotic cream 25 Water purification tablets (Potable-Aqua) 9 ft Nylon Cord (wrapped around kit) 3 ft Electrical Tape (wrapped around kit to seal it) 16 in Duct Tape 10 ft Sewing Thread 2 Sewing Needles 6 Safety Pins 5 sq. ft Aluminum Foil 1 Small Pencil 2 waterproof paper (Rite In The Rain) • Essential Personal Equipment • Multi-purpose Tool (Leatherman) • Knife Sharpener • Whistle • Flashlight • Compass • Signal Mirror • Emergency Poncho • Energy Bar/Candy
Wilderness Survival Training Task 6: Build a Fire Using 3 Different Methods Describe the steps you would take to build a fire using 3 different methods (other than matches) • METHODS • Flint and Steel • Metal Match – or – Fire Striker • Magnesium Bar • Magnifying Glass • Coke Can • Camera Lens-Binoculars • 9 Volt Batter and Steel Wool • Bow and Drill • Hand Drill • An ember from another fire • Butane Lighter • Bug Spray • Hand Cleaner • How to Prepare • Choose a dry location-avoid windy spots • Gather tinder • Place tinder on a dry surface • Windy – build a fire ring • Avoid creek beds or rain run-off points • Dig a shallow pit–protect from the wind • Clear 4 ft around the fire pit • Build a heat reflector (wood/rocks) • Collect fuel (to last the night) • Use improvised technique to start fire
Wilderness Survival Training Task 7: Signaling Describe the steps you would take to signal rescuers when Lost: • Show 5 ways to attract attention: • Visual: Fire and Smoke, Bright Clothes, Signal Mirror, Flashlight, Sea Dye, Natural Materials-contrasting Shapes • Audio: Whistle, Radios, cell phone, gunshots • Demonstrate how to use a signal mirror
Wilderness Survival Training Task 7: Signaling Describe the steps you would take to signal rescuers when Lost: • 2. Demonstrate how to use a signal mirror
Wilderness Survival Training Task 7: Signaling Describe the steps you would take to signal rescuers when Lost: • 3. Recall from Memory the 5 Ground to Air Emergency Codes and describe what they mean? V = REQUIRE ASSISTANCE X = REQUIRE MEDICAL ASSISTANCE N = NO Y = YES = Proceeding in This Direction
Wilderness Survival Training Task 8: Build a Shelter Describe the steps you would take to build a shelter: • Find Natural Cover – Caves, Tree Branches, Overhang • Make Cover – Lean-to, Ponchos, Emergency Blanket • Snow Shelter, Garbage Bag • Avoid Low Spots (water puddles) • Avoid areas near water (flooding) • Avoid Fire Hazards • Avoid ant hills, dens, poisonous plants • Next to a clearing • Avoid hill tops (windy, cold) • Near resources – Wood, close to water, plants • THINGS TO CONSIDER • Check Natural Shelters for signs of animals • Don’t place food in the Shelter • Don’t build a fire in your shelter • Put Signals or signs out for rescue Teams
Wilderness Survival Training Task 8: Build a Shelter Improvise a natural shelter. For the purpose of this demonstration, use techniques that have little negative impact on the environment. Spend a night in your shelter. Build a ShelterA small shelter which is insulated from the bottom, protected from wind and snow and contains a fire is extremely important in wilderness survival. Before building your shelter be sure that the surrounding area provides the materials needed to build a good fire, a good water source and shelter from the wind. Wilderness shelters may include: 1. Natural shelters such as caves and overhanging cliffs. When exploring a possible shelter tie a piece of string to the outer mouth of the cave to ensure you will be able to find your way out. Keep in mind that these caves may already be occupied. If you do use a cave for shelter, build your fire near its mouth to prevent animals from entering. 2. Enlarge the natural pit under a fallen tree and line it with bark or tree boughs. 3. Near a rocky coastal area, build a rock shelter in the shape of a U, covering the roof with driftwood and a tarp or even seaweed for protection. A lean-to made with poles or fallen trees and a covering of plastic, boughs, thick grasses or bark is effective to shelter you from wind, rain and snow. 5. A wigwam may be constructed using three long poles. Tie the tops of the poles together and upright them in an appropriate spot. Cover the sides with a tarp, boughs, raingear or other suitable materials. Build a fire in the center of the wigwam, making a draft channel in the wall and a small hole in the top to allow smoke to escape. 6. If you find yourself in open terrain, a snow cave will provide good shelter. Find a drift and burrow a tunnel into the side for about 60 cm (24 in) then build your chamber. The entrance of the tunnel should lead to the lowest level of you chamber where the cooking and storage of equipment will be. A minimum of two ventilating holes are necessary, preferably one in the roof and one in the door.
Wilderness Survival Training Task 9: Describe how to protect yourself Describe the steps you would take to protect yourself from Insects, Reptiles, Bears • INSECTS: • Wear proper Clothing: – hat – long sleeves –shoes/socks • Use Insect repellent: Skin and clothes • See and Avoid: If you see bee hives, spider webs, ant mounds – avoid them and do not disturb • REPTILES: • See and Avoid • Walk carefully- watch where you step • Look carefully where picking fruit or in water • Check bedding, shelters carefully – use sticks to turn rocks/logs • Be calm – normally reptiles will flee once they are spotted
Wilderness Survival Training Task 9: Describe how to protect yourself Describe the steps you would take to protect yourself from Insects, Reptiles, Bears BEARS: • See and avoid • Cook 100 yards away from your sleeping area • Leave all cooking utensils, bowls, spoons… anything that touched the food away from your site. • Toothbrushes, toothpaste, chap stick, soap, first aid kit (except prescription meds – should be kept in double zip lock bag) bug spray, sun screen… should all be put with the food. • Place all above items inside plastic bags and synch them tight, them place in bear bag.
Wilderness Survival Training Task 9: Describe how to protect yourself Describe the steps you would take to protect yourself from FLORIDA -Specific • Poisonous Animals • There are many different types of poisonous animals and critters that inhabit Florida. They can be dangerous and sometimes deadly to people who can come in contact with them. Parents can help to prevent injuries from poisonous animals by carefully monitoring their children during play. • Snakes • Snakes have the unfortunate reputation of being vicious and aggressive. Actually, most are shy creatures preferring to be left alone. They attack only to protect themselves. They use venom primarily to kill food and usually will not waste it on an animal too large to kill. Always wear shoes or boots when hiking. Remember, if you are close enough to identify a snake by its markings...you are too close! The following are poisonous snakes found in Florida: • Eastern Diamondback Rattlesnake • Canebreak Rattlesnake - Pigmy Rattlesnake - Coral Snake - Cottonmouth (Water Moccasin) - Copperhead • If you or a family member are bitten by any snake, call the Poison Information Center at 1-800-222-1222. If you are sure it is one of the poisonous snakes listed here, call the Poison Information Center immediately or go to the nearest emergency department. DO NOT attempt to suck the venom out of the victim. DO NOT apply a tourniquet. DO NOT elevate the affected limb or apply ice to the bite area. Ask the victim to lay down and remain calm. • Spiders • Approximately 20,000 species of spiders live in the US. Almost all are capable of biting but very few are capable of penetrating human skin. Bites can be painful and may cause redness, swelling and infection. In Florida, only the black widow and brown recluse spiders are considered potentially dangerous. • Caterpillars • Handling caterpillars may cause intense burning pain due to the insect's spines becoming lodged in the skin. Severity of symptoms depends on the maturity of the insect, the victim's sensitivity to the spines, and the number of spines embedded in the skin. The most common symptoms are redness, swelling, localized pain, itching and rash. Never rub the site. Spines can be removed from the skin by applying adhesive tape to the affected area and quickly removing it. Call the Poison Information Center for treatment advice. • Stinging Insects • There are literally thousands of species of insects capable of stinging. Fortunately, most of these insects are not dangerous. Call the Poison Information Center for treatment advice. If a stinging victim develops serious symptoms including flushing, swelling of the face or shortness of breath, further medical attention should be sought immediately.
Wilderness Survival Training Task 10: How to Treat Water Describe the steps you would take to treat water • DO This • Clean/Safe Sources • Rain • Dew • Solar Still • Lakes • Streams • Cliff Trickles/Run Off • Best Sources: Fast moving Water • Avoid: • Don’t eat Snow • Avoid polluted and Sea water • Cactus Pulp Making it Safe to Drink • Boiling • Iodine Tablets • Bleach • Pumps and Filters • Tripod Filters • Solar Stills will produce potable water • Improvise – Collect – Allow to settle – use a T-shirt or clean cloth to filter