Download
1 / 46
470 likes | 770 Views
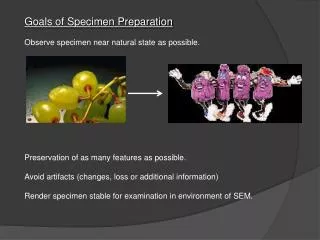
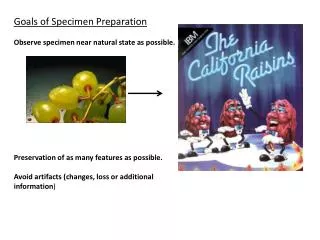
Goals of Specimen Preparation Observe specimen near natural state as possible. Preservation of as many features as possible. Avoid artifacts (changes, loss or additional information) Render specimen stable for examination in environment of TEM. Problems.

E N D
Goals of Specimen Preparation Observe specimen near natural state as possible. Preservation of as many features as possible. Avoid artifacts (changes, loss or additional information) Render specimen stable for examination in environment of TEM.
Problems TEM not widely used by biologists until 1950’s Considerations for TEM- High vacuum Support of sample Intense heat from beam Depth of electron penetration Considerations for SEM- High vacuum Size of specimen Localized elevated temperatures Capable of emitting signal Conductive Early images of diatoms
Standard Preparation Tissue TEM SEM Chem. Fixation Cryo Fixation Chem. Fixation Cryo Fixation Rinse/store Substitution Rinse/store En bloc staining Cryo- sectioning Dehydration Dehydration Dehydration Drying Resin infiltration Mounting Sectioning Coating Post staining
Specimen preparation Stabilization - Fixation and dehydration. Embedding in resin for TEM Surface Preparation - cleaning and/or exposure of new surface for SEM. Cutting specimen to ultra-thin sections for TEM Mounting - specimen on stub (SEM) or grid (TEM) “Staining” with heavy metals for image contrast (TEM)
Basic factors affecting chemical fixation pH (Isoelectric point) Total ionic strength of reagents Osmolarity Temperature Length of fixation Method of application of fixative
Buffers • Def. - a solution containing a weak acid and its salt. • Serve to hold pH steady during the fixation process. • Chemical fixation is a complex set of oxidative and reductive reactions, thus [H+] is constantly changing. • All fixatives have an optimal pH at which the rate of cross-linking is greatest. • At a specific pH, all proteins have a point, the isoelectric point (IEP) where the numbers of + and - charges are equal. Fixation is most effective at the IEP.
CONSIDERATIONS IN THE SELECTION OF A BUFFER • pH - each buffer has a point (pKa) where there is equal concentration of acid and base. • Compatibility with fixatives components and stains • E.g. - GTA reacts with buffers containing sulfhydryl groups (TRIS, HEPES) and phosphate buffer precipitates uranyl acetate, a commonly employed TEM stain. • Introduction of artifacts - if elemental analysis is to be done. • Effective at low concentrations • Low Cytotoxicity
CONSIDERATIONS IN THE SELECTION OF A BUFFER • Tonicity • Osmolality = a measure of solute concentration. • Osmolality in groups of organisms: • Mammals - 290- 700 mOsm (plasma) • Reptiles - 325 • Marine organisms (250 - 375, 1000 or more) • Freshwater invertebrates - as low as 30 mOsm • Plants - differs with the tissue and species (meristematic = 400, mature vascular tissue = 800)
Tonicity • Effect of tonicity: • 1.Isotonicity • Environment and • Sample similar • 2.Hypertonicity • Environment higher osmolarity • Water moves out of sample • 3.Hypotonicity • Environment lower osmolarity • Water enters sample 5 mOsm 5 3 8
Fixation A process which is used to preserve (fix) the structure of freshly killed material in a state that most closely resembles the structure and/or composition of the original living state. Chemical crosslinking - coagulative/noncoagulative - Coagulative: original killing agents (alcohols, Farmer’s, FAA, Bouins) Coagulates cellular components - like frying an egg. - Non Coagulative: Formaldehyde, Glutaraldehyde, Osmium Tetroxide
Osmium tetroxide • An additive, non-coagulative type of fixative, but lacks the ability to crosslink many proteins. • Very poor rate of penetration • Its use as a primary fixative is quite limited, although it is popular in some mixtures with other fixatives for unicellular organisms. • Due to its extreme toxicity, low vapor pressure, and being a strong oxidizing agent, precautions are necessary for its handling. • Vapors rapidly fix exposed mucous membranes such as those in the eyes (eventually causing blindness) and respiratory tract (lung edema). • Mode of action - reacts primarily w/ double bonds and sulfhydryl groups of proteins, causing major conformational changes in the structure of proteins*
Dehydration • Reasons for dehydration: • Water in incompatible with conditions inside an electron column. • Most of the materials used to infiltrate and embed specimens prior to ultrathin sectioning are hydrophobic. • Methods of Dehydration: • Organic solvent Series • Tissue is transferred through a series of organic solvents in increasing concentration. • Ethanol and acetone are the most commonly used. • Water content is slowly reduced to the point that the tissue is in 100% solvent. and is thus completely dehydrated.
Embedding and Sectioning • Requirements for cutting any material into thin slices: • Support - biologicals tend to be soft. Inducing hardness in them gives them the mechanical support needed for sectioning. • Accomplished by lowering temperature (freezing) or infiltration with some material that can be hardened. • Plasticity - resiliency as opposed to brittleness.
Embedding and Sectioning • Embedment • Light microscopy • Tissue infiltrated with molten paraffin wax - which is allowed to cool and harden. • Requires dehydration and infiltration with a paraffin solvent - aromatic hydrocarbon (xylene, toluene, benzene). • Provides sufficient support to section to about 3 micrometers minimum with a steel knife. • Paraffin can infiltrate deeply into tissue, allowing large blocks and ultimately large sections to be obtained.
Embedding and Sectioning Paraffin Sectioning for Light Microscopy
Embedding and Sectioning • TEM Embedment • Tissue infiltrated with a resin which is polymerized by heat, chemicals, or U.V. • Provides support to section infiltrated tissue to about 40 nm minimum. • Infiltration is limited...specimens can be no more than a few mm thick. • The required thinness of the sample and the friction during cutting limits the section size to about 1 mm2 maximum.
Embedding and Sectioning • Types of Resins • Acrylics - ie methyl, butyl methacrylates (plexiglass) - "Open-structured" - allows for better stain penetration and Antibody rxn • Epoxies - epon, araldite, Quetol, Spurr - for most general work • Polycarbonates - vestopal - fiberglass resin • Epoxy Resins - most commonly used. • Components: • Resin - Epon 812, Araldite 502 or 6005 • Hardener - DDSA - amount can be varied • Plasticizer - NSA • Accelerator - DMP-30
Embedding and Sectioning • Infiltration • In resin/solvent mixture in increasing concentration • Ethanol/resin or acetone resin often used • Propylene oxide/resin is most effective • When 100% resin is reached, it should be changed twice to insure that all solvent is removed • Polymerization • Thermal - 50-70 C, depending on resin mix • U.V. - usually done to avoid heat • of polymerization. Often done at low temp.
Embedding and Sectioning • Ultramicrotomy • Mechanical Advance • Thermal Advance • Ultramicrotome Knives: • Diamond - 1.5 - 6mm cutting edge • Latta-Hartmann (glass) - 6mm cutting edge (~1mm useable) • Both use water to support and lubricate the section as it is cut (decreases friction)
Embedding and Sectioning • Making a glass knife: • Use of a glass knifemaker to score a 1" glass square
Embedding and Sectioning A scored 1" glass square (top) and the resultant glass knife: Making the water trough Tape or plastic a) Cutting edge b) Knife angle (45o) c) Corner d) Shelf
Setting up the Microtome Block face Sample Block Knife edge Glass Knife
Tools Needed: Syringe - adjusting water in trough Loop - assist picking up sections Eyelash tools - assist with section manipulations
Embedding and Sectioning • Section Thickness • Ideally, sections should be in the 55 - 60 nm range. • This allows for enough stain uptake for contrast, and maximum resolution (limited in the TEM by specimen-induced chromatic aberration). • Determined by interference colors. • Maximum thickness should not exceed 85 - 90 nm (light gold). • Thickness can sometimes be reduced by one color range by flattening sections - smooths out compression to a limited extent. Toluene, xylene, chloroform, heat.
Section Mounting • A 200m grid has 60% open area; a 400m grid only 40% • Thin-bar grids...more fragile, more expensive. • Ultrathin sections can be supported on a bare grid of no greater than 200m. • Commonly used TEM grid types:
Picking up sections Mesh grids Eyelash tool Slot grids
Collecting on slot grids Dried on bridge, then punched out for viewing Sections floating on water
Section Mounting An ultrathin section on a 50m support filmed grid at 200X mag.
Contrast • Transmission Electron Microscopy: • Contrast is produced by the adsorption of heavy metals to specimen macromolecules. • The ability of an atom to absorb electrons is directly related to its mass. • Since biological specimens are composed mostly of low atomic # elements (C,O,H,N), they lack endogenous contrast....thus contrast is induced by "staining" with heavy metals. • Microscopists refer to the measure of a specimen's ability to absorb electrons as its electron density (vs electron “transparency”).
Post-Staining • Typically always used, even if enbloc staining (ie uranyl acetate) has been done. • Uranyl acetate - 0.5 - 2% aqueous. Also can use saturated ethanolic or methanolic UA • Lead citrate - several formulations (Venable and Coggeshell or Reynolds). Common is using lead nitrate chelated with sodium citrate. • Adequate rinsing between and after staining is essential to prevent post-stain contamination. Particular care must be used to exclude CO2 to inhibit lead carbonate formation - black cannonballs.
Staining with UA Lead staining • Typical protocol: • - 30 minutes UA • - Wash with water • - 5 minutes lead citrate • - Wash once in 0.02M NaOH • Wash well with water. • Dry by wicking with filter paper
Support Films Formvar, Carbon, Collodion -Used when sections or samples are smaller than support of grid. -100 mesh or less, slot grids -Fragile or very thin sections Avoid when possible because: Usually has holes or uneven thickness Added thickness affects clarity and contrast
Formvar coated grids Holey formvar Formvar and carbon
Negative Staining Positive staining - forms a complex with specimen Negative - stain and specimen do not interact and specimen remains electron transparent Advantages: 1) Improved resolution 2) Speed 3) Unique information 4) Simplicity
Disadvantages: 1) Repeatability 2) Limited surface topography 3) Toxicity
Choice of stain: 1) High density to provide high contrast 2) High solubility and minimal reaction to sample 3) High melting and boiling point (beam stable) 4) Precipitant formed is extremely fined grained Stains commonly used: Phosphotungstate, sodium tungstate, uranyl acetate and uranyl nitrate
Brief procedure: Small grid and support film (formvar, paraloidin. Sometimes carbon added. Thin suspension of sample and excess removed. Dry then add negative stain and remove Factors affecting staining: concentration of stain pH of stain time - Dry and view.
Negative stain of purified RhMV virus labelled with anti-RhMV and detected with anti- rabbit conjugated to 10 nm gold. Bar = 100 nm. Photograph provided by Fred Gildow Lab, Department of Plant Pathology, Penn State.