Download
1 / 14
140 likes | 149 Views
Multimedia Journalism Video for the Web. Sec. C1 – March 23, 2009. Topics we’ll cover today. Creating video for the Web Your video story ideas Elements of Web video Examples In-class assignment Assignments for next week. Creating Video for the Web.

E N D
Multimedia JournalismVideo for the Web Sec. C1 – March 23, 2009
Topics we’ll cover today • Creating video for the Web • Your video story ideas • Elements of Web video • Examples • In-class assignment • Assignments for next week
Creating Video for the Web • Remember from week 1:Video is best for showing action, especially with breaking stories; it takes you to a place central to the story • When you edit, remember: • Keep ‘em short—AJR reported in 2008 a survey showing the average length of video elements on newspaper sites being 2-3 minutes. (Editing can take 3-4 hours.) • Note also that YouTube, Vimeo, and other free sharing sites will often limit you to X minutes per video (generally 5-10) • It’s a lot like television: Show interviewees for a few seconds, then switch to "B-roll,” stand-ups, etc. • B-Roll is: supplemental or alternate footage intercut with the main shot in an interview or news piece. It makes things interesting. • Stand-up: When the journalist stands in front of the camera with the mic and gives supplemental/connecting information (like in voiceover) • What are some other elements? • Because the Web typically uses a low frame rate—usually 15 fps rather than 30--avoid action shots with a lot of movement or shots that capture nuance. They usually display poorly on the Web.
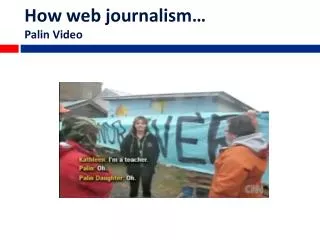
Creating Video for the Web • Basic rules: • Avoid wide shots: In broadcast, wide sweeping shots are generally fine. But remember that your Web video viewers are much smaller (typically just 3 inches wide when embedded). • Wider shots, especially those with people (movement) are harder to see on the Web. The writing is easier to make out in image 2.
Creating Video for the Web • Basic rules: • Avoid long fades/transitions/dissolves. On the Web, short fades (or better yet, direct cuts) look much cleaner. Note how the original fade looks clean while the Web fade looks muddy/has artifacts.
Creating Video for the Web • Basic rules: • While I don’t expect you to add text (lower thirds, flashy intros, etc.) to your pieces, remember this: • Any text you do use should be easy to read on a small screen. • The second image is better, but even that’s pushing it. • What I prefer: introduce interviewees with narration/voiceover rather than text. NOTE: The rule of thumb for text on the screen is to leave it up long enough to be read three times over.
Creating Video for the Web • Stand-ups and interviews (Web or broadcast): Key terms/What they mean: Extreme close-up shot Close-up shot Medium close-up shot Medium wide shot (American shot) Wide shot (full shot) Extreme wide shot (long shot) In general, you will use CU/MCU for interviews & MCU shots for stand-ups. Medium shots are useful when you have the interviewer and interviewee in one frame Notice the space around the subject in all of these shots. He’s not perfectly centered until you go wide, but the shot is still balanced. Only center the subject head-on if you’re it (that is, if you’re talking to viewers)
Creating Video for the Web • Notes for filming and editing: • Remember that you don’t have to keep everything you shoot. In fact, you should bank on shooting more than you’ll ever need. These are two of the hardest things to learn when first doing video. • When in doubt, leave it out: As with print, if you’re not sure if a certain piece of information belongs in your piece, it probably doesn’t. Leave it out. • This is the purpose of editing. • You edit to improve your clips, not to tie together every little thing you’ve shot. • Since most Web videos are 2-3 minutes in length, you need to keep the important stuff in and be willing to leave the auxiliary stuff out.
Creating Video for the Web • Other tips for interviewing and editing • Your interviewees don’t have to say everything, especially if the topic at hand is complicated. If you can summarize complicated points in narration, do. • What if your interviewee uses a lot of “uhs” and “ums”? • Be sure to ask them the same question in multiple ways. Once they get comfortable with what they’re saying, they’ll usually say it better. • Ask the tougher questions last. This will make your interviewee (who might not be comfortable with the camera) relax and speak more calmly. • If your piece has complicated math or financial figures, you can go ahead and use text to illustrate the key points and figures, but use it sparingly and clearly • Graphics and charts (created in Photoshop or Excel, for example) might also help you illustrate key points, so consider them, but remember that they, too, should be used sparingly. • Think about your audience’s attention span. You should only use supplemental information (charts, graphics, numbers) if they are necessary to your story and if they make things easier to understand. Do NOT use them to squeeze in more complicated information.
Creating Video for the Web • Remember that good audio is just as important as good video (if not more). • In a video piece, what you hear and what you see should have equal importance. Otherwise, why aren’t you doing a slide show instead? • Most pro and consumer cameras will come with a mic input jack. If you have your own camera and mic, please use them both. • Make sure that you have a pair of headphones plugged into your camera. This will help you monitor your levels and avoid something too quiet or too loud. • It will also help you fix any issues with noise. If you hear a buzzing sound as you’re recording, it could be the sign of an equipment problem, or it could mean that you just need to move your wires around. • Even though you’re done with your Soundslides presentations, don’t forget how to use your audio recorders. You’ll need them to record a nice, crisp, clear narration for your piece. • Avoid music – It’s tempting, but you don’t need it for straight news. Plus, it can make your other audio difficult to hear.
Creating Video for the Web • Past Student videos • HIV/AIDS funding in jeopardy • Getting Inked • The Youth Vote at BU • What do you notice about these videos? • What do you like/dislike? • How did they incorporate B Roll, stand ups, and other elements?
Useful Links/Outside reading • Useful links/Outside reading: • MediaCollege.com’s Video Guides • Sony’s Video Tip Book • As I’ve mentioned, we can’t cover all of the ins and outs of video in this class: • The reason that broadcast is its own major at most schools is because neither one class period nor one course semester is enough to cover all that you need to know to create stellar work. • If you are non-broadcast track and are interested in producing good video for this class (or your final project), I suggest you start reading guides like the above ASAP. I will try to answer any questions I can, but remember not to bite off more than you can chew: • Doing video for the Web involves more than a camera and a mic—it involves a variety of software (from editing tools to uploading tools/sites). The learning curve is high, but don’t let it discourage you.
In-class assignment • Get into pairs and begin working with your cameras. • Get a feel for the different buttons, the zoom feature (which should be used sparingly) etc. • Take turns interviewing each other. Pay attention to: • Where the person being filmed is standing. • Can you hear them? Are they too close? • Are they out of the shot? • Show me what you’ve got and I’ll offer any pointers if you need them.
Assignments for Next Time • Write up and bring in three ideas for your final project as we discussed last week. Review the project requirements if needed. • You need to have a written proposal for your topic • You will also need to bring a storyboard outlining (just a rough sketch) how your site/three multimedia elements work together. (You will turn in both the proposal and storyboard.) • Get into pairs, check out a camera, and shoot a video report. It should be at least 2.5 minutes long and include at least 2 interviews. This is a group project and is designed to get non-broadcasters comfortable with video cameras. • Due NEXT WEEK: Rough cut (almost final) / Due in TWO WEEKS (April 6): FINAL • Videos (rough AND final) should be on YouTube/Vimeo/similar and cross-posted to your blogs for viewing in class. We will critique. • NOTE: Both partners should take part in the planning, shooting, and editing of this project. It will not be acceptable for one party to be stuck with (or to steal) all of the work. Not working together could result in a failing grade for the assignment. So find out each other’s schedules before selecting partners. • If one person is doing the stand-up(s), the other should record the narration.