Download
1 / 46
500 likes | 818 Views
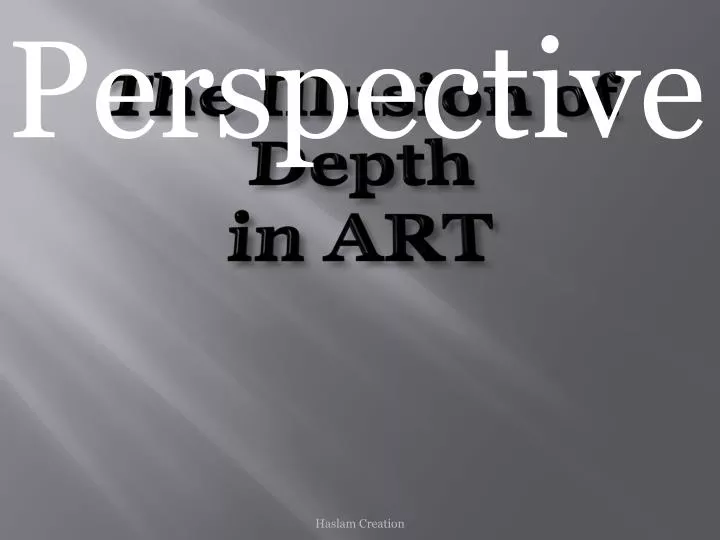
Perspective. The Illusion of Depth in ART.

E N D
Perspective The Illusion of Depth in ART Haslam Creation
The creation of depth in paintings started around the time of the early Renaissance. Artists created drawings and painting that had overlapping shapes, objects of different sizes and placements, and even used variations of color and detail to create the illusion of depth. Another form of creating depth was discovered during the early Renaissance as well. This is now called “linear perspective”. Filippo Brunelleschi (1377-1446), arguably the most important Italian Architect of all time, is credited with the discovery. Sculpture of Brunelleschi: placed to have him looking at one of his greatest architectural creations. Haslam Creation
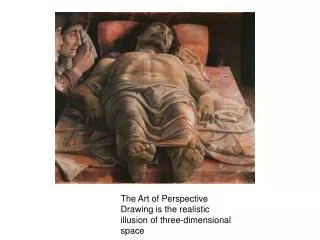
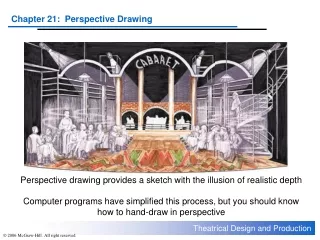
Perspective has to do with creating the illusion of depth and volume in art works created on a two-dimensional surface. The next six slides will give you examples of these types. They are: Overlapping; Size; Placement; Detail; Color; and Linear Perspective, which has to do with converging lines on the horizon. Most of this presentation will have to do with linear perspective. Linear Perspective is essentially “visual mathematics”, but don’t let that scare you. It can be a lot of fun. It is also science oriented. “Why,” you ask? Because this discovery allows the artist to create objects on a two-dimensional surface in the same way that our eyes view the world. Haslam Creation Art Work by: Tony Haslam
Overlapping I am the 2nd object. I am the 1st object. This is done when one object covers part of another object. This creates the illusion that the first object is closer than the second. Haslam Creation
Size In size, larger objects seem closer than smaller objects. In life, this is how objects appear. The farther away they are, the smaller they appear. Haslam Creation
Placement Objects placed low in a picture plane appear to be closer than objects placed at or near eye level. Picture plane: The surface area of a painting or drawing. Foreground: Objects seem closer and are located at the bottom. Middle ground: The area between the foreground and background. Background: Objects seem farther away and are located above the foreground. Haslam Creation
Detail Objects with clear , sharp edges and show a lot of detail appear to be close to you. Objects that seem hazy and lack detail seem farther away. Haslam Creation
Color Objects that have colors that are brighter appear closer, and objects with dull colors seem farther away. Again this is true in life and is how we see things. This is caused by dust and moisture in the air which we call “haze”. A better term for color perspective is “Atmospheric Perspective”. Haslam Creation
Linear Perspective Haslam Creation
Linear PerspectiveTerms and Definitions • Linear Perspective – A graphic system that creates the illusion of depth and volume on a flat surface. Objects appear three dimensional on a two dimensional surface. • One-Point Linear Perspective - A type of linear perspective where the sides of the object facing the viewer are parallel to the picture plane and the parallel lines that recede from the viewer converge to a single vanishing point. • Two-Point Linear Perspective - A type of linear perspective where the sides of the object facing the viewer are at an angle to the picture plane and the parallel lines that recede from the viewer converge to two vanishing points. • Three-Point Linear Perspective - A type of linear perspective where the sides of the object facing the viewer are at an angle to the to the picture plane and the parallel lines that recede from the viewer converge to three vanishing points. • Horizon line - This line is drawn across the page and represents the eye level of the viewer. The height of the horizon line changes depending on the viewer’s height. This changes the view of the subject. • Parallel lines - Two lines that are the same distance from one another and will never intersect. • Vanishing point - Imaginary points on the horizon line in 1 pt. and 2 pt. perspective. Convergent lines all rise or fall to the vanishing point (or points). • Convergent lines - Parallel lines that appear to come together towards a single vanishing point. Haslam Creation
The interior of Santo Spirito was designed by Filippo Brunelleschi and construction began around 1436. Filippo Brunelleschi is considered the father of Renaissance architecture; credited with the discovery of linear perspective; and is even credited by many as the father of the Renaissance. Notice this photograph was taken with a one-point linear perspective view. Haslam Creation
We see life in perspective and therefore should create art using linear perspective. This is what made the masters, such as DaVinci, Michelangelo, Donatello, and Rafael become “The Masters”. Of course later they became famous Ninja Turtles too. Notice this photograph was taken From a two-point linear perspective view Haslam Creation
The Horizon Line is always at eye level, or in other words, from the perspective of where you are looking. For that purpose, the horizon is somewhat imaginary, and not the real horizon where the earth meets the sky. Q: Is this photographs perspective one or two point? A: One Point Haslam Creation
IT’S RIGHT HERE……SEE IT? DO YOU? One Point Linear PerspectiveHorizon line When you begin using the most basic type of linear perspective, one point linear perspective, always know where your horizon line is. This basic principle will continue though all forms of linear perspective. The horizon line should go all the way across your paper. Now to create your first object using one point linear perspective. After drawing your horizon line, draw a box somewhere below the horizon line, although the box can be on or above the horizon line as well. Haslam Creation
Horizon Line One Point Linear Perspective Vanishing Point Now that you have a horizon line and a box, determine where you want the vanishing point to be. You will use this vanishing point for all objects you create using one point linear perspective. Next, using a ruler (or some type of straight edge), lightly draw lines (convergent lines) from the vanishing point to the corners of the box. Remember, draw lightly because you will erase these lines later. Haslam Creation
One Point Linear Perspective Next, decide where you want the back side of the box to be. You will do this by drawing a vertical line along the left side of the box since we see the left side of the box, and a horizontal line across the top of the box since we see the top of the box. Q: Why do we see the top of the box? Q: Why do we see the left side of the box and not the right side of the box? Haslam Creation
One Point Linear Perspective Next, decide where you want the back side of the box to be. You will do this by drawing a vertical line along the left side of the box since we see the left side of the box, and a horizontal line across the top of the box since we see the top of the box. Q: Why do we see the top of the box? A: Because it is below the horizon. Q: Why do we see the left side of the box and not the right side of the box? A: Because the box is to the right of the vanishing point. Haslam Creation
One Point Linear Perspective You did it. You made a box. Now fill in the areas that create the top and left side of the box. You don’t really have to add color or value to those areas, but I did for the visual effect. Haslam Creation
More One Point Linear Perspective Haslam Creation
Two Point Linear Perspective Haslam Creation
VP1Horizon Line VP2 Two Point Linear Perspective As before, begin with a horizon line. This time create two vanishing points, as far apart as possible. This will allow you to put many objects within the two vanishing points. You can even use additional paper extensions to extend the vanishing points off the edge of the drawing. Haslam Creation
VP1Horizon Line VP2 Two Point Linear Perspective Time to make a box. Create convergent lines from each vanishing point to position your box. Watch what we do next to define the corners of your box. Haslam Creation
Now, add in the corners and the box will become visible. Time to add walls. Two Point Linear Perspective Haslam Creation
Two Point Linear Perspective With the two walls added, the box starts to take shape. Haslam Creation
Two Point Linear Perspective TOP Bottom Now with the two back sides added and the bottom thrown in, we’ve created an open box. With a click, I drop the top on and I have an enclosed box. It’s really easy. Haslam Creation
Two Point Linear Perspective Let’s put a very simple pyramid roof top on this box and make it look like an old German style house. First find the center of the top of the box by drawing lines from corner to corner. Then, draw a vertical line from the center. All that is left do decide is how tall you want the roof top to be. Haslam Creation
Two Point Linear Perspective See how simple it can be with a little practice. Haslam Creation
VP1Horizon Line VP2 Two Point Linear Perspective How to make a pyramid. Once again create convergent lines from each vanishing point to position the pyramid. Haslam Creation
VP1Horizon Line VP2 Two Point Linear Perspective Now find the center. Put a vertical line off of the center line. Now, once you’ve decided how tall you want your pyramid, add in the walls. Here are the back two. Now here are the front two. Ta-dah!!! A pyramid. Haslam Creation
Two Point Linear Perspective The Pitch Roof: First create a two point linear perspective box. Once you have done that, you must decide which direction you want the roof to go. In this drawing, I’ve decided to have the roof run toward the right vanishing point. The first thing I must do is find the center of the front left and back left walls. Next I decide how high I want to make the roof. It doesn’t matter, and when you do it, just make it the height that looks good to you. Haslam Creation
Two Point Linear Perspective The Pitch Roof: Now you draw the two triangle shaped ends of the pitch roof. Haslam Creation
Two Point Linear Perspective The Pitch Roof: Now fill in the main part of the roof. Once you have erased the convergent lines you have created your house; but why stop here. Haslam Creation
Two Point Linear Perspective Why not add in windows, doors, and maybe even a chimney. It’s all very easy if you just follow the rules. Haslam Creation
Two Point Linear Perspective Haslam Creation
Two Point Linear Perspective Haslam Creation
Two Point Linear Perspective Haslam Creation
Three Point Linear Perspective Vanishing point 3 or VP3 3 point is done exactly like 2 point. The only difference is the 3rd point alters the vertical lines you create in 2 point for the sides of your objects. All of the vertical lines must come from the 3rd point. VP1 VP2 Haslam Creation
Three Point Linear Perspective This is the simplest way to create 3 point linear perspective. You can be very creative and very complex. Start with the objects that are closest to you. Haslam Creation
Three Point Linear Perspective Are you getting the idea? You can put objects anywhere within your three points. The next slide will show you how a simple idea can still look pretty cool. Haslam Creation
Three Point Linear Perspective Haslam Creation
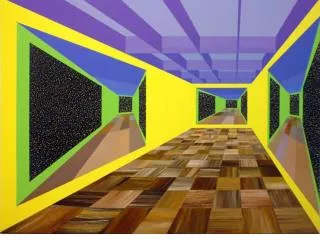
Now let’s look at a simple one point linear perspective idea that looks like it’s not easy. Put your vanishing point in the center of the paper and add intersecting lines that create a spoke effect as you see here. You might also add in the two horizontal and parallel lines to imagine where a street below might be. Haslam Creation
Step two is to draw in the front of your buildings. Notice how they appear to rise toward an imaginary sky. Haslam Creation
Step 3: Add in the tops of the buildings using vertical lines, then bring in the back of the building from your vanishing point. Haslam Creation
…add in a little sky. Haslam Creation
…and a few special effects. Haslam Creation
The END 217 403 Linear Perspective is fun. Haslam Creation