Download
1 / 19
190 likes | 364 Views
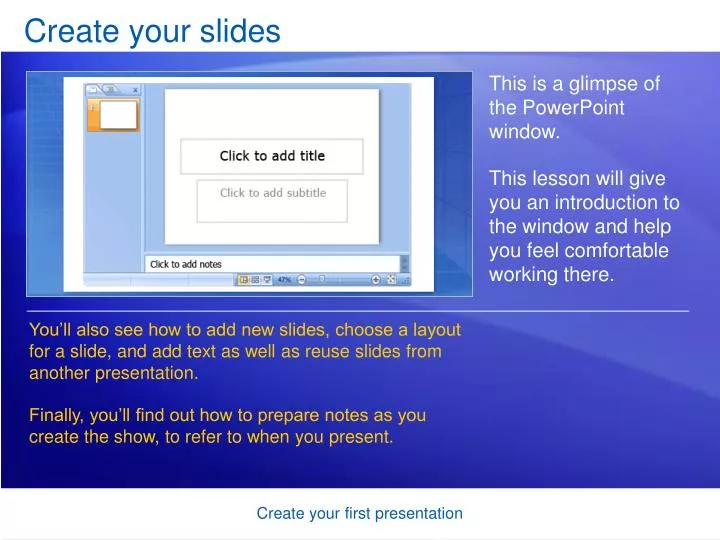
Create your slides. This is a glimpse of the PowerPoint window. This lesson will give you an introduction to the window and help you feel comfortable working there.

E N D
Create your slides This is a glimpse of the PowerPoint window. This lesson will give you an introduction to the window and help you feel comfortable working there. You’ll also see how to add new slides, choose a layout for a slide, and add text as well as reuse slides from another presentation. Finally, you’ll find out how to prepare notes as you create the show, to refer to when you present. Create your first presentation
Get to know your workspace This is the view that first opens in PowerPoint. It’s called Normal view. You work here to create slides. There are three main areas of Normal view. The slide pane is the big area in the middle. You work directly on the slide in this space. On the slide, the boxes with the dotted borders are called placeholders. Here’s where you type your text, insert art, or add other content. Create your first presentation
Get to know your workspace This is the view that first opens in PowerPoint. It’s called Normal view. You work here to create slides. There are three main areas of Normal view. On the left are small, or thumbnail, versions of the slides in your presentation, with the one you’re working on highlighted. This area is the Slides tab. Create your first presentation
Get to know your workspace This is the view that first opens in PowerPoint. It’s called Normal view. You work here to create slides. There are three main areas of Normal view. In the bottom area is the notes pane, where you type the notes that you’ll refer to while you present. Create your first presentation
Add new slides When PowerPoint opens, there’s only one slide in the show. You add the other slides. The most obvious way to add a new slide is by clicking New Slide on the Home tab, as the picture shows. Create your first presentation
Add new slides When PowerPoint opens, there’s only one slide in the show. You add the other slides. There are two ways to use the New Slide button: If you click the top part of the button, where the slide icon is, a new slide is immediately added beneath the slide that’s selected on the Slides tab. Create your first presentation
Add new slides When PowerPoint opens, there’s only one slide in the show. You add the other slides. There are two ways to use the New Slide button: If you click the bottom part of the button, you get a gallery of layouts for the slide. You choose a layout, and the slide is inserted with that layout. Create your first presentation
Add new slides If you add a slide without choosing a layout, PowerPoint applies one automatically. You can change it if you want: Right-click the slide that has the layout you want to replace, and then point to Layout. Create your first presentation
Pick layouts for slides A slide layout arranges your slide content. For example, you may want both a list and a picture on the slide, or a picture and a caption. Layouts contain different types of placeholders and placeholder arrangements to support whatever your content is. Create your first presentation
Pick layouts for slides The picture shows the layouts that PowerPoint starts with automatically. The Title Slide layout, shown here as it looks in the layouts gallery, is applied to the first slide in the show (the one that’s already there when you start). On the slide, the Title Slide layout contains placeholders for a title and subtitle. Create your first presentation
Pick layouts for slides The picture shows the layouts that PowerPoint starts with automatically. The layout you’ll probably use the most for other slides is called Title and Content, shown here as it looks in the layouts gallery. On the slide, this layout has a placeholder for the slide title, and a second, all-purpose placeholder that contains text as well as several icons. Create your first presentation
Type your text In the all-purpose placeholder shown previously, you can add graphic elements or text. Let’s talk about text. The default formatting for text is a bulleted list. You can use different levels of text within bulleted lists to make minor points under major points. On the Ribbon, use commands in the Font group to change character formatting, such as font color and size. Create your first presentation
Type your text In the all-purpose placeholder shown previously, you can add graphic elements or text. Let’s talk about text. The default formatting for text is a bulleted list. Use commands in the Paragraph group to change paragraph formatting, such as list formatting, text indentation, and line spacing. Create your first presentation
Insert slides from another presentation You may need to use slides from an existing presentation in your show. Here’s how to do it. On the Home tab, click the arrow next to New Slide, as if you were going to insert a new slide and choose a layout for it first. Below the layout gallery, click Reuse Slides. Create your first presentation
Insert slides from another presentation You may need to use slides from an existing presentation in your show. This is how to do it. In the Reuse Slides task pane, under Insert slide from, click Browse to find the presentation or slide library that has the slides you want. Then click the arrow to open those slides in the task pane. Create your first presentation
Insert slides from another presentation You may need to use slides from an existing presentation in your show. This is how to do it. When you find the slide you want, take notice of the Keep source formatting check box at the very bottom of the pane. If you want to retain the exact look of the slides you’re inserting, be sure this check box is selected before you insert the slide. Create your first presentation
Insert slides from another presentation You may need to use slides from an existing presentation in your show. This is how to do it. Click each slide you want to insert. Each one is copied into the open presentation, below the currently selected slide or below your cursor, if you’ve positioned it beneath a slide thumbnail. Create your first presentation
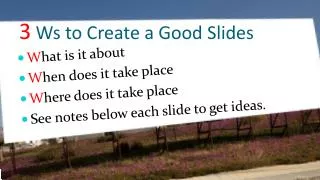
Create speaker notes Use speaker notes to elaborate on the points on a slide. Good notes can help you keep your audience engaged and prevent text overload on the slide. As you develop the content on your slides, type your notes in the notes pane, below the slide. You can enlarge the notes pane so that it’s easier to work in by dragging the split bar. Create your first presentation
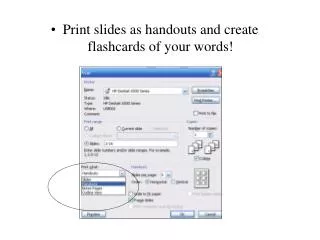
Create speaker notes Use speaker notes to elaborate on the points on a slide. Good notes can help you keep your audience engaged and prevent text overload on the slide. Your notes are saved in a notes page, which contains a copy of the slide along with the notes. This is the page you print to refer to as you give the presentation. Create your first presentation