1 / 43
430 likes | 997 Views
( IoT Certification Training : https://www.edureka.co/iot-certificat... ) <br>This "Raspberry Pi 3 Tutorial" video by Edureka will help you in getting started with Raspberry Pi 3. This Raspberry Pi Tutorial video helps you to learn the following topics: <br><br>1. What is Raspberry Pi? <br>2. Raspberry Pi Hardware <br>3. Raspberry Pi OS Installation <br>4. Sense Hat tutorial <br>5. IoT Project using Raspberry Pi u2013 Motion Detection Camera

E N D
Copyright © 2017, edureka and/or its affiliates. All rights reserved.
Agenda Copyright © 2017, edureka and/or its affiliates. All rights reserved.
Need of Raspberry Pi Copyright © 2017, edureka and/or its affiliates. All rights reserved.
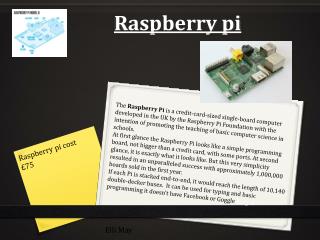
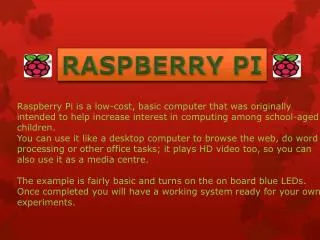
Need of Raspberry Pi Taking IT back to basics and making it accessible to every school “We want to see the Raspberry Pi being used by kids all over the world to learn to program and understand how computers work” Taking IT back to basics Making it accessible to every school • Developed by the Raspberry Pi Foundation • First generation was released in February 2012 Copyright © 2017, edureka and/or its affiliates. All rights reserved.
What is Raspberry Pi? Copyright © 2017, edureka and/or its affiliates. All rights reserved.
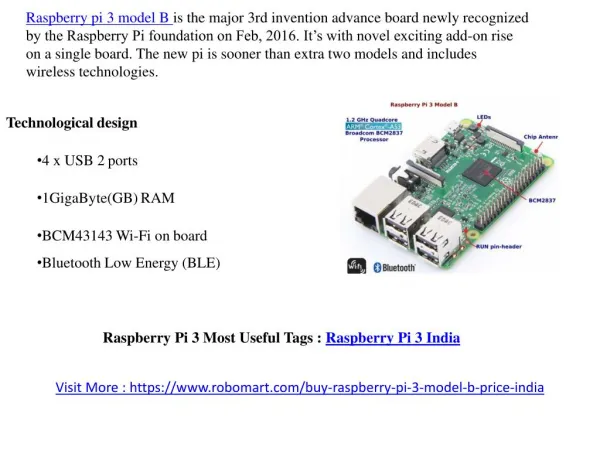
What is Raspberry Pi? Series of small single-board computers bundled with on-board WiFi, Bluetooth and USB boot capabilities, GPIOs etc. • Low cost, credit-card sized computer • Plugs into a monitor & uses a keyboard & mouse • Capable of exploring computing & learn how to program • Raspberry Pi 3 released in February 2016 + Raspberry Pi = Copyright © 2017, edureka and/or its affiliates. All rights reserved.
Why Raspberry Pi? Copyright © 2017, edureka and/or its affiliates. All rights reserved.
Capabilities of Raspberry Pi Browsing the internet & playing HD video Making spreadsheets & word-processing Playing Games Infra-red cameras & security systems Music machines & detectors for weather stations Copyright © 2017, edureka and/or its affiliates. All rights reserved.
Raspberry Pi Hardware Copyright © 2017, edureka and/or its affiliates. All rights reserved.
Raspberry Pi Hardware H D M I P O R T A U D I O P O R T E T H E R N E T P O R T C H A R G E R U S B P O R T S D C A R D S L O T G P I O P I N S Copyright © 2017, edureka and/or its affiliates. All rights reserved.
Raspberry Pi Hardware • Raspberry Pi 1stgeneration uses Broadcom BCM2835 SoC • ≅ the chip in 1st generation smartphones Processor • CPU -> ARMv6 architecture • VideoCore IV graphics processing unit (GPU) and RAM RAM • L1 cache of 16 KB and L2 cache of 128 KB Networking • L2 cache is used primarily by the GPU Peripherals • Raspberry Pi 3 uses a Broadcom BCM2837 SoC • 1.2 GHz 64-bit quad-core ARM Cortex-A53 processor Video • 512 KB shared L2 cache & 1 GB RAM Connectors The Raspberry Pi 3, with a quad-core Cortex-A53 processor, is described as 10 times the performance of a Raspberry Pi 1 Copyright © 2017, edureka and/or its affiliates. All rights reserved.
Raspberry Pi Hardware Model A Model B Generations 1 1+ 1 1+ 2 2 ver 1.2 3 Processor Architecture ARMv6Z (32-bit) ARMv7-A(32-bit) ARMv8-A (64/32-bit) RAM BroadcomBCM2 836 SoC Broadcom BCM2835 Broadcom BCM2837 Networking 900 MHz 64-bit quad- core ARM Cortex-A53 900 MHz 32- bit quad- coreARM Cortex-A7 1.2 GHz 64- bit quad- core ARM Cortex-A53 Peripherals CPU 700 MHz single-coreARM1176JZF-S Video Broadcom VideoCore IV @ 250 MHz (BCM2837: 3D part of GPU @ 300 MHz, video part of GPU @ 400 MHz) 1080p30 H.264/MPEG-4 AVC high-profile decoder and encoder Connectors GPU Copyright © 2017, edureka and/or its affiliates. All rights reserved.
Raspberry Pi Hardware Model A Model B Generations 1 1+ 1 1+ 2 2 ver 1.2 3 Processor 256 MB (shared with GPU) 512 MB (shared with GPU) as of 4 May 2016. Older boards had 256 MB (shared with GPU) Memory (SDRAM) 1 GB (shared with GPU) RAM Networking Peripherals • Initially Model B -> 128 MB was allocated by default to the GPU, leaving 128 MB for the CPU Video • Default split was 192 MB (RAM for CPU), sufficient for 1080p video decoding or for simple 3D, but not for both together Connectors Copyright © 2017, edureka and/or its affiliates. All rights reserved.
Raspberry Pi Hardware Model A Model B Generations 1 1+ 1 1+ 2 2 ver 1.2 3 Processor 10/100 Mbit/s Ethernet, 802.11n wireless, Bluetooth 4.1 RAM On-board network 10/100 Mbit/s Ethernet (8P8C) USB adapter on the USB hub None Networking • Model A, A+ and Pi Zero have no Ethernet circuitry, commonly connected to a network using an external USB Ethernet or Wi-Fi adapter Peripherals • On Model B and B+ the Ethernet port is provided by a built-in USB Ethernet adapter using the SMSC LAN9514 chip Video Connectors • Raspberry Pi 3 & Pi Zero W (wireless) are equipped with 2.4 GHz WiFi 802.11n (150 Mbit/s) & Bluetooth 4.1 (24 Mbit/s) based on Broadcom BCM43438 Copyright © 2017, edureka and/or its affiliates. All rights reserved.
Raspberry Pi Hardware Model A Model B Generations 1 1+ 1 1+ 2 2 ver 1.2 3 Processor 2 (via the on-board 3-port USB hub) 1 (direct from BCM2835 chip) RAM USB 2.0 ports 4 (via the on-board 5-port USB hub) Networking Audio inputs As of revision 2 boards via I²S Peripherals Audio outputs Analog via 3.5 mm phone jack; digital via HDMI and, as of revision 2 boards, I²S Video SD, MMC, SDIO card slot (3.3 Vwith card power only) SD, MMC, SDIO card slot MicroSDHCslot , USB Boot Mode On-board storage MicroSDHC slot MicroSDHC slot Connectors Copyright © 2017, edureka and/or its affiliates. All rights reserved.
Raspberry Pi Hardware • Video controller can emit standard TV resolutions, such as HD and Full HD, and higher or lower monitor resolutions Processor • Raspberry Pi 3 does not have H.265 decoding hardware, but CPU is more powerful enough to allow the decoding of H.265-encoded videos in software. RAM • GPU in the Raspberry Pi 3 runs at a higher clock frequencies of 300 MHz or 400 MHz, compared to previousversions which ran at 250 MHz. Networking Peripherals Video Connectors Copyright © 2017, edureka and/or its affiliates. All rights reserved.
Raspberry Pi Hardware Model A Model B Generations 1 1+ 1 1+ 2 2 ver 1.2 3 Processor 15-pin MIPI camera interface (CSI) connector, used with the Raspberry Pi camera or Raspberry Pi NoIR camera Video input RAM Networking HDMI (rev 1.3), composite video (3.5 mm TR RS jack), MIPI display interface (DSI) for raw LCDpa nels HDMI (rev 1.3), composit e video (RCA jack), MIPI display interface (DSI) for raw LCD p anels HDMI (rev 1.3) compo site video (RCA jack), MIPI display interface (DSI) for raw LCD pa nels Peripherals HDMI (rev 1.3), composite video (3.5 mm TRRS jack), MIPI display interface (DSI) for raw LCDpanels Video outputs Video Connectors Copyright © 2017, edureka and/or its affiliates. All rights reserved.
Raspberry Pi Hardware Model A Model B Processor Generations 1 1+ 1 1+ 2 2 ver 1.2 3 RAM 8× GPIO plus the following, which can also be used as GPIO: UART, I²Cbus, SPI bus with two chip selects, I²S audio +3.3 V, +5 V, ground. An additional 4× GPIO are available on the P5 pad if the user is willing to make solder connections 8× GPIO plus the following, which can also be used as GPIO: UAR T, I²Cbus, S PI bus with two chip selects, I²S audio+3.3 V, +5 V, ground Networking 17× GPIO plus the same specific functions, and HAT ID bus Peripherals Low-level peripherals 17× GPIO plus the same specific functions, and HAT ID bus Video Connectors Copyright © 2017, edureka and/or its affiliates. All rights reserved.
Raspberry Pi Hardware GPIO# 2nd func. Pin# Pin# 2nd func. GPIO# +3.3 V 1 2 +5 V 2 SDA1 (I²C) 3 4 +5 V Processor 3 SCL1 (I²C) 5 6 GND 4 GCLK 7 8 TXD0 (UART) 14 RAM GND 9 10 RXD0 (UART) 15 17 GEN0 11 12 GEN1 18 27 GEN2 13 14 GND 22 GEN3 15 16 GEN4 23 +3.3 V 17 18 GEN5 24 Networking 10 MOSI (SPI) 19 20 GND 9 MISO (SPI) 21 22 GEN6 25 Peripherals 11 SCLK (SPI) 23 24 CE0_N (SPI) 8 GND 25 26 CE1_N (SPI) 7 (Pi1 Models A and B stop here) Video EEPROM ID_SD 27 28 ID_SC EEPROM 5 N/A 29 30 GND 6 N/A 31 32 12 13 N/A 33 34 GND Connectors 19 N/A 35 36 N/A 16 26 N/A 37 38 Digital IN 20 GND 39 40 Digital OUT 21 Copyright © 2017, edureka and/or its affiliates. All rights reserved.
Raspberry Pi OS Installation Copyright © 2017, edureka and/or its affiliates. All rights reserved.
Raspberry Pi OS Installation The Raspberry Pi Foundation recommends the use of Raspbian, a Debian-based Linux operating system 1 RISC OS 2 FreeBSD 3 NetBSD 4 Plan 9 from Bell Labs 5 Windows 10 IoT Copyright © 2017, edureka and/or its affiliates. All rights reserved.
Raspberry Pi OS Installation 1 Download NOOBS from www.raspberrypi.org D o w n l o a d N O O B S . z i p Copyright © 2017, edureka and/or its affiliates. All rights reserved.
Raspberry Pi OS Installation 1 Download NOOBS from www.raspberrypi.org 2 Extract the zip File E x t r a c t t h e z i p f i l e & G o t o R a s p b i a n Copyright © 2017, edureka and/or its affiliates. All rights reserved.
Raspberry Pi OS Installation 1 Download NOOBS from www.raspberrypi.org 2 Extract the zip File 3 Copy these file to a formatted SD card C o p y t h e s e f i l e s t o S D C a r d Copyright © 2017, edureka and/or its affiliates. All rights reserved.
Raspberry Pi OS Installation 1 Download NOOBS from www.raspberrypi.org 2 Extract the zip File 3 Copy these file to a formatted SD card 4 Put in Raspberry Pi SD Card slot Copyright © 2017, edureka and/or its affiliates. All rights reserved.
Raspberry Pi OS Installation 1 Download NOOBS from www.raspberrypi.org 2 Extract the zip File 3 Copy these file to a formatted SD card 4 Put in Raspberry Pi SD Card slot 5 Follow the installation instructions Copyright © 2017, edureka and/or its affiliates. All rights reserved.
Raspberry Pi Accessories Copyright © 2017, edureka and/or its affiliates. All rights reserved.
Raspberry Pi Accessories HAT (Hardware Attached on Top) expansion boards – ▪ Together with the Model B+, inspired by the Arduino shield boards, the interface for HAT boards was devised by the Raspberry Pi Foundation. ▪ Each HAT board carries a small EEPROM containing the relevant details of the board ▪ Raspberry Pi's OS is informed of the HAT, and the technical details of it. ▪ Mechanical details of a HAT board are available online. Temperature 8X8 LED Matrix Humidity Pressure Joystick Gyroscope Copyright © 2017, edureka and/or its affiliates. All rights reserved.
Raspberry Pi Accessories Camera • On 14 May 2013, the launched the Raspberry Pi camera board alongside a firmware update • 8 megapixel camera • Camera board has flexible flat cable that plugs into the CSI connector • Located between the Ethernet and HDMI ports • User must enable the use of the camera board by running Raspi-config • Produce 1080p, 720p and 640x480p video Copyright © 2017, edureka and/or its affiliates. All rights reserved.
Raspberry Pi Accessories Infrared Camera • In October 2013, the foundation started producing camera module without an infraredfilter, called the Pi NoIR Gertboard • Device designed for educational purposes • Expands the Raspberry Pi's GPIO pins to allow interface with & control of LEDs, switches, analog signals, sensors and other devices • Includes an optional Arduino compatible controller to interface with the Pi Copyright © 2017, edureka and/or its affiliates. All rights reserved.
Sense Hat Tutorial Copyright © 2017, edureka and/or its affiliates. All rights reserved.
Raspberry Pi Hardware from sense_hat import SenseHat Importing Sense Hat from time import sleep Displaying text from random import randint sense = SenseHat() Displaying images Initializing Sense Hat r = randint(0,255) Setting orientation sense.show_letter(“e", (r, 0, 0)) Displaying letter e on LED matrix sleep(1) Sensing the environment Peripherals r = randint(0,255) sense.show_letter(“d", (0, 0, r)) Detecting movement Clearing Sense Hat LED Matrix sleep(1) sense.clear() Copyright © 2017, edureka and/or its affiliates. All rights reserved.
Raspberry Pi Hardware from sense_hat import SenseHat sense = SenseHat() r = (255, 0, 0) o = (255, 127, 0) y = (255, 255, 0) g = (0, 255, 0) b = (0, 0, 255) i = (75, 0, 130) v = (159, 0, 255) e = (0, 0, 0) Displaying text Displaying images RGB code for different colours Setting orientation Sensing the environment Peripherals image = [e,e,e,e,e,e,e,e,e,e,e,r,r,e,e,e,e,r ,r,o,o,r,r,e,r,o,o,y,y,o,o,r,o,y,y,g ,g,y,y,o,y,g,g,b,b,g,g,y,b,b,b,i,i,b ,b,b,b,i,i,v,v,i,i,b] Detecting movement Displaying image on LED matrix sense.set_pixels(image) Copyright © 2017, edureka and/or its affiliates. All rights reserved.
Raspberry Pi Hardware from sense_hat import SenseHat Displaying text import time sense = SenseHat() Setting angles for rotation Displaying images sense.show_letter("J") Setting orientation angles = [0, 90, 180, 270, 0, 90, 180, 270] Sensing the environment Peripherals for r in angles: sense.set_rotation(r) Detecting movement Rotating the letter time.sleep(0.5) Copyright © 2017, edureka and/or its affiliates. All rights reserved.
Raspberry Pi Hardware from sense_hat import SenseHat sense = SenseHat() while True: t = sense.get_temperature() p = sense.get_pressure() h = sense.get_humidity() t = round(t, 1) p = round(p, 1) h = round(h, 1) if t > 18.3 and t < 26.7: bg = [0, 100, 0] # green else: bg = [100, 0, 0] # red msg = "Temperature = {0}, Pressure = {1}, Humidity = {2}".format(t, p, h) sense.show_message(msg, scroll_speed=0.05, back_colour=bg) Displaying text Getting temperature, humidity & Pressure Displaying images Setting orientation Sensing the environment Peripherals Rounding to 1 decimal point Detecting movement Copyright © 2017, edureka and/or its affiliates. All rights reserved.
Raspberry Pi Hardware Getting orientation using gyroscope Displaying text from sense_hat import SenseHat sense = SenseHat() while True: orientation = sense.get_orientation() Displaying images Setting orientation pitch = orientation['pitch'] roll = orientation['roll'] yaw = orientation['yaw’] Sensing the environment Peripherals print("pitch={0}, roll={1}, yaw={2}".format(pitch,yaw,roll)) Detecting movement Getting pitch, roll, yaw Copyright © 2017, edureka and/or its affiliates. All rights reserved.
Raspberry Pi Hardware from sense_hat import SenseHat sense = SenseHat() while True: acceleration = sense.get_accelerometer_raw() Displaying text Displaying images x = acceleration['x’] y = acceleration['y’] z = acceleration['z’] x=round(x, 0) y=round(y, 0) z=round(z, 0) print("x={0}, y={1}, z={2}".format(x, y, z)) Setting orientation Sensing the environment Peripherals Detecting movement Gets the amount of g-force acting on each axis Copyright © 2017, edureka and/or its affiliates. All rights reserved.
Demo Copyright © 2017, edureka and/or its affiliates. All rights reserved.
Raspberry Pi Demo Copyright © 2017, edureka and/or its affiliates. All rights reserved.
Problem Statement You’re trying to build a security camera for your house. You have to detect the motion or any movement in front of it, and as it detects any motion it will capture and save the image. Copyright © 2017, edureka and/or its affiliates. All rights reserved.
Solution Logic Save the image Start Initial frame Save the initial Image in a frame Yes No Convert this image to a gaussian blur image If Take the frames with the object and covert it into gaussian blur image Calculate the difference difference is detected? Copyright © 2017, edureka and/or its affiliates. All rights reserved.
Copyright © 2017, edureka and/or its affiliates. All rights reserved.